background image

OUR ARTICLES

What’s News

Post thumbnail

How to clean a vase with a narrow neck: 6 effective ways

There is nothing easier than washing a container that your hand can fit into. However, it is not uncommon to find vessels with narrow necks. Flower vases in particular can often be this way. On their walls and bottom accumulate dried remnants of flowers, lime scale and rust. But, as it turns out, you can easily clean and such a vase with a narrow neck.

There are some useful tips that will help you easily solve this seemingly impossible task.

  • Fill the container with table vinegar. A few hours will be enough for the vinegar to eat away all the dirt inside. After that, just rinse the vase well with water.
  • Can help in this case and effervescent tablets for cleaning dentures. The vase should be filled to the brim with warm water and throw the tablets there: one – for a small vase, two – for medium and three – for large. Such a solution should be left in the vessel for at least 8 hours. After that, it will only remain to rinse it with running water.
  • The vase can be washed and liquid for cleaning the toilet. It is necessary to fill it about 1/3 of the volume of the vessel and then carefully turn the vase, slightly tilting it, so that the liquid moistened completely all of its inner surface. After 20 minutes, everything should be rinsed off. You will get a clean, shiny surface.
  • There is also a method using dry rice and baking soda. You will need a cup of dry rice and half a cup of baking soda. Pour them into a vase and fill it with warm water. Then close the neck with the palm of the hand and begin to shake intensively. This mixture should remove from the walls of the vessel all the excess, leaving only a clean surface.
  • You can mix 3 tablespoons of fine table salt with one tablespoon of table vinegar. Then take a brush for washing bottles and distribute this mixture on the walls of the vase. After such a procedure, 20 minutes will be enough for all the excess to come off the walls. It remains only to rinse the vase with warm water.
  • There is another way of cleaning – with the help of shells from several hard-boiled eggs. It should be thoroughly crushed and mixed with either baking soda or some dry detergent. Pour this mixture into a vase and add a little warm water. Then carefully turn the vase so that the mixture gets on the entire inner surface. All you have to do is let the vase stand with this mixture for a few minutes and then rinse it thoroughly.

This way you can wash not only a flower vase, but also any vessel with a narrow neck, on the bottom of which more than one “cultural layer” has already been deposited. If you do not want to spend your personal time on cleaning the house, but for you is important every detail in your hallway, kitchen, bedroom or other room, you can turn to us. Our cleaners will perform everything at a high level – they will wash vases, chandeliers, clean floors and more. To order cleaning services in Calgary leave a request on our website.

Post thumbnail

Gypsum tiles in the interior

Are you renovating your apartment or are you trying to “refresh” an old interior that is already boring? Do you want to add a little coziness, warmth and style to your home? Decorative gypsum tiles will help you. What are the features of the material, how to properly install it, a review of ready-made projects – all in our article.

Material Features

  • Environmental friendliness. Gypsum tile is an artificial stone made of natural materials (from a mixture of gypsum, lime and water). Some types of such tiles are made with imitation of natural surfaces: stone, wood, etc. In its composition does not contain harmful impurities, safe and environmentally friendly material.
  • Aesthetics. Decorative gypsum tiles will be a great addition to any interior: it will decorate the rooms of your home, the interior of a cafe, restaurant, successfully complement the design of any room. A wonderful thing for decorating the fireplace, columns and arches.
  • Convenience in the installation process. Gypsum tiles are very easy to install (easy to cut and glue to the base). Low weight of the material allows you to use the tiles for decorating gypsum board partitions, arches and other surfaces.
  • Fire resistance. Gypsum does not support combustion, is able to prevent the spread of flames in case of fire.
  • Hydrophilicity. Simply put, gypsum absorbs moisture well, so the use of such boards outside buildings and in rooms with high humidity is absolutely not allowed. When absorbing a minimum amount of moisture, gypsum loses strength significantly. Untreated with protective compositions (varnish, paint) the surface of this material will not withstand the effects of precipitation, so gypsum stone is used inside buildings.

Gypsum tiles in the interior

Stone tiles

The most popular variation of gypsum tiles – with imitation of the surface of brick and natural stone. Tiles for walls under the stone has a more rough, torn surface, looks great in the room in the loft style, for example. Tiles with imitation brickwork will successfully decorate your loggia, TV area or balcony. If you are not quite satisfied with the color of the purchased tiles, you have the opportunity to paint it in the desired color.

3D tiles

Tiles with three-dimensional surface in the form of waves and squares, pyramids or crystals will strike the heart of the most fastidious aesthetes. Smooth shapes, pleasant textures – this type of tile is an extremely stylish solution for interior decoration.

gypsum stone

If you don’t like the visible seams between the tiles, using putty and a small trowel you can easily get rid of them and get a solid canvas.

How to lay it correctly?

Gypsum tiles for interior works are quite easy to install. The substrate should be strong and level, without gaps and depressions. If the surface has significant defects, it should be preliminarily leveled and cleaned of contaminants. The base can be a concrete wall, brickwork, wood or plasterboard. Gypsum tiles are fixed with tile adhesive, dry building mixtures that include gypsum or liquid nails. Before installation for better adhesion (bonding), the walls should be primed.

How to care for the tiles?

Care for gypsum tiles is not difficult. Fluted and textured gypsum panels can be vacuumed, wiped with soft brushes and cloths, and in the case of covering the tiles with paint or varnish, wash with water and detergents without abrasives. But this all takes time, so the best idea is to contact our experts in Calgary. The cleaners will do everything quickly, neatly and you will definitely be satisfied. 

Post thumbnail

Efficient tent cleaning

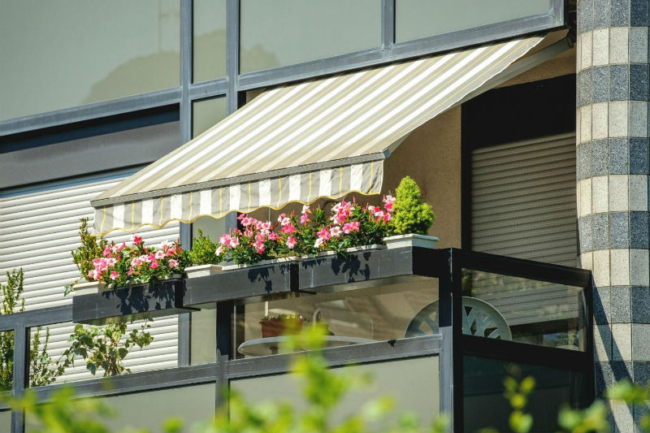
Awnings, canopies, awnings are an indispensable attribute of every entertainment and commercial establishment, because with their help you can take shelter from the sun, rain, any other bad weather and spend your time as comfortably as possible. As on all other surfaces on the awning sits street dust, layered and formed already plaque, which is just water with a hose can not be washed away, so for effective and quality cleaning must use highly concentrated alkaline chemistry, high-pressure apparatus and resort to the services of a good specialist who will do the job qualitatively and without side effects. Well, now let’s consider the question in more detail. 

When to clean the visor?

Image visors for shop windows actively attract the attention of customers and give a great marketing effect. Therefore, it is very important to keep them clean, as well as to remove snow from the structure. In time to wash the canopies is worth and to eliminate dust, faded and grayish tint, which invariably arises due to pollution. Another nuisance is bird droppings, which immediately turn the awning into an unkempt structure.

It is recommended to clean the structures as they lose their attractiveness due to external soiling, dusting, and after the summer season is over. Self-treatment is not always possible, especially if the canopies are not on the first floor of the building or under the roof. In this case, it is worth ordering the services of professional washing or dry cleaning of awnings, awnings and canopies. Masters strictly observe safety measures and use special equipment that cleans the material with steam or chemical solutions. The advantages of cleaning are undoubted:

  • saving your own efforts, time;
  • no risk to life at height;
  • exclusion of damage to facades and glass;
  • work at any time of the year;
  • cleaning of any contaminants, including persistent ones.

In addition, companies that provide canopy washing services often offer to apply a special hydrophobic coating to the surface on the outside. It repels dirt, dust, water, helps to easily wash away debris and other contaminants. Also, the coating allows you to extend the life of the fabric and keep the brightness of the color.

Brushing is an easy way to clean yourself

There is an uncomplicated method of washing the visor of the shop window, if access to it is not obstructed. It is suitable in the absence of strong dirt and stains on the fabric. It is best to carry out such a procedure regularly, so that the need for dry cleaning does not arise.

It is necessary to buy a brush with a soft pile and a detergent without aggressive components, acids, alkalis. Soap or laundry detergent, which corresponds to the material of the canopy in composition, will do. You will also need a stepladder – it will allow you to carry out all manipulations safer. Use only warm water (up to +30 degrees). Hot water should not be used – it can cause shrinkage of the matter. Act as follows:

  • soap or powder is diluted in water;
  • wet a brush in the solution;
  • treat the surface of the awning well;
  • wash off the product with clean water from a hose.

Not a bad tool for washing the visor is ordinary laundry soap. It is safe for most fabrics, does not cause shrinkage, deformation, loss of color. It is more difficult to wash off, but no less effective dishwashing detergent. If the brush has a short handle, it can be extended with a mop, window scraper or other similar tool.

Hand washing a removable canopy

Sometimes customers are interested in how the washing of visors, which do not have a frame, are tensioned and removable. The possibility of removal makes the owner’s task easier. Some fabrics are allowed to be washed in the machine. To do it correctly, you need to strictly follow the manufacturer’s instructions on water temperature and the compositions used. Do not wring out the fabric – this can deform it. Also, the removable awning can be laid out on a flat surface, well spread out and cleaned with a brush, and then rinse off foam and dirt with a hose.

  • Cleaning with a hose and a high pressure washer
  • A garden hose can be a good tool for cleaning dust from a canopy. A jet of water is unlikely to wash away stains and smudges, but regular rinsing will help to refresh the appearance of the structure. Surface dirt is perfectly washed off with a jet of water under pressure. In addition, stubborn stains are more visible after rinsing and can be brushed away locally.
  • If you have a high-pressure washer, you can get an excellent result of washing, close to professional. The conditions for using a pressure washer are as follows:
  • – strong, dense canopy fabric;
  • – minimum pressure setting.

It is safest to use the sink for cleaning tarpaulin awnings. It is categorically not recommended to use it if there is a hydrophobic layer on the fabric – it will be damaged by the action of water under pressure. If you have the slightest doubts, you need to seek help from professionals – they will help restore the cleanliness and attractive appearance of any canopy without reducing the service life!

Post thumbnail

How to clean garden furniture: technologies and selection of cleaning products

Artificial rattan furniture is not only beautiful, but also environmentally friendly and safe. It will decorate a garden, an open terrace, will suit the interior of a kitchen or a restaurant room. It will allow you to comfortably and cozily equip any corner for recreation, tea drinking.

  • Synthetic material looks no different from natural.
  • Presented in a wider range of colors, which is liked by buyers.
  • Does not require special care, certain storage conditions.

The shape of furniture made of artificial vine can be very different. This allows you to make individual elements and entire sets in the classic, rustic style, “eco”, country, minimalism.

Benefits to be aware of

The first advantage of wicker sets is functionality. After all, such chairs, tables, sofas are suitable for home interiors, exteriors, as well as the equipment of open terraces, lounge areas in restaurants, coastal cafes. With their help, you can comfortably equip the dining area, a place of rest and leisure indoors or outdoors.

The second reason to choose wicker furniture made of artificial rattan will be durability:

  • the material is not afraid of the sun, precipitation, temperature fluctuations;
  • retains its strength, aesthetic appearance even after exposure to moisture, ultraviolet light;
  • can be used outdoors for 10 years and longer.

The advantages include hygiene, ease of use, easy care. You will not have problems with cleaning dirt, bacteria. You can wash sofas, tables, chairs right outside under the pressure of clean water.

Please note! A significant advantage is the affordable cost. The price of such products is many times lower, while the quality of manufacturing remains at the top.

Unlike natural material, artificial vine can be selected by color, texture. Thereby emphasize the peculiarity of the interior, exterior of the outdoor area. Purchase furniture suitable in shape and color for a particular design of patio, lounge area, terrace, room. 

HOW TO STORE FAUX RATTAN FURNITURE IN WINTER

Before storing sofas and armchairs, they need to be prepared. First wash off dust, sand, dirt from the legs, seat and backrests, and then dry the furniture completely. If there are covers, they need to be washed. It is better to store garden furniture in a closed room, ideally in a special cover.

If all the conditions are met, then spring cleaning of rattan furniture is to remove the cover and wipe the seat and back with a damp cloth.

But what if for some reason you did not have time to wash the furniture in the fall or it had to be stored outdoors and sofas and armchairs got dirty? We deal with each case separately.

HOW TO CLEAN DIRT AND DUST FROM A WICKER SOFA

First clean the furniture from small debris with a vacuum cleaner. For this purpose, an attachment with bristles for hard furniture will come in handy. Also suitable brush with a soft long pile – such are often used for shoes.

If there is dried dirt and grass on the sofa and chairs from last season, it can be soaked and washed off with water. The fastest and most reliable way – take the furniture outdoors and go over them with a high-pressure washer, for example, Kercher. Do not worry – furniture made of artificial rattan such a shower will not hurt. Wicker fabric is very durable.

A steam cleaner will also come in handy – it is suitable for deep cleaning of the wicker.

If there is no such opportunity, an ordinary sponge and any detergent will do.

After washing, you need to collect excess moisture with a towel and leave the furniture under a canopy or in the shade until it dries completely.

HOW TO CLEAN FAUX RATTAN FURNITURE FROM GREASE STAINS

1. If you find a greasy film or dried splashes on your sofa or armchair, wipe the dirt with a soapy solution. You can use regular laundry soap, dishwashing detergent or glass cleaner.

2. Rinse off the foam with a sponge and clean water. Dry the furniture. 

HOW TO REMOVE STUBBORN STAINS FROM WICKER FURNITURE

In the process of use, you can miss the appearance of splashes and stains on furniture and discover them only when preparing for the new season. What to do.

Splashes from wine, oil can be easily removed with any dishwashing detergent or soap solution.

Dried paint or varnish can be removed with a solvent. Just check that it does not destroy polymers!

Iodine stains are more difficult to remove, but also realistic – wipe the dirt with a stain remover for synthetics. The same method will be useful to remove traces of marker.

HOW TO CLEAN UPHOLSTERED CUSHIONS ON FURNITURE

Wicker rattan furniture often comes with soft cushions. In proven manufacturers, the cushions have removable covers – it is enough to remove them and put them in the washing machine.

If the covers are not removable, first remove the cushions and vacuum them from all sides. a brush with a soft pile will do. Did you find any stains on the fabric? Try using a special upholstery and carpet cleaner. Follow the instructions carefully and first test the product on a small piece on the back of the cushion.

HOW NOT TO CLEAN WICKER FURNITURE

Refuse to use products with coarse abrasives – they can scratch the coating and worsen the appearance of the product.

Also do not use very aggressive chemicals with chlorine – the furniture can get stained and change color.

Another taboo is mechanical cleaning with a metal brush and knife, such a rough procedure is likely to damage the coating and paint.

RATTAN FURNITURE CARE: PREVENTIVE MEASURES

To sofas and armchairs made of artificial rattan for a long time remain like new, it is enough to follow simple recommendations for operation:

  • regularly wipe the furniture with a damp cloth or sponge, so that dust does not accumulate;
  • avoid harsh abrasives;
  • keep furniture away from barbecue, fire, do not put hot objects on it;
  • avoid getting on the surface of acid, strong solvents

Now you know how to put furniture in order after winter storage and how to maintain its appearance during the warm season.  But you do realize that it all takes time and certain knowledge not to spoil the surface. That’s why we advise you to contact our cleaning company and order cleaning services from our specialists. 

Post thumbnail

How to wash ink off an office or computer desk

Is your printer leaking ink? Or perhaps the expensive pen that the organization gave you as a gift to commemorate 10 years of service in the workplace has started leaking after a month of moderate use? Whatever the case, if ink has spilled on your computer or office desk, there are several ways in which you can clean it up. The sooner you start cleaning up the ink, the sooner you’ll be done!

Method 1. Removing ink with medical alcohol or hairspray

1.Blot the ink as soon as possible. The first thing you need to do is blot the ink. As soon as possible, remove the still wet ink by blotting the stain with a damp paper towel.

  • Try not to rub the stain until you have blotted it well.
  • Blot the stain with damp paper towels until they are no longer stained with ink.

2. Apply medical alcohol or hairspray. Medical alcohol is one of the most effective cleaners. If you have hairspray, use it as it will do the job too. It can be used on laminate, wood, metal, plastic, glass and most other materials. 

  • Soak a cotton ball completely in alcohol or hairspray. Squeeze out the excess liquid.
  • Rub the ink stain in small circular motions until it disappears. The cotton should absorb the ink.
  • The cost of hairspray does not affect its effectiveness. As a rule of thumb, the cheaper the hairspray, the more alcohol it contains.

3. If necessary, repeat the process with a clean cotton ball. Press harder, but be careful not to overdo it, so as not to damage the finish of the table.

  • To remove ink from metal, apply a generous amount of alcohol directly to the metal surface of the table. Then wipe the stain off with a clean cloth.

Method 2. Removing ink with home remedies

1.Test the cleaner on an inconspicuous area. Whichever cleaner you choose, be sure to test it on a small, inconspicuous area.

  • You don’t need to test the ink removal ability of the cleaner. Just make sure it won’t harm the surface you are trying to clean.
  • Don’t rub too hard, as materials such as absorbent cotton and baking soda have some abrasive potential, they can ruin some surfaces.
  • Remember to take a damp cloth or paper towel and wipe the area where the stain was.

2. Try baking soda. Mix baking soda with water until you have enough paste to cover the ink-stained table. Baking soda can be used on almost any surface, including laminate, metal, plastic, wood, and glass.

  • Apply a generous amount of paste to the stain and rub it in with your fingertips or a toothbrush.
  • Gently rub the area with a clean, damp cloth to wipe away the paste. Do not rub too hard to avoid scratching the surface of the materials.
  • Repeat the process again if necessary.
  • Clean the area with a cotton ball soaked in rubbing alcohol.

3.Use toothpaste. Toothpaste combined with baking soda is particularly effective. Coat the area with a generous amount of toothpaste and gently scrub the stain.

  • Wipe off the toothpaste with a damp cloth. Wipe gently so as not to scratch the surface.
  • If toothpaste residue remains on the surface, wipe it off with a cotton ball soaked in alcohol.
  • If the table is made of wood, leave the toothpaste for 10-15 minutes. If the surface is made of another material, you don’t have to wait that long.

4. Apply acetone or nail polish remover. The cleaning properties of acetone are so well known that it is even used for nail polish remover! Chances are it will do the same for the ink stain.

  • Place a cotton ball on the neck of a bottle of nail polish remover and shake it gently to soak the cotton ball in the liquid.
  • Gently wipe the ink stain until it disappears.
  • Use acetone or nail polish remover with extreme care. Wear gloves and remember to test the product on the surface of the material to make sure it will not change color.
  • Acetone can be used to clean metal, glass, plastic and even leather.

5. Try insect repellent or sunscreen spray. Sprays designed to be applied to the skin can also be used to remove ink because they penetrate the stain itself. This method is especially effective on plastic surfaces.

  • Be sure to test the remedy on an inconspicuous area so as not to harm the table surface, as these substances can have different concentrations.
  • Spray the stain until it is completely covered with insect repellent or sunscreen.
  • If the stain is small, spray the product onto a cotton ball and gently wipe the stain.
  • Wipe off the spray with a clean, soft cloth. Repeat the entire process again if the stain remains.

6. Use mayonnaise to remove stubborn ink stains from wood surfaces. To remove an old ink stain from a wooden surface, you will need a stronger remedy. For this, you will need mayonnaise.

  • Apply a thick layer of mayonnaise on the stain and leave it on overnight.
  • Wipe off the mayonnaise with a damp paper towel, then wipe the wooden surface with another damp paper towel.
  • Polish the surface with a cloth and wood polish to give it the finishing touch.

As you can see, none of these methods offer any special guarantees, so it’s best to contact a cleaning company. Our cleaners will help you get rid of stains quickly and you don’t have to worry about damaging the surface. A cleaning company in Calgary is the key to your peace of mind and keeping your apartment, home or office clean. 

Post thumbnail

Rules for cleaning antique furniture

Today in modern interiors more and more often appear antique furniture and other collectibles. Not surprisingly, because quality antiques are able to preserve for a long time not only its artistic value, but also the proper appearance. However, it is worth remembering that care for such things should be appropriate. Consider how to clean antique objects from different materials in this article. But we note that independent cleaning is not the best idea when it comes to expensive and such specific things. It is best to contact a cleaning company in Calgary. Our cleaners will get the job done in the best way possible. 

1. Cleaning wood furniture

– It is unacceptable to use modern polishes to care for antique furniture. Chemicals can irrevocably spoil delicate wood.

– To remove dust accumulated on the surface, it is best to use a natural soft cloth. There is no need to soak the cloth. Having removed the dust, you can use a special agent that prevents dust from settling on the furniture. Wipe the surfaces of antique furniture should be regularly to avoid strong contamination, which will be much more difficult to remove.

– Decorative carved elements on antique furniture can be cleaned with a soft brush or brush.

– Periodically, antique wood can be waxed. To do this, soften a small piece of wax and rub it on the surface with a cloth or soft shoe brush. After waxing, the furniture should be wiped with a dry cloth. Special products based on natural wax can also be used for polishing.

– Another problem that can arise is the appearance of pests. Woodworm bugs are especially fond of antique wood and eat it from the inside. So at least three times a year, carefully inspect your furniture for fresh holes or wood dust. If pests are present, treat immediately with an insecticide treatment.

2. Cleaning the leather on antique furniture

The leather on antique furniture needs special care. If the leather upholstery on the furniture is not cared for, the material will be covered with cracks and subsequently fall apart. Therefore, only careful care will help to preserve the product.

Leather furniture should be periodically lubricated with a special composition. Some experts give preference to the usual hand cream. According to their observations, it improves the condition of antique leather.

3. Care of upholstered furniture

– Upholstered antique furniture can be cleaned with a vacuum cleaner and a soft cloth attachment. Antique sofas and armchairs will become clean even in hard-to-reach places: around buttons, armrests. Act carefully, especially if the fabric is shabby and dilapidated.

– Antique fabrics are not impregnated with water-resistant compositions, so it is not recommended to clean them wet. In case of heavy soiling it is worth contacting professionals.

– Metal fittings of upholstered furniture also require some care. If the lining on the chair or sofa faded, then return them to their original shine will help the following composition:

ammonia alcohol -30 gr;

tooth powder or chalk – 15 grams;

water – 50 g.

All components should be mixed and soak the mixture flannel cloth. It is rubbed on the metal fittings. After that, take a dry cloth and rub the metal to shine. Act carefully so that the composition does not get on the wood or fabric. It is best to contact a specialist.

4. Care of antiques made of bronze, steel, copper

Objects made of copper, steel or bronze are cleaned from dust with a dry flannel cloth without the use of cleaning agents.

If blackness and greenness appeared on the objects, ammonia alcohol is recommended as a folk remedy for their removal. A cotton swab should be soaked in alcohol and thoroughly wipe the object with it until it shines. However, it is preferable to have the item cleaned in a workshop.

5. Care of brass and gold-plated items

Remove dust and dirt from such surfaces with a soft brush. It is strictly forbidden to polish the parts even with a dry cloth. This can damage the coating.

6. Cleaning ivory objects

Things made of ivory over time become fragile, so you need to take care of them very carefully. The item is cleaned with a soapy sponge. Wipe the item with it and then use a damp cloth.

Post thumbnail

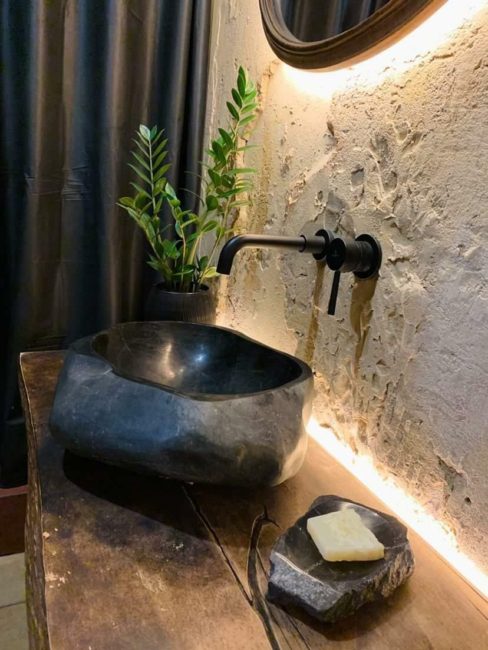
Marble sink care: tips from professionals

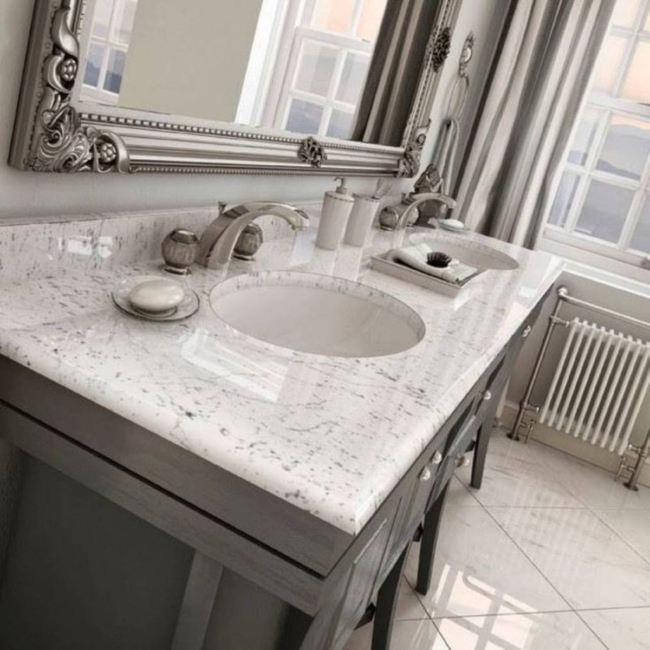
Marble has been popular as a decorative material since ancient times. However, it requires careful maintenance. Its cleaning is a rather painstaking process, the fulfillment of which implies compliance with certain requirements. In case of their violation, the loss of aesthetic qualities and destruction of the stone is inevitable. Lack of proper care leads to the darkening of the stone and the loss of its original appearance.

If you have installed a marble sink in your home, you should remember that without constant care it will quickly lose its attractive appearance. In this article, we will talk about what you need to buy to care for your sink and ways to remove stains from the surface. 

To care for marble sinks, you need:

  • A soft cloth.
  • Water that has a warm temperature that does not contain any detergent.
  • Suede (can be replaced with a regular towel).

Throughout the year it is required to wash the marble with a detergent, for this role is perfectly suitable for ordinary dishwashing detergent. After cleaning with a cleaning composition, you should wash the surface with purified water, then wipe, after which it is polished with a towel. These procedures are sufficient to ensure the daily care of this stone. 

Cleaning must not be delayed: if the sink has been soiled, it must be cleaned immediately, without waiting for the colorants to absorb into the structure of the marble.

Rubbing against the surface is inadmissible, it is possible only to blot the stains formed by the liquid. However, there are other ways to clean marble, and you need to know them to avoid damage to the marble surface.

Specialized products that remove dirt

Cleaning of the marble sink is carried out using only specialized preparations, carefully affecting the natural stone and damaging it. With the choice of means should be careful, it is best to entrust this matter to professionals. Our cleaning specialists in Calgary know what marble cleaning products can be used, what will not harm the appearance of the products, etc. Our cleaners guarantee a gorgeous result. 

Stain removal on marble

Effective stain removal requires identifying the cause of a particular stain, followed by the selection of a cleaner.

  • Streaks
  • In case of streaks caused by non-coloring liquids, they can be eliminated as follows:
  • Once a wet spot is detected, it must be blotted with a paper towel. Friction is not allowed, as it increases the size of the spill and leads to the usual rubbing of water into the stone pores.
  • A sponge soaked in a soap solution is used to wipe the dirty spot.
  • A towel is used to remove excess moisture.
  • The surface is polished with a soft and dry cloth to help eliminate streaks.

Stains from organic substances – coffee, tobacco, tea, sodas, juices

It is not difficult to determine the type of substances that have caused stains on the marble surface, as such stains take on a slight pink color. Removal requires the use of bleach.

Cleaning a marble sink using hydrogen peroxide with ammonia:

  • The above-mentioned substances are mixed in equal volumes and applied to the stain.
  • They are left for 24 hours.
  • With the help of a napkin, what is left after the cleaning solution is eliminated, rinsed with water.
  • Everything is thoroughly wiped.

Contamination from fats, oils, lotions and cosmetics

These substances leave darkened stains on the stone surface.

They can be removed with a natural absorbent, ideally starch:

  • It is poured directly on the place of contamination and left for a couple of hours, this process is repeated until the final removal of dirt.
  • After that, the surface of the marble is washed with any cleaning agent designed for natural stone.
  • In the case when the dirt could not be removed at the first attempt, marble can be cleaned with the help of a solvent:
  • Paper napkins are soaked in a solution of acetone, placed on the stain.
  • After five minutes they are removed, the room is ventilated.

A marble sink is not cheap and if you do get a stain on the surface, it is better not to try to save money and entrust the cleaning to professionals. Our cleaning service in Calgary will ensure that your bathroom or kitchen is cleaned to a high standard. 

Post thumbnail

What can be used to clean plastic panels

How to clean plastic panels in the kitchen, bathroom or other rooms? It all depends on the type of contamination and on the features of the panels themselves. In this material we will deal with both questions.

What kind of plastic panels are there?

Plastic panels as a finishing material are actively used for the bathroom and kitchen, and this is quite justified.

Plastic panels have a long list of positive properties: they are hydrophobic, wear-resistant and light-resistant, strong enough and durable. And also look aesthetically pleasing enough and are inexpensive. And, since they are present in the homes of many Ukrainians, the question of how to clean them is more than relevant.

Before you start washing plastic panels, you need to determine what type you have (glossy or matte).

Glossy plastic panels are covered with a laminating layer, unlike matte ones. There are pros and cons to both. Laminating layer of lacquer protects the surface from dirt, it becomes resistant to abrasives, and therefore glossy surfaces are easier to clean.

But for cleaning matte surfaces you need to use non-aggressive chemistry and carefully choose the inventory, so that the surface is not scratched. The best suited vacuum cleaner and dry microfiber.

Plastic panels are used for finishing walls and ceilings, kitchen apron.

Types of contaminants and specifics of their control

The most common types of dirt that form on plastic panels are as follows:

  • grease buildup;
  • rust;
  • lime scale;
  • water stains;
  • soap marks;
  • mold, fungus;
  • dust.

Before cleaning, it is necessary to free the working space as much as possible, remove all objects that may interfere with the process. It is recommended to use personal protective equipment – a mask and gloves.

To wash PVC panels, use warm water, but not hot (optimally – 40-45 degrees). If you are using a detergent for the first time, first test it on a small area to see if it will damage the surface.

General rules for cleaning plastic panels:

  • Use cleaning agents with fine abrasive particles, or better yet, without them at all. They can scratch the top layer, and moisture will damage the surface, because of which mold can develop;
  • use soft cloths and sponges, and never iron brushes or rubbers;
  • wash plastic panels often enough, at least once every four weeks. In this way you will not allow the appearance of dried stains;
  • after washing, rinse the panels with water and then wipe them dry with a cloth to avoid streaks.

How to clean plastic panels?

There is a huge selection of detergents and cleaners for washing plastic panels in stores today. When choosing a means, remember about abrasives, and try to buy a means without them, it is best to buy a gel.

Properly selected gel will help to cope with the most difficult stains, but if for some reason you do not want to use store chemistry – you can cope with home remedies. Those that are sure to be at hand at the hostess:

  • Soap solution with high concentration. For 1 liter of water you will need 50-70 milliliters of dishwashing detergent and 1 bar of laundry soap grated;
  • Soda paste. It is prepared from just two ingredients: baking soda and water. In the soda add water little by little until you get the necessary concentration, you can add 20 grams of starch. You cannot rub the surface with baking soda paste, only apply it and wash it off – it is quite abrasive;
  • Solution of ammonia: 20 milliliters per liter of water;
  • Vinegar solution – a mixture of vinegar and water, in a ratio of 1:3;
  • Alcohol solution – in the same ratios as vinegar. This is a great way to get rid of lime mortar, but first it is worth checking on a small area, whether the alcohol will not damage the material;
  • Sulfur gruel. An effective remedy, but quite troublesome in preparation. You need to clean sulfur from ordinary matches, mix with water to the consistency of a porridge, apply to the area to be cleaned and leave it for 15 minutes.

So, plastic panels – a universal and very convenient material, quite unpretentious in maintenance. But provided that you wash it correctly and regularly. If you do not want to do it yourself, you can ask for help from our specialists. They will perform cleaning quickly, qualitatively and for an affordable price. 

Post thumbnail

How to clean rust off a toilet bowl

As a result of intensive use, sanitary ware gradually loses its original appearance. Often rust starts to show through on the inner surface of the toilet bowl, causing aesthetic discomfort. Below are the methods to keep the sanitary ware clean and looking good for as long as possible.

Causes of rust

Rust on the surface of the toilet bowl is caused by a number of factors, the key one of which remains the increased concentration of iron salts in tap water. The solution is to buy capsules or tablets that change the chemical composition of the water.

In many cases, the source of rust is not galvanized steel pipes that are used for a long time. The optimal solution is to add the above tablets to the cistern. If there is no proper effect, it will be necessary to install polypropylene or metal-plastic pipes.

Intensive appearance of stains contributes to the rough surface of the toilet bowl. In particular, this applies to earthenware copies. At the same time, porcelain toilet bowls are characterized by a smoother surface, which is not so strongly exposed to contamination.

Rusty traces arise due to the leakage of the cistern. It is necessary to eliminate the malfunction as soon as possible, because otherwise the stains will soon appear again.

Removing rust by using household chemicals

These products include the following varieties:

  • Abrasive. This group includes products whose cleaning effect is caused by the mechanical action of powder particles on contaminated areas. Substances are applied to a rag or sponge, then intensively wipe the stain until it disappears. Despite the positive result, the cleaning process will take a long time. There is a high probability of damage to the integrity of the surface of the toilet bowl by small sharp particles of powder.
  • Alkaline. Means of this group do not damage the surface of the sanitary ware. They should cover the stain, and after 10-15 minutes wash off the remains of the substance with water. It should be taken into account that alkaline household chemistry is powerless in relation to ingrained contaminants.
  • Acidic. Under the influence of these substances, contaminants are simply dissolved. They perfectly cope with various types of stains. It should be taken into account the fact that the use of these means at home requires compliance with safety rules. Before cleaning, it is necessary to take care of the presence of gloves. Immediately in the process, it is necessary to avoid contact with chemically aggressive substances on the skin and in the eyes. Acids are suitable for both earthenware and porcelain toilet bowls. At the same time, you should refuse to use them to remove stains from an enameled bathtub, because they dissolve the enamel.

NOTE. Do not use different household chemicals at the same time. Not only can this cause unpredictable chemical reactions, but it can also damage the surface of the toilet bowl.

Folk recipes

  • Soak a cloth in vinegar and place it on the contaminated area. After 30 minutes or an hour, rinse the area well with water.
  • Mix peroxide and ammonia in a ratio of 1:10. Use the resulting mixture to treat the stain and leave it for several hours.
  • Cover rust stains with oxalic acid. After an hour, it is necessary to wipe the area with a sponge soaked in ammonia, and after – abundantly rinse with water.
  • Contamination is required to carefully pour hydrochloric acid for a few minutes, and then – well rinse with water.

Little tricks

If there is no cleaning agent available, you can clean the surface of the toilet bowl from rust stains as follows:

  • Apply toothpaste to the desired area and scrub with a brush.
  • Moisten a rag with a drink such as “Cola”, “Sprite” or “Fanta”, placing it on the contaminated area. After a while, you need to rinse the spot with water.
  • Cover the stain with electrolyte from batteries. After 15 minutes, wash off the liquid.
  • If something did not work – order cleaning of the apartment from our cleaning company. Cleaning of the bathroom is included in any of the packages.

In order to keep the sanitary equipment as long as possible to retain its original appearance, it is necessary to carry out regular cleaning and in time to eliminate possible breakdowns. At the stage of purchasing sanitary fixtures, it is appropriate to opt for copies with a water-repellent glaze, which prevents the occurrence of contamination.

Post thumbnail

How to clean windows after renovation?

Usually renovation begins with the installation of plastic windows. Therefore, they get dirty and covered with dust. After the end of repair plastic windows should be returned to pristine cleanliness, well cleaned profile, and washed to a shine double-glazed windows.

Work on cleaning the profile and window includes removing protective tape, remnants of mounting foam, glue and dust. Let’s consider each situation separately.

How to remove protective tape from the window

  • In its instructions, the manufacturer of plastic windows warns that the protective film should be removed immediately after installing the window profile. This recommendation is not always followed, assuming that it protects the frame from dirt. It is not difficult to remove the tape with logos after its installation. But if this is not done in time, then caulking the slopes, the tape can get under the plaster. Then you can get rid of the tape in several ways.
  • Remove the tape with a special spatula. Carefully, without damaging the surface of the profile, peel off the film.
  • Turn on a hair dryer, heat the taped surface with it and quickly remove it from the frame. An ordinary hair dryer can be used for this purpose. It is necessary to carefully observe that the film does not melt from the hot air and does not stick to the frame, as it will be impossible to remove it.
  • You can remove the tape with school plastic. This method is safe. It does not leave scratches. However, it is a labor-intensive procedure.

How to remove adhesive residue

After the foil has been removed, black glue stains may remain on the profile. If the glue has not dried yet, it can be easily removed with a cloth soaked in a soap solution. To remove dried glue residue, you will need to buy a special product. In order not to make a mistake in the choice of means, it is necessary to consult with the seller, telling him about your problem.

Also dried glue should be heated with a hair dryer, removed with a plastic spatula, wiped with acetone and washed with detergents. When such methods are powerless and ineffective, you have to polish with a drill or grinder, using felt wheels and acetone cleaners. This treatment removes the thin plastic layer from the profile along with the dried adhesive and gets rid of small scratches.

How to remove foam residue

It is difficult but possible to clean the profile from the remaining gasket on it in the following way:

  • Use a plastic spatula to gently scrape off the hardened gasket.
  • Apply a special profile cleaner to a piece of felt and treat the dirty spots.
  • Allow the foam to soften, then polish the frames with felt to completely remove the sealant residue.

This work should be done with rubber gloves.

How to remove dust from the profile

Plastic frames are well cleaned with a solution of dish detergent or any other detergent. A heavily soiled profile is well washed with liquid soap. It should first be applied to the frames, wait a few minutes, and then rinse it off along with the dirt. After bringing the profile in perfect order and removing debris from all hard to reach places, you can proceed to washing the double-glazed window.

Washing windows after renovation

No one can cope with window cleaning after renovation better than a cleaning company – you can save your time and nerves just by ordering window cleaning. First of all, the windows should be wiped with a dry cloth to clean them from dust. If there are stains of paint or other substances on the glass, they should be removed with a special glass cleaning scraper. These scrapers have a thin blade and therefore cannot scratch the glass.

What should be cleaned in windows after renovation

It is impossible or very difficult to clean the window to shine and without streaks with water. There are other effective and less labor-intensive ways to do this. Solution for washing frames can be prepared from one cup of vinegar, or a tablespoon of ammonia, or 50 grams of bleach per one liter of water. Take a soft sponge, soak it in the prepared solution, wash the double-glazed window, and then wipe the glass well with a newspaper. For washing hard to reach places it is good to use a special brush with a long handle. It is convenient to wash the glass with such a brush. After it there are no streaks on the glass. The rubber spatula on it perfectly removes dirt and water.

All kinds of active chemical compounds are very dangerous for white plastic. Therefore, window frames should not be cleaned with solvents and acid-containing liquids. Such compounds can spoil the profile. This prohibition also applies to household detergents. Plastic and wooden profiles should only be cleaned with soap and water and wiped well with a natural cloth.

How to make glass perfectly clean

Today, it is not difficult to clean the glass perfectly. Many different sprayers and wipes are sold for this purpose. Before treating the glass with a special product, it should be wiped with a wet cloth to remove dirt. After that, the sprayer is applied to the glass special agent, then wipe the glass well with a dry cloth. The result is a transparent window surface that is pleasing to the eye.

For washing large windows sell special devices “screed”. Their assortment is so diverse that anyone can choose the right size for themselves, both in length and width. On one side of the scraper is attached hard rubber, and on the other a sponge. The sponge soaked in solution washes the glass, and the hard rubber scrapes off the water along with the remaining dirt. Wash the window from top to bottom with horizontal movements.

You can also use simple folk tips to clean the glass. For example, for washing glass is well suited diluted 1 to 4 vinegar essence. Apply the solution to the glass, after a couple of minutes to wipe with a dry cloth or paper. You can prepare a solution with ammonia. In 250 ml of water add a tablespoon of ammonia, spray or wet the glass with a cloth, then wipe dry. A spoonful of starch in a liter of water is also a good help in cleaning the glass.

The profile is cleaned, the glass is perfectly washed. It remains to tidy up the window sills. If it is wooden, then wash with soapy water. Plastic window sill can be washed with special cleaning agents. To make the white color of the window sill acquire a pristine color, it should be wiped with a special agent, such as Domestos. To have more sunlight in the apartment, the windows should always be clean and not dusty. Keep long clean and save from dusting will help glycerin and ammonia. Make a mixture and apply it to the windows.

Safety precautions must be observed when cleaning after window installation.

  • Do not allow chemicals to get on exposed areas of the body. Otherwise, you can get severe burns.
  • Avoid getting harmful substances on rubber seals. This will deteriorate the rubber and break the impermeability. Sometimes this can lead to a complete replacement of the profile, since in some of their types the sealing rubbers are soldered inside and cannot be replaced.
  • Use special means to remove lime-cement contaminants. Removing them mechanically can damage the surface of the frames.
  • Be aware of the different concentrations of simple solvents and choose the safest ones to avoid damaging the surface of the profile.

Observing all precautions for the product and yourself, you can perfectly clean plastic windows, which will be pleased with their cleanliness. If you do not want to waste your time, order our cleaning service in Calgary.

Post thumbnail

MOSAIC BATHROOM HYGIENE: USEFUL TIPS

The bathroom is a room that can take any shape and area, but will necessarily keep a high level of humidity inside. Frequent water procedures and poor ventilation sometimes lead to the fact that between the mosaic tiles fungus begins to multiply, and on the ceramic finish itself there is plaque. Therefore, cleaning of the bathroom should be done quite often. You can wash the bathroom yourself, and you can entrust the cleaning of tiles and other surfaces to a cleaning company. Immediately we note that the second option is better. But nevertheless, we will tell in this article about how to be if you still want to save money on bathroom cleaning in Calgary. 

Before cleaning mosaic bathroom cleaning, you should prepare the necessary tools:

  • Gloves;
  • sponges and rags;
  • a toothbrush for easy cleaning;
  • a bucket or other container to mix the cleaning solution.

How to clean mosaic in the bathroom

If you want to clean mosaic and at the same time protect yourself from the negative effects of household chemicals, use the following recommendations:

  • visually divide the surface into several zones to clean them one by one;
  • do not use brushes with a metal pile to avoid scratching the tiles;
  • only use household rubber gloves;
  • find a cleaner with optimal acid and grease content;
  • do not use detergents or substances with abrasive particles.

Standard means for cleaning mosaic tiles do not always demonstrate effectiveness, and sometimes even leave streaks that are difficult to wipe off. If it seems to you that you have already tried everything, it’s time to familiarize yourself with the most popular methods of tile cleaning.

EFFECTIVE WAYS TO CLEAN MOSAICS

The floor and walls of the bathroom are often covered with lime scale, which remains on the surfaces due to the use of hard water. Such dirt should be cleaned immediately, because a thicker layer will take much longer to remove. Mosaics in the bathroom can be cleaned:

  • by chemical preparations – well-known brands make a lot of proposals available to ordinary consumers. When buying them, it is necessary to carefully read the instructions;
  • folk methods – by creating concentrated solutions with laundry soap, ammonia or citric acid;
  • high-tech devices – the safest and most innovative solution to the problem will be a steam cleaner.

But you should realize that the use of any of the above methods requires time, effort and certain skills and abilities (if you make mistakes during the cleaning of mosaic tiles can damage the surface). For this reason, if you need mosaic tile bathroom cleaning, it is best to leave a request to our cleaners in Calgary. Our cleaning company specialists will clean your bathroom tiles at the most favorable conditions for you. 

Post thumbnail

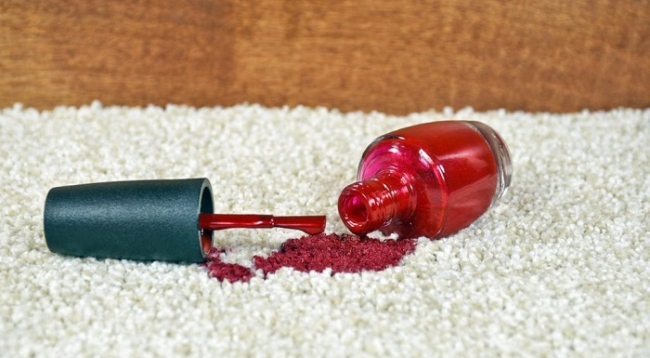
How to remove nail polish from carpet, rug or other fabric surface

If you’ve inadvertently just dripped nail polish on your carpeting, it’s too early to despair. You are not the first (first) or the last person in this world to commit this ghastly act. Your carpet (carpeting) can be restored without problems, and we will introduce you to the recommendations for removing nail polish from fabric coverings.

You need to act quickly and decisively before your bright and beautiful nail polish is absorbed into the surface of the carpeting. Fortunately, you always have the necessary products at hand – you just need to look in the bathroom or kitchen.

In our article, we will tell you how to remove nail polish from the carpeting so that no trace is left behind.

Products for removing nail polish from carpet

Before removing a nail polish stain, let’s look at the products that can help us in this seemingly impossible task. First, each product should be tested for reaction with the carpeting to avoid irreparable damage to the carpeting. Apply the named products to a small inconspicuous area of the carpeting and wait a couple of minutes – if the product did not spoil the carpet, then proceed to the removal of nail polish.

Consider a few handy remedies that will help to remove the nail polish stain from the carpet.

  • Acetone-free nail polish remover. This product works great, but make sure it is acetone-free. Otherwise, you will remove the color of the carpeting itself along with the nail polish.
  • Alcohol solution or hairspray. Products containing alcohol are great for removing nail polish from carpeting.
  • Carpet Stain Remover. This is a more specialized product and it’s not a given that you have it on hand. But if you do, use it as directed, it will most likely do the job.
  • Hydrogen Peroxide. A good remedy, but if the concentration percentage is too high, it can easily discolor the carpet. Test it on an inconspicuous area and dilute if necessary.
  • Window cleaner. It may seem strange, but almost any window cleaner will handle a varnish stain on carpet.

Step-by-step instructions for removing nail polish from carpeting.

Now, let’s get down to practice and consider how you can get spilled nail polish out of the carpet in the shortest possible time. Recall that the faster you react to the problem, the better your chances of a positive result.

  • Remove by hand with a napkin whatever you can. The more you can remove in this way, the more effective the remedy will work – it will work on the lacquer particles that have penetrated deeper.
  • Blot the stain. Take a clean towel or microfiber and put it on the stain so that the varnish on the surface is absorbed into it. Do not press down hard, so as not to press the problem deeper.
  • Test the chosen product. Whichever product you choose from the above – be sure to test on an inconspicuous area how it will interact with your carpeting. Only apply it directly to a nail polish stain after you are sure that the product will not eat away at the carpet or discolor it.
  • Use the product of your choice. Apply a small amount of your chosen nail polish remover product to a clean microfiber and work on the nail polish stain. Do it as if you are blotting away the moisture, never rub it to avoid making it worse. Do this procedure until the nail polish stain is discolored.
  • Wash the stain with warm water. Take a kitchen sponge and fill a small container with warm water and a small amount of dishwashing detergent. Work diligently to scrub out the residue of the stain and your detergent – change the water periodically to do this.
  • Give it a final rinse and dry. When the stain is gone and the chosen product for removing nail polish from the carpet is completely removed – rinse control warm water and dry it. If you don’t have a hair dryer at hand – attach a paper towel and press with a heavy object.

Now you have enough knowledge to remove nail polish stains from carpeting. If you do not remove it completely, you will make it almost invisible.

Final notes on removing nail polish from carpeting

Well, if you followed the above instructions completely, most likely your nail polish stain on the carpet is already almost unnoticeable. Now you won’t be frightened or driven into despair by nail polish spilled on the carpeting. The main thing is to react quickly, choose a remedy, check its effect on the carpet and get to work. Thank you for reading to the end and we hope the information was useful for you!

And we remind you that to make every corner of your home shine clean it is best to use the services of a cleaning company in Calgary. 

Post thumbnail

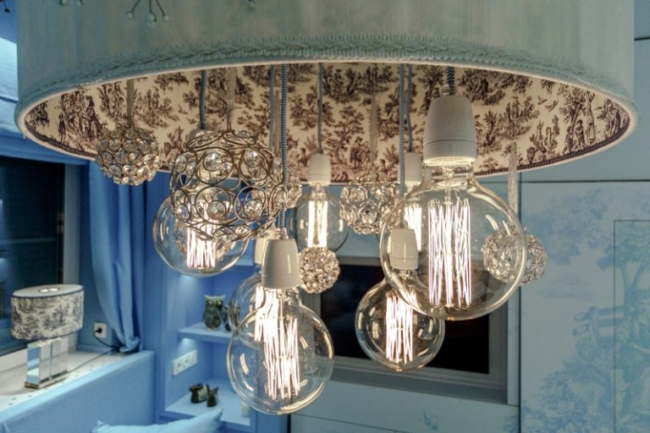
How to clean lampshades of any type

How to clean lampshades or shades, whether they are paper, fabric, glass, plastic or even corrugated. Get rid of dust, dirt and stains with our tips.

Dirty hands, house dust and pet hair make lampshades dirty. Cleaning them is one of those tasks that transform your home from tidy to truly clean.

The fact is that lamps are the decorations of your room: if they are clean, they will enhance its beauty, but if they are in bad condition, they will make it visually unkempt. And just like jewelry, good light fixtures and their decoration are not cheap.

Generally, lampshades cost more than the lamp that goes in them, so use the right method to clean them depending on the type of material. Turn off the light a few minutes before you are going to clean the lampshade to let it cool down completely to room temperature.

How to clean fabric lampshades

If the fabric material is sturdy, you can use a vacuum cleaner and a soft brush attachment to dust the lampshades. If the fabric is bonded, you can rinse it after dusting. Do this in a sink of cold water with a teaspoon of liquid dishwashing detergent or laundry detergent. Submerge the lampshade in the water and spin it to remove dirt. Work quickly and don’t let it get wet or you may damage the glue that holds the fabric in place. Rinse thoroughly, using only cold water, and blot with a towel. Allow the lampshade to dry completely before putting it back in place.

For lampshades made of fine fabric, use a clean wool roller or brush and sweep the dust from top to bottom in long, vertical strokes. Brushes work especially well for pleated fabric lampshades. Remove stains by gently scrubbing with a special dry cleaning sponge.

How to clean paper or parchment lampshades

Paper or parchment lampshades cannot be washed, so they should be wiped well with a dry microfiber cloth.

Remove grease stains by pressing a piece of crustless white bread against the stain. Turn the bread over to the clean spot, then blot until the stain is gone. (Sounds crazy, but it works!)

How to clean plastic or fiberglass plafonds

Remove the plafond and wipe inside and outside with a damp microfiber cloth.

Wash plastic plafonds in a sink or bowl of warm water with a little dishwashing liquid. If there is grease buildup on the plafond, add white vinegar to the water. Rinse well and dry.

How to clean glass lamps

Glass lamps can be washed in the dishwasher on the top shelf as long as they are not hand-painted, gilded or glued on. They don’t need to be washed separately from other dishes, but you don’t want to overload the machine either.

If you don’t have a dishwasher, wash glass placemats in the sink with warm, soapy water. Add white vinegar to the water if there is grease buildup, then rinse and wipe dry.

And in general, you shouldn’t waste your time with boring cleaning. It is better to leave a request on our website and wait for our professional cleaners to do everything for you. Cleaning in Calgary is the best solution for the cleanliness of your home or office. 

Post thumbnail

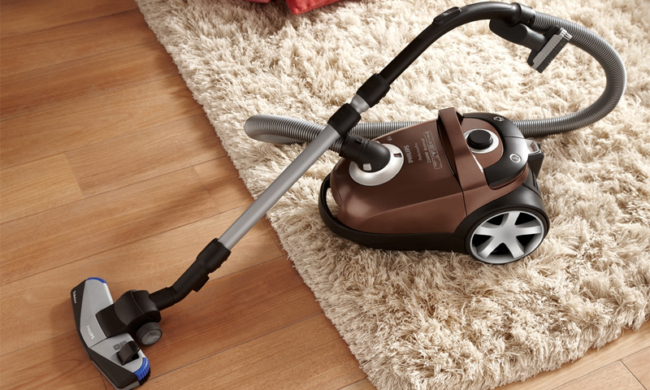
How to vacuum properly or 6 major mistakes

Do you use your vacuum cleaner to mop almost every day, but your floor doesn’t look perfectly clean and shows dirt particles and dust? Maybe you’re doing something wrong and it’s time to google “how to vacuum properly”? Most people use the wrong technique when vacuuming and make the simplest common mistakes that leave dust, dirt and pet hair on the floor.

In this article, we will cover the most common mistakes when using a vacuum cleaner. By correcting them, you will get the most out of your vacuum cleaner and your floors will always be clean.

Unprepared room before cleaning

You are tired, you want to vacuum as soon as possible and relax in the cleanliness. It’s very tempting to skip the step of picking up scattered items and large debris, and this ends up resulting in a dirty floor even after cleaning.

Simply pushing scattered toys and other items with the vacuum cleaner nozzle causes debris from underneath them to accumulate even more, rather than being removed. For optimal cleaning results – clear the space, pick up scattered items, and hand pick up large debris that will be hard for the vacuum cleaner to suck up. It doesn’t allow the nozzle to maximize its pressure on the floor, plus it’s faster than trying to suck up a piece of popcorn for three minutes.

Using a clogged vacuum cleaner

If you don’t clean the bag or container of your vacuum cleaner regularly, it reduces its effectiveness and leaves your floors dirty after cleaning. In addition, a clogged filter can cause the vacuum cleaner motor to overheat and break down.

To maximize the suction power and performance of your vacuum cleaner, you need a clear container or bag, a clean filter, and a functioning brush and free-flowing hose. Empty the container or change the bag when it is more than half full, and clean or replace the filter every 3 to 6 months, as recommended by most manufacturers. Before each cleaning, check for hair clogs in the roller brush and hose.

Ignoring other surfaces when cleaning

Shiny specks of dust floating in the air are beautiful in a photograph, but in your apartment room, not so much. Since dust gets into the air from other surfaces and settles on the floor, it would be a mistake not to use a vacuum cleaner to clean other surfaces as well. This is especially important if anyone in the house suffers from allergies.

At least once a month, before vacuuming the floor, use the brush attachment to clean curtains or blinds, and the upholstery attachment to clean sofas and chairs. This proactive approach can clean pet hair more effectively and reduce dust throughout your home.

Vacuuming carpets and carpeting as hard surfaces

If you vacuum carpeting and hard floors with one nozzle without adjusting it, it’s a mistake and you won’t remove all the dirt. Carpet fibers are twisted and looped threads embedded in a woven backing. This creates many places for dirt to concentrate, and dust can penetrate through the backing to the floor or carpet backing.

For quality carpet cleaning, the vacuum cleaner attachment should be adjusted so that the bristles of the roller brush or beater make contact with the surface of the carpet without reducing suction. Different carpets may require different nozzle heights. A sure sign that the nozzle height is set correctly is that there are visible lines when vacuuming, but the vacuum cleaner moves freely.

Moving too fast and cleaning too quickly

Often, we grab the vacuum cleaner in a hurry before guests arrive or after work to remove visible dust and pet hair. Vacuuming in a hurry is ineffective and leaves dirt on both hard and carpeted floors. Vacuum cleaner needs time to pull in all the dust, dirt, pet hair and other contaminants.

To vacuum the floor, slowly move the nozzle back and forth overlapping areas, giving the vacuum time to remove debris from the floor. In carpeted areas, remember to turn the nozzle at right angles and repeat the procedure to clean all sides of the twisted carpet fibers. By taking your time, you will remove much more dirt from the floor, whether it is carpeted or not.

Not vacuuming often enough

Lastly, one of the most common mistakes is not vacuuming often enough. Many people think that vacuuming should be done all at once, which is a lot of volume, a lot of time – you have to put it off for another time.

In fact, it is enough to vacuum the walls once a week, and every three days vacuum the floors in the most frequented areas of the apartment. If you have small children or pets, it is better to vacuum the main areas every two days.

A thorough weekly vacuuming will remove dust and dirt that can eat into carpeting or settle on hard floors and reduce their shine. Remember, the floor is the largest visible surface in most rooms, so avoiding these vacuuming mistakes improves the overall cleanliness and appearance of your home.

TivaCleaners specialists come to clean your apartment or house with professional vacuum cleaners and specialized skills to maximize the cleaning of your home from dust, dirt and pet hair. 

Post thumbnail

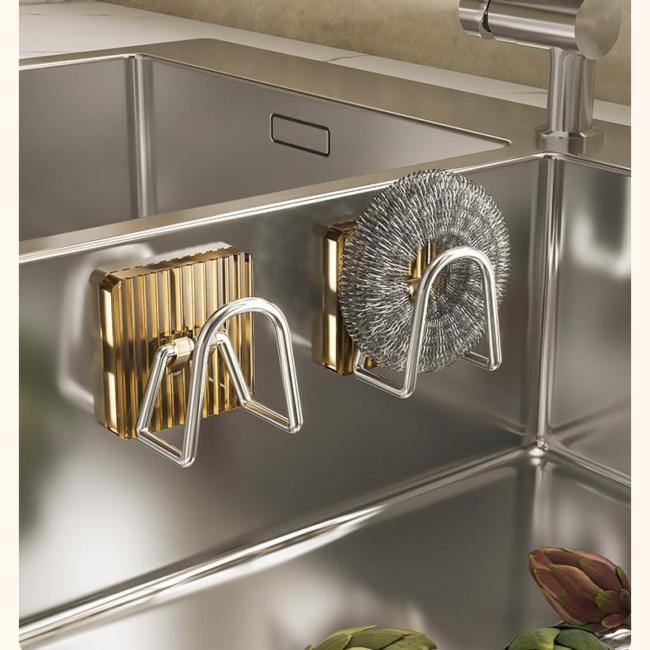
How to remove water, finger and other stains from stainless steel

Removing stains from stainless steel surfaces requires gentle handling and proper methods to maintain the shine and finish of the material. Stainless steel is known for its durability and resistance to corrosion, which is one of the reasons why it is often used in food preparation areas – cafes, restaurants and domestic kitchens. However, it is not immune to staining and discoloration.

The professionals at our Calgary cleaning company will provide expert advice on how best to deal with different types of stains on stainless steel surfaces and appliances. Whether you need advice for your kitchen or you want to keep your HoReCa looking presentable with stainless steel appliances, knowing how to effectively remove stains is a must.

How to remove stains from stainless steel

Before we get into the details of stain removal, it is important to understand the nature of stainless steel. Stainless steel is an alloy composed primarily of iron, chromium, and nickel, known for its smooth, shiny appearance and resistance to rust and staining. However, despite its name, stainless steel is not completely impervious to stains.

Common types of stainless steel stains

Stainless steel stains can be categorized into several common types:

  • water stains. These are usually caused by mineral deposits left behind after water evaporates;
  • fingerprints. Natural oils on our skin can leave unsightly marks on stainless steel surfaces;
  • food residue. Stains from food, sauces and condiments are common, especially on kitchen appliances;
  • rust stains. These can occur if the stainless steel surface has been in contact with other materials that can rust, such as some other types of steel.

How to clean stainless steel from stains

Here are a few ways to remove stains from stainless steel:

  • Start with warm, soapy water and wipe the stained area with a soft cloth or sponge. This will help remove many everyday stains such as fingerprints and light food residue.
  • Vinegar solution. To remove water stains, you can prepare a solution of equal parts water and white vinegar. Apply this mixture on a soft cloth and gently rub the stained area. After that, rinse thoroughly.
  • Baking soda paste. Prepare a paste of baking soda and water for more stubborn stains like rust. Apply this paste on the stain and leave it on for a few minutes. Then rub the stain gently with a soft cloth or sponge. Rinse and dry thoroughly.
  • Commercial stainless steel cleaners. These are widely available and can effectively remove stains. Be sure to follow the manufacturer’s instructions and test the product on a small, inconspicuous area first to make sure it won’t damage the surface.
  • Directed cleaning. When cleaning stainless steel, always follow the directional line of the fibers or polish to maintain the appearance of the surface. Rubbing across the fibers can cause visible scratches.

How to prevent stains on stainless steel

Prevention is often the best strategy for maintaining the appearance of stainless steel, and you can accomplish this by using the following guidelines:

  • wipe down stainless steel surfaces regularly with a damp microfiber to prevent stains and dirt;
  • use of stands and trivets. If you are dealing with stainless steel appliances, use drink coasters and coasters for hot pots and pans to avoid water and heat stains;
  • avoid harsh abrasives. Never use abrasives such as an iron pick, stiff sponge or harsh chemicals as they can scratch or damage the stainless steel surface.

Stainless steel is a versatile and attractive material that can be found in a wide variety of spaces. Knowing how to remove stains and maintain its appearance will ensure its longevity and aesthetic appeal.

Our technicians have all the skills to remove stains from stainless steel. This is done as part of general or post-construction cleaning of an apartment, private house or HoReCa facility. We provide a full range of cleaning services and strive to be as helpful as possible for our customers. 

Post thumbnail

How to remove water stains from wooden surfaces

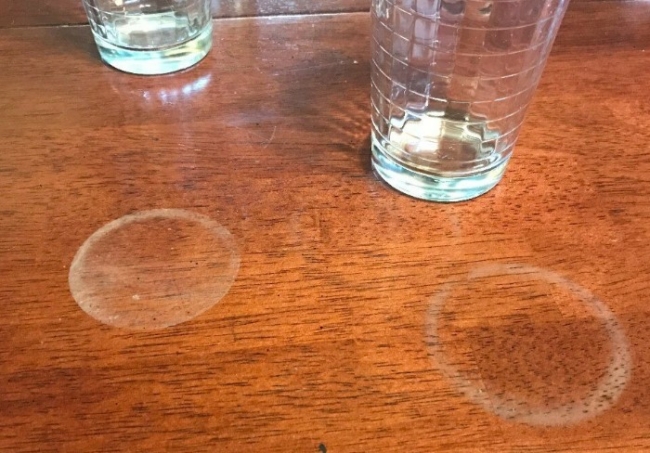
Oops! Someone carelessly left a cold drink on your beautiful wooden table – and didn’t use a coaster? Now you’re left with an unsightly and unpleasant ring on your table that you can’t seem to get rid of. Before you admit to falling into despair, read on for some simple yet effective methods by which you can remove water stains from your wooden tabletop once and for all.

Before you replace a countertop with a stain…

One of the biggest mistakes people make when it comes to water stains on wood is assuming that they need to completely replace or polish their wooden furniture because of a small water stain. Yes, these stains are unpleasant to look at and they can certainly ruin the look of your room. However, you should always exhaust all the ways to get rid of these stains before taking any drastic measures.

If you can’t look at the water ring because the stain is “cutting your eye”, that’s okay. Place a lamp, vase or other decorative items on the stain until you find the time to remove the stain from your wooden furniture.

It is also important to perform an inspection before using any of the following methods to get rid of water stains on wood furniture. This is especially important if you are working with antique wood or wood that has been pre-treated with varnish, paint, stain or other coating. You can perform a spot test in an inconspicuous area (such as the inside of a table leg) 24 hours in advance to make sure no new damage or discoloration occurs.

Ways to remove water stains from wood surfaces

There are a number of proven methods for removing water stains from most wood surfaces. We’ve selected a few of the easiest and most effective that we’ve found to be our favorite. And more than likely, you already have all the materials and/or ingredients you need. If not, you can find everything you need at the nearest grocery store.

Removing water stains with an iron

Keep in mind that this method works best if the water stain you are dealing with is relatively new. If the stain has remained on the wood surface for some time, you may be better off moving on to another method.

To try this method, you will need a clean microfiber cloth, a clean towel, and an iron with no water inside the tank. Start by wiping the wood with the microfiber cloth, otherwise food crumbs or other debris can dissolve into the wood and cause further contamination when exposed to heat.

Then lay a clean towel directly on the stain. On the maximum heat setting, run the iron over the towel for 5-10 seconds. The idea here is that the heat from the iron will vaporize the moisture from the wood. Lift the towel and see if the stain is gone, then repeat this process a few times if necessary.

If you still have a cup mark after following these steps, it’s time to move on to another method.

Method using baking soda

Another method worth trying is using baking soda to remove moisture that has penetrated the pores of the wood. We warn you right away that if you use this method – you will have to apply wax, varnish or polish to the surface of the wooden furniture afterward. This is due to the fact that baking soda is abrasive and therefore can remove the protective layer and expose the structure of the wood.

You will need a few microfiber cloths, baking soda and water to get started. When you’re done, you’ll also need some furniture wax or varnish to apply to the wood.

Start by mixing a small amount of baking soda and water until you have a thick paste. After applying this paste to a microfiber cloth, start rubbing the soiled area of the wood in smooth, circular motions. Follow the procedure for a few minutes until the stain is completely gone. While working, try to avoid clean areas of wood.

If you are satisfied with the result, simply wipe off the excess baking soda with another clean microfiber and apply furniture wax or varnish once the surface is completely dry.

Preventing Stains on Wood Furniture

Now that you’ve gotten rid of those pesky water stains from your wood furniture, there are a few preventative steps you can take to avoid future stains.

Install coasters

Often water stains on wooden furniture occur when a cold glass is placed on a wooden table without a protective coaster. Over time, condensation forms on the outside of the glass, which then drips down and penetrates the wood. To avoid these annoying water rings on wooden tables, make sure you have drink coasters designed for guests and family members.

Lay a tablecloth

Another option for protecting the wooden surfaces in your home is to simply place a tablecloth or bamboo mats over your wooden table. Many of these materials have a waterproof bottom layer to prevent moisture from seeping in. Tablecloths and napkins can also add a beautiful decorative touch to your cozy space.

Use a protective coating

If you have unfinished wooden furniture in your home, it will be more susceptible to water stains. You can take extra steps to protect wood surfaces throughout your home by applying a protective coating in the form of stain, paint, wax, or varnish. These products are usually fairly easy to apply (just make sure you apply in a well-ventilated area) and can add a layer of protection between wood surfaces and items that may be placed on them.

To get some extra help in keeping your home beautiful….

The next time you discover a water stain on your favorite wooden furniture, you already have a few ways on how to get rid of it. Need some extra help keeping your home beautiful? TivaCleaners cleaning company is always ready to help. Leave a request and expect the experts at your place. 

Post thumbnail

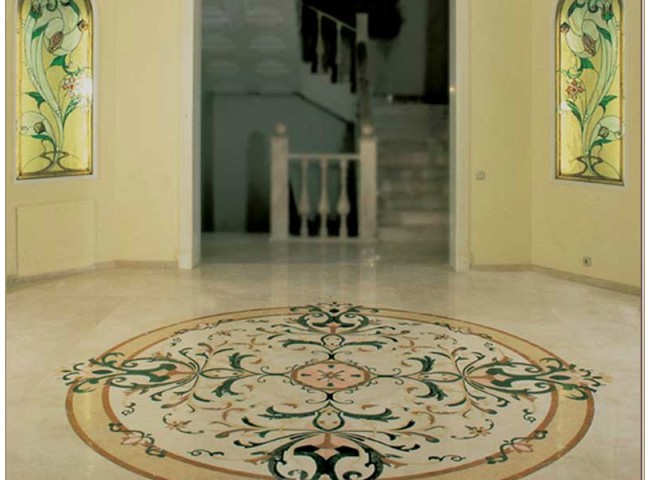
MARBLE FLOOR CARE: WHAT YOU CAN AND CANNOT DO

Because of its porous structure, marble requires special care. In order to maintain its shine and prevent deformation and wear, the surface should be cleaned regularly to remove dirt from the marble floor, which can fill seams and microcracks.

What to do with stains?

To maintain the shine of a marble floor and prevent frequent sanding, it is recommended to use special detergents, perform regular preventive cleaning and wash fresh stains immediately. 

  • Organic stains. In case of spills of alcohol, coffee or ketchup, remove the traces immediately as they may be absorbed into the material and change its color. Fresh dirt can be removed with a soft white cloth soaked in peroxide and ammonia.
  • Traces of rust. Manufacturers of household chemicals have created special compositions for removing such contaminants, which effectively react only with rust and do not damage the glossy surface of marble. It is more difficult to remove too ingrained traces.
  • Yellowed old stains. They appear from regular exposure to ultraviolet light. To eliminate the defect, the stone should be polished. But before that, you can try to fight with the help of ordinary bath soap. To do this, apply the foam to the marble yellowed surface, leave it for 5-6 hours. Then wash off the solution. 

How to restore the shine of marble

To give the marble floor a fresh shine and mirror effect, it is recommended to use special polishes based on natural wax. A proven option of means “from the people” is beeswax, which also helps to give a mirror-like effect and protects against mechanical damage.

Another method is rubbing the marble floor with turpentine, but you should remember about precautions, as turpentine emits harmful vapors for health compounds. All these methods of polishing can be used, but for the best result it is recommended to use special pastes and powders for stone care.

How not to clean marble and why

It is not recommended to clean marble with conventional detergents containing abrasive particles, which can destroy the structure of the mineral and leave streaks. You should also refuse means for cleaning ceramics and tiles, as they can spoil the surface of marble.

It is not worth testing on such a stone not proven folk remedies (lemon, Coca-Cola). When using acetone, hydrogen peroxide, vinegar and other chemical agents should be careful, as improper use can harm the material and your health.

We do not advise you to test the marble floor “on durability” – it is better to entrust its care to specialists.  Our cleaners will clean it accurately, quickly and for an affordable price. With us, your floor will shine clean and you will be able to enjoy all its advantages. 

Post thumbnail

How to clean a quartz countertop

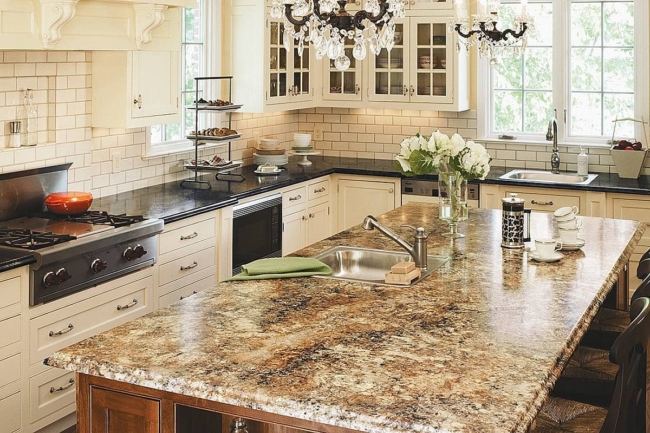
Quartz countertops are durable, easy to clean and successfully complement the kitchen interior thanks to their interesting design. No wonder they are in high demand today. Once installed, a luxurious quartz table is very convenient in everyday life. If a stain appears, in most cases it can be easily wiped off with a cloth, after which the kitchen table becomes like new again. It is important to remember that not every detergent or cleaning method is suitable for removing dirt from quartz. Wipe the countertop daily with a cloth or sponge soaked in soapy water, and avoid using harsh metal brushes and tools, as they can damage the quartz. 

Cleaning of dried splashes and stains

Step 1 Soak a cloth in warm, soapy water.To keep your quartz countertops clean, it is usually sufficient to clean them with a solution of dishwashing detergent in water. It is best not to use products that contain astringent and harsh chemicals. They can ruin the quartz surface, especially with frequent use.

The binding composite in quartz agglomerate, from which the countertops are made, makes the surface resistant to dust, dirt, stains and mold.

Warm water is better at getting out stubborn stains than cold water.

Step 2 Scrub the stain. Make smooth, circular motions with the cloth over the surface of the countertop. With a little effort, most stains should come off easily. If it’s stuck or adhered to, wet it more liberally with soapy water.

Make a habit of wiping down your countertops after you’ve prepared food, whether you’re boiling soup or baking.

Step 3 Wipe the countertop with a damp cloth. Wring out the cloth or sponge, wet it with water, and run it over the tabletop again to remove any traces of soap. Blot any remaining moisture with a paper towel and allow the tabletop to dry.

If you don’t rinse off the soap residue, the countertop will lather after a while.

When the countertop is dry, wipe it with the palm of your hand to remove the last dried food residue.

Step 4 Wash off stains as soon as they appear. Household quartz is not porous, so dirt doesn’t get stuck in it. However, it’s best to remove stains, crumbs, and other dirt before it has a chance to stick to the surface, or you may have to resort to more serious cleaning methods later.

Quartz has a natural colored pattern and grainy texture, which can cause some dirt to go unnoticed.

Simple steps to keep your quartz surface clean will keep your kitchen table in its original condition for years to come.

Removing embedded dirt

Step 1 Scrape away hardened dirt. Sometimes it can be hard to get hardened dirt off your countertops with soap and water. In these cases, try scraping it off with a plastic scraper. You can make it easier by softening the stain with warm water, but be prepared to sweat a little.

Use only flexible plastic scrapers (not metal) or non-abrasive sponges and don’t overdo it with the pressure – you can leave scratches that will only get bigger over time.

If you have a large surface area covered with dirt, wet a few paper towels with hot water and place them on top of the dirt.

Step 2 Soften stubborn stains with a vinegar solution. Over time, food particles and mineral deposits from hard water can form a film. A rag and soapy water won’t do the trick. You can dissolve the film with a solution of table vinegar (9%). Pour water and vinegar in equal parts into a spray bottle, spray the resulting solution on the countertop and go over it with a soft sponge. This will help you get a shiny, streak-free finish.

If you don’t have vinegar on hand, use hydrogen peroxide.

Vinegar is an effective natural cleaning agent, but its odor can be too pungent. For a pleasant aroma, add a few drops of lemon juice or any essential oil to the mixture.

Step 3 Remove stubborn stains with a special cleaner. If you need to remove deep-seated stains such as gum, ink or glue, use a stain remover such as Dr. Beckmann. Apply a little product to the stain and wait a few minutes, then blot off the dirt and stain remover with a damp cloth.

You can also try softening stubborn stains with rubbing alcohol.

Step 4 Periodically clean the countertop with a mirror and glass cleaner. Over time, the clear bonding composite can become cloudy. You can brighten it by spraying mirror cleaner on the quartz and wiping it off with a rag. This will make the coating look polished and sparkling. Such cleaning is useful once a month or more often if you notice that the surface of the kitchen table has lost its shine.

After applying the product, wipe the countertop with a cloth or sponge, not a paper towel, to avoid leaving paper particles on the surface.

If you have any concerns about whether you can deal with the stains yourself, it’s best not to take any chances. We advise you to order a cleaning service from us and wait for our specialists. Our cleaners will perform the cleaning quickly and efficiently. In addition to cleaning the quartz surface in the kitchen, they will perform a number of other tasks to maintain cleanliness and order in your home. 

Maintaining the quartz coating in good condition

  • Use only non-rigid cleaning tools and non-abrasive cleaners. Quartz is fairly tough, but it still succumbs to deterioration. Abrasive agents can leave small scratches on the surface of the bonding composite and the deeper stone, which will remain permanently. Also avoid using harsh chemicals such as bleach or oven cleaner. They can cause a lot of trouble, such as blistering, tarnishing and discoloration of the surface. Only use harmless cleaning agents such as liquid soap and vinegar.
  • Never rub quartz with a metal washcloth, sandpaper, pumice stone or stiff brush.
  • When cooking, use a cutting board to cut food to avoid scratches and gouges on the countertop.
  • Do not expose quartz to high temperatures. Quartz can be damaged by contact with hot objects. If you need to place a baking tray that has just been removed from a hot oven, place a heat-resistant silicone mat or a special hot plate underneath. As for hot pots and pans, place them on the stove, not on the countertop. Most quartz countertops can withstand temperatures up to 150-200 °C. Higher temperatures can cause deep cracks.
  • Try not to place highly heated electrical appliances, such as a toaster or metal rice cooker, on a quartz countertop.
  • Do not use quartz countertops outdoors. When exposed to constant sunlight, moisture and temperature fluctuations, quartz can easily fade and crack. That is why this type of coating is used, as a rule, inside the house – in the kitchen or bathroom. Also, small debris and dirt adheres to quartz quite easily. If you place such a countertop outside, you will have to clean it much more often.
Post thumbnail

How to remove coffee stains from carpets

You’ve just had a cup of coffee and oops. Your cup fell over and you spilled coffee everywhere: on your clothes, on the floor (even on the table…).

So what to do? Clean it up immediately.

And the best way to get rid of it is to get inside, because coffee stains tend to spread.

So, in detail, here’s what you should do:

Step 1

Take a clean white cloth to blot the coffee stain as much as possible. Make sure you keep switching to a cleaner part of the cloth if other parts already have stains on them.

Step 2

You can then use some cold water to spray over the stain.

Step 3

Take another clean cloth and continue blotting. Just keep repeating this process until the stain is completely gone.

Step 4

Once the stain is removed, it’s time to grab your carpet stain remover Step 5 

Remember to spray liberally because this can be a way to easily attract dirt next time.

Step 6

Finally, allow the carpet to dry completely.

However, if you need to get rid of old coffee stains on your carpeting, then read on. 

How to remove old coffee stains from the carpet

Let’s note right away that it can be very difficult to get rid of the stain and it’s better to contact our cleaning company for help right away. 

If you want to try your luck and try to deal with the problem yourself, then check out the algorithm below. It will definitely be useful for you. 

Before we go directly to the algorithm let’s define what we will need:

  • Cold water
  • Towel or white clean rags
  • Dishwashing detergent
  • Carpet stain remover
  • Ammonia (used for semi-wool or non-wool carpets)

Step 1.

First of all, you should wet the soiled area with cold water.

Step 2

Then you can repeat the same steps as removing a fresh coffee stain.

Step 3

If the stain still remains, it’s time to prepare your own cleaning solution. You can mix at least three drops of dishwashing detergent and mix it with water.

Step 4

You can then apply with a sponge directly on the stain.

Step 5

You can then take a dry cloth or towel and blot the spot. Make sure that you are not rubbing.

Step 6

Alternate between the wet cloth and the dry cloth. The damp cloth soaks the stain and the dry cloth removes the stain and moisture.

Step 7

If your carpet is made of wool or blended wool, you can also mix a little ammonia (one tablespoon) with a glass of water.

Step 8

Do a spot test to make sure the mixture won’t ruin your carpet. Take another dry cloth and blot the stain.

Step 9

Again alternate between dry and damp cloths. Allow surfaces to dry completely before using a carpet cleaner.

Step 10

Allow the carpet to dry completely.

Bad news: the coffee stain is coming back! What to do.

Like what? The coffee stain is back! It’s really a surprise, but really…. it happens.

And for good reason:

The original stain hasn’t been removed. Instead, the coffee has mixed with the fibers. Or there’s moisture left behind. And in this case, the stain resurfaces as it dries.

The solution is as follows:

Step 1

Simply repeat the steps of the very first method of removing fresh stains.

Step 2

Another thing you can do is to cover the stain with a towel and place a heavy object on it and leave it there or for some time. This will allow you to absorb all the moisture 

Step 3

Finally, use a fan to dry it quickly and completely.

How to deal with coffee creamer stains?

Spilled coffee and creamer? No problem. You just need to use a stronger cleaning solution for this type of stain. To be clear: you can use a carpet cleaner for pets.

Pet carpet cleaner is a good solution because it can break down the proteins in the stain. It can also eliminate the odor.

Just be sure to rinse it off and let it dry completely.

Some nuances of carpet cleaning

  • If you have a carpet with long fibers, it will likely be more difficult to remove the stain. For this type of carpet, you simply need to extend the soaking time.
  • For carpets that are made up of wool or mixed with wool, ammonia works great. Just be sure to do a spot test beforehand so you don’t damage the carpet fibers.
  • For those who are still struggling with old coffee stains, you can use salt. Using salt will help absorb the coffee and water from the carpet. This will lighten the stain considerably, and it will be easier for you to see what you are working on. First, you should spray the stain with cold water and then apply salt to it. Then, you can vacuum up the salt and clean the carpet with a carpet cleaner.
  • You can also use lemon to get rid of old coffee stains. It is better to mix the lemon with your chosen carpet cleaner. This way you will be able to remove the stain much faster.
  • To get rid of old stains, you can also use beer. You can apply it directly on the coffee stain. You can then use a dry cloth or towel to remove the moisture. 

All of these home methods require time, extreme caution (a small slip-up can cost the homeowner a lot of money, because it can happen that the carpet will be completely ruined and it will have to be simply thrown out) and any costs. To be sure that you will have cleanliness and order, leave a request to our cleaners. 

Post thumbnail

HOW TO CLEAN UPHOLSTERED CHAIRS

A chair is a universal object of furnishings. It is used to decorate the interior of different rooms, from the living room to offices. Stably high demand are designs with upholstered upholstery. They are characterized by convenience, but at the same time they get dirty quite quickly. Therefore, users often have to face the question of how to remove a stain on the chair.

GENERAL RECOMMENDATIONS FOR FURNITURE CARE

An upholstered chair needs systematic cleaning from dust and dirt. The procedure should be carried out weekly. Its features are determined by the type of material from which the upholstery is made. In any case, it is necessary to avoid:

  • excessive wetting of the seat. Most manufacturers use furniture foam as a filler. The material gets wet quickly and takes a long time to dry. In its raw form, it is an ideal environment for the reproduction of pathogenic organisms. Another disadvantage is the unpleasant odor emitted by wet foam;
  • the use of aggressive cleaning agents. Their use can irreversibly damage the upholstery;
  • prolonged drying.

Often recommendations on how to clean upholstered chairs at home, contain only advice on tidying up the upholstery. But the frame also needs care. If it is made of wood, then you need to take into account that this material does not tolerate moisture well. To treat the lacquered surface, polishes applied to a flannel cloth are optimal. To remove stubborn dirt, mild detergents are suitable. After completing the procedure, the surface of the frame should be wiped dry.

TREATMENT OF A TEXTILE SEAT

To learn how to clean the upholstery of the chair, it is necessary to study household chemicals suitable for the material from which the seat is made. If there is a Teflon impregnation, it is acceptable to use wet wipes. But such upholstery can not be steamed and treated with alcohol. Another prohibition concerns the use of mechanical impact, as a result of which the product will be irrevocably damaged.

Textile upholstery looks very presentable, but it quickly passes water, which becomes a reason for the filling to get wet. In addition, the fabric takes a very long time to dry, which eliminates the possibility of using the chair for its intended purpose. Another disadvantage is susceptibility to contamination. Careless handling leads to the rapid appearance of stains on the fabric.

To properly clean the seat, it is necessary to adhere to the following recommendations:

  • Remove dust from the textile upholstery with a brush or vacuum cleaner. In the latter case, it is recommended to use a crevice nozzle and set the unit to the minimum power;
  • treat the fabric parts of the chair with a special agent. The composition should be evenly distributed over the surface, paying special attention to stains;
  • remove the remnants of the product with a sponge;
  • place a terry towel on the seat for maximum quality absorption of excess moisture.

Often users wonder what to clean fabric chairs. For this purpose, upholstery preparations or oxygen bleaches are suitable. Special chemistry can be replaced with laundry soap.

Chairs with synthetic upholstery are predominantly used in offices. The best way to clean it from dirt is to use a foam for the interior of the vehicle. It gets rid of stains and unpleasant odor. As an alternative option, shaving foam is used. It should be applied for a quarter of an hour, and then carefully removed with a sponge.

CLEANING LEATHER AND LEATHER SUBSTITUTES

Such upholstery is considered the most practical. The material does not let water pass through, which protects the filler from moisture. Leather chair is best treated with a special agent, which moisturizes the upholstery and preserves its elasticity. Alternatives:

  • mild dishwashing gel;
  • lemon juice. One small spoonful should be diluted in 1.5 cups of water;
  • ammonia. It should be mixed with water – one small spoonful per 200 g of liquid.

After completing the treatment, the seat should be polished with a balm.

Leather and eco-leather are cleaned with a neutral agent. It is strictly forbidden to use solvents, stain removers or petroleum products. If the stain is fresh, it is removed with a sponge soaked in soap solution. For persistent stains, a composition of water (10 parts) and alcohol (1 part) is suitable.

To keep the upholstery from leatherette as presentable as long as possible, it is recommended to use solutions for washing delicate fabrics for cleaning. But their temperature should be no higher than 45 degrees.

HOW TO CLEAN CHAIRS MADE OF OTHER MATERIALS

For designs upholstered with tufted fabric, it is not worthwhile to engage a vacuum cleaner. The fabric can be refreshed with a mixture of vinegar or salt and water (one small spoon per liter of liquid).

To remove dust, it is enough to cover the seat with a wrung towel, and then pat it with your hand. The last stage – smoothing the surface with a brush, taking into account the direction of the pile. If stains appear, it is necessary to apply a soap solution or special water-based products to the problem area. Before applying the composition, it is desirable to test them on a small inconspicuous area.

Flock upholstery is considered very practical. But due to the adhesive base, it is not recommended to wet it abundantly. To remove stains, you can use water-based chemistry. Do not use turpentine, white spirit and other aggressive preparations.

A seat made of jacquard is best washed by hand, but the water temperature should not exceed 40 degrees. Care should be taken when wringing it out. Chairs should not be dried in direct sun.

To clean upholstered chairs made of microfiber, means that do not include aggressive components are used. To remove the stain, it is required to apply a mixture of vinegar and water (one large spoonful diluted in a liter of liquid).

TIPS FROM THE PROFESSIONALS

Furniture care includes not only its regular cleaning from dust. In addition, it is necessary to know how to clean an upholstered chair from stains. The basic rules are as follows:

  • do not rub dirt into the fabric;
  • carefully use water to prevent excessive moisturizing of the chair;
  • after the procedure is completed, blot the chair to remove excess moisture;
  • if possible, remove stains immediately so that they do not have time to become embedded in the fabric;
  • apply the stain remover on a cloth, not on the seat;
  • when treating a stain, move from the edge to the center.

As improvised means it is recommended to use hydrogen peroxide, if the stain is left by blood, a mixture of equal parts of ammonia and vinegar to remove juice from berries and fruits, as well as alcohol. Soap solution is a universal option, coping with most contaminants.

Post thumbnail

HOW TO REMOVE THE SMELL OF CIGARETTE SMOKE IN THE ROOM?

Cigarette smoke odor is one of the most persistent and difficult to remove. It soaks into walls, furniture and textiles. In a room where people often smoke, you can see a yellow tarry deposit on the walls, which also acts as a source of unpleasant “amber”. It is impossible to stay in such an apartment or house for a long time, and to live – even more so. There is a feeling of squeamishness, worsens well-being and mood. It is necessary to get rid of the problem! 

FORGETTING BAD HABITS

We will not talk about the harm of smoking, it is obvious, because not all people can easily give up cigarettes. First of all, you need to get rid of the habit of “vapor” in the house and in the car. Smoke will stop penetrating into every corner of the room or salon, you will not have to solve a difficult problem. When the body by habit requires another dose of nicotine, it is better to go outside and enjoy a cigarette in a specially designated place.

GETTING RID OF THE STINKY SOURCE

It is pointless to seek answers to the question: “What interrupts the smell of tobacco?” when the apartment or balcony is full of ashtrays. The containers with cigarette butts should be regularly cleaned and washed, because they smell very unpleasant, even if they are far away from you. Waiting for them to be completely full is another bad habit. Ashtrays are completely impregnated with harmful substances, so they need regular cleaning.

How to eliminate the smell of cigarettes on the balcony, where they constantly smoke? This is not an easy task, because all finishing materials, frames and windows are impregnated with it. If there are boxes, old things and so on, the problem is aggravated. Cardboard should be disposed of and clothes should be washed. General cleaning and cleaning of all surfaces is a must.

VENTILATE AND TREAT

Wherever there is a smell of tobacco (on the balcony, in the toilet, in the office or living room), first you need to provide access to fresh air. Open all windows and doors, ventilate the apartment for at least a day. It is especially effective to do this in windy weather. When it is hot outside, the result will be disappointing.

Important: in the bathroom and in the toilet necessarily check the functionality of ventilation systems. 

After airing, you can begin to treat all surfaces. To remove the smell of cigarettes, walls, floors and other washed with a solution consisting of water and vinegar. This is the beginning of the general cleaning, during which no moisture-resistant product is missed.

Treat window sills, windows and other things, do not forget to constantly change the water and add the solution to it. Vinegar is great at removing unpleasant odors! To remove persistent “odors” in the room, additionally hang a towel soaked in the solution.

The following inexpensive means cope well with the task of absorbing unpleasant odors:

  • baking soda;
  • cat litter;
  • activated charcoal.

During the general cleaning, pay attention to every corner, small details and boldly part with what is no longer important to you. Give curtains, tulle and other textiles to the dry cleaner, or better yet, buy new ones. Do not forget about blinds, wash them completely with detergent and hang them outside to dry completely.

The next stage of general cleaning is to replace the light bulbs. The old ones have already absorbed cigarette smoke and emit a disgusting odor when switched on. They should be disposed of, otherwise the clean room will again be uncomfortable in the evening, when you need artificial light sources.

GIVING A SECOND LIFE TO FURNITURE AND CARPETS

It seems that the smell of tobacco is irretrievably absorbed into sofas, armchairs, mattresses, but it is not so. Furniture can be saved by giving it a second life and providing yourself with comfortable conditions for rest. Some people manage to cope with the task themselves, others – have to contact a specialized company.

You need to know how to remove the smell of tobacco from the furniture, otherwise it can be ruined. Do not use aggressive chemicals, bleaching compositions and other toxic means. Prepare the solution yourself, using the following:

  • water;
  • carpet cleaner;
  • vinegar.

Take a large washcloth and thoroughly treat every centimeter of furniture. Preliminary it should be vacuumed. In the same way clean the carpet, but with a mattress is more difficult. The most correct solution will be to order a dry cleaning service.

Important: after cleaning upholstered furniture upholstery repeatedly and repeatedly wipe with a washcloth soaked in water to remove detergent residue. 

In practice, it is quite difficult to remove the smell of tobacco from mattresses, carpets and sofas. If you are afraid of spoiling interior items, it is better to contact our company at once.

Post thumbnail

HOW TO REMOVE A GREASY STAIN FROM THE SOFA

If the stain is fresh, the first thing you should do is try to remove excess grease from the surface of the fabric as quickly as possible. Use paper towels, napkins, or cotton cloths to do this. They absorb liquids well and prevent the grease from spreading deeper into the upholstery fabrics and filler. It is very important not to rub the stain, but simply press the absorbent material against it. Otherwise, you will only rub the grease deeper into the fabric and “stretch” it over the surface. And you don’t want that.

Then you can use special products to remove stains from the surface. There are more than enough of them for different types of upholstery: Vanish, Astonish, Dr. Beckman, and others. If the stain is old and the cleaning is not urgent, you have time to go to the store and buy the product or order it with delivery from an online store. However, if the grease stain is new, it is better to try to clean it as soon as possible. And at such a moment, you may not have the right product at hand.

In this situation, you can make your own grease cleaner from improvised means:

  • Baking soda and vinegar. Mix a tablespoon of baking soda and a glass of vinegar in a bowl. Apply the resulting paste 
  • Salt and lemon. Sprinkle a thin layer of salt on the stain and squeeze the juice of half a lemon on it. Leave it on for 10-15 minutes, and then brush off the salt with a brush or cloth. Repeat the procedure as needed.
  • Ammonia and soap. Dissolve a teaspoon of ammonia in a glass of warm water and add a little liquid soap. Soak a sponge or cloth in the solution and wipe the stain in a circular motion. Then blot the sofa with a clean, damp cloth and dry it.

But keep in mind that some upholstery materials are very sensitive to various chemicals and aggressive agents. Such materials include silk, cotton, linen, natural wool, acrylic, polyester and some others. If you need to remove stains from such surfaces, you will have to be especially careful not to use too aggressive compounds.

HOW TO CLEAN A GREASY STAIN ON THE SOFA WITHOUT USING CHEMICALS AND AGGRESSIVE AGENTS

There are very non-standard methods for cleaning a sofa from grease, allowing you to remove even quite problematic stains. And these methods are completely safe for upholstery:

  • Milk (plain yogurt, whey). Suitable for removing greasy stains from natural fabrics such as cotton, linen, silk and velvet. Simply soak a cloth or sponge in milk and wipe the stain. Repeat the procedure until the stain disappears. Then rinse the sofa with clean water and dry it.
  • Starch and talcum powder. These powdery substances absorb grease well and help remove it from the surface of the fabric. Sprinkle the stain with starch or talcum powder and leave it on for several hours or overnight. Then wipe off the powder with a brush or vacuum cleaner.
  • Alcohol or vodka. Alcoholic beverages can also dissolve grease and clean the fabric from stains. Dip a cotton pad or cloth in alcohol or vodka and wipe the stain. Then blot the sofa with a clean, damp cloth and dry it.

But if you are not sure that you can remove the old stain and remove it from the sofa without consequences, we recommend that you do without experiments and contact a specialist. This is the only way you will know that all the work will be done correctly and your upholstered furniture will not be damaged.

COMMON MISTAKES WHEN CLEANING A SOFA FROM GREASE

When washing a sofa, it is quite easy to make mistakes that can result in damage to the fabric or deterioration of the furniture’s appearance. Let’s take a look at some of them so that you don’t make them:

  1. Washing the sofa without first studying the properties of the fabric.First of all, if possible, study the manufacturer’s recommendations on this issue. Next, you can try to test the fabric in an inconspicuous area for its reaction to moisture and chemicals. Remember that not all types of fabrics are suitable for wet cleaning.
  2. Use of hot water or steam.Hot water and steam can also damage the fabric or filling of the sofa by causing it to shrink, stretch or stick together. In addition, hot water can only set stains on the fabric, not remove them. Therefore, it is recommended to use warm or cold water to wash the sofa and avoid steam cleaners.
  3. The use of aggressive detergents.Many detergents contain alkalis, bleaches, solvents or other components that can destroy the structure of the fabric or filler, as well as cause allergic reactions in humans or animals. To clean the sofa, we recommend choosing neutral or slightly acidic products designed specifically for upholstered furniture.
  4. Washing without further drying.After washing the sofa, it is necessary to ensure its complete drying, otherwise wet fabric or filler can become a source of unpleasant odors, mold or rot. We do not recommend using a hairdryer, iron or battery to dry the sofa – they can damage the fabric or filler. It is best to dry the sofa outdoors or in a well-ventilated area, avoiding direct sunlight.

And these are actually just a few of the mistakes that upholstered furniture owners sometimes make when trying to clean it from grease stains. So let us repeat once again: if you are not sure that you can clean your sofa with high quality and without any consequences for the upholstery, it is better to trust the professionals in this matter. 

Post thumbnail

IS IT POSSIBLE TO GET WINE STAINS OUT OF A WHITE CARPET?

Wine is a wonderful drink! But if you spill it on the carpet, it can cause a lot of trouble. Not everyone knows how to clean wine from the carpet, how to remove the stain and how to return it to its original appearance. Today we will tell you how you can clean the carpet from a wine stain, how to take out even stubborn stains and remove the odor. It’s not as complicated as it seems.

The first thing you have to do is to remove as much wine from the carpet as possible, using a paper towel or a clean rag. The more you remove at once, the easier it will be to get the stain out and launder the carpet later. Next, you can use one of several ways to clean the carpet. 

THREE OPTIONS HOW AND WITH WHAT TO CLEAN WINE FROM THE CARPET

So, we offer several options at once, how to clean and launder the stain from the carpet:

  • The first method – remove the stain from the carpet with the help of salt. Apply an even layer of salt on the stain and leave it for 10-15 minutes so that the salt absorbs the wine and removes the stain. After that, remove the salt with a vacuum cleaner. Almost any carpet can be cleaned in this way. But there may still be a noticeable red stain, which should be additionally treated with vinegar or hydrogen peroxide.
  • The second method – remove the stain from the carpet with the help of vinegar. Vinegar is an acid that can destroy the pigments of wine and lighten the stain. To do this, you need to mix one part vinegar and two parts water in a spray bottle and spray the solution on the stain. Then you need to wait 10 minutes and wipe the stain with a sponge or brush. If necessary, you can repeat the procedure.
  • The third method – remove the stain from the carpet with the help of hydrogen peroxide. Peroxide is a strong bleaching agent, but it will only work if you spilled red wine on a white carpet. Colored carpet, on the other hand, can lose color if you try to clean it and remove the stain this way. Mix one part peroxide and two parts water in a bowl and apply the solution to the stain using a cloth or sponge. Then wait 5 minutes and blot the stain with a paper towel or cloth.

If you are not sure how to remove the stain and whether the chosen composition will not damage the carpet fibers, you can “test” it on an inconspicuous area. This will help to make sure that the carpet will not suffer from such manipulations. 

If you are not ready to take risks – trust your favorite carpet to us! We guarantee safe removal of any stain, even wine.

COMMON MISTAKES WHEN REMOVING WINE STAINS FROM CARPET

Many people unknowingly make some very unpleasant mistakes when trying to get a wine stain out and clean the carpet. Here are just a few of those mistakes:

  • Using dishwashing detergent to remove the stain.Sometimes this can work, but often such products only leave streaks on the carpet, making the situation worse.
  • Watering the carpet with water. Water will only “stretch” the stain over the area and ruin the carpet even more. Use wet wipes or a slightly dampened cloth to pick up the wine residue.
  • Pressing down on the carpet pile in an attempt to scrub the stain.This ruins the structure of the carpet. You don’t need to press down hard on the pile. Move smoothly and without excessive force.
  • Attempts to soak a dried stain at home.Often this only leads to deformation of the pile and the spread of red marks.

We also strongly advise against self-cleaning carpets and removing stains from viscose or silk carpets with your own hands. These are very delicate materials that require special care and careful actions. Otherwise, there is a risk of irrevocably spoiling the carpet. 

If you are not sure that you can remove the wine stain yourself and do not want to take risks, we recommend you to contact us and save yourself from unnecessary difficulties with our cleaning company. Our masters work with the most difficult stains and the most delicate fabrics. Contact us!

Post thumbnail

How to properly clean parquet?

Parquet is definitely one of the most popular and beautiful floor coverings. But beauty has to be paid for, and in this case we are talking about cleaning parquet. This is not the easiest task, which is associated with a lot of non-obvious nuances and complexities. Therefore, today we will talk about how to wash the parquet without streaks at home, how to do it correctly and in general how often you can wash the floor, so that the parquet board did not deteriorate and retained its pristine appearance longer.

If you have a parquet floor at home, the following information is for you!

HOW TO CLEAN PARQUET: THE BASIC WAY

Wash and clean your parquet floor no more than 2-3 times a year, using warm or cool water and special detergents for parquet. It is not allowed to use aggressive and caustic compositions, as well as hot water – because of them the parquet can be hopelessly spoiled.Use a soft cloth for washing – felt or microfiber.

Proceed as follows:

  • Wet the cloth in a solution of detergent and water. Then wring it out so that the cloth is damp but not wet.
  • Wipe the cloth gently and without much physical force so that the parquet flooring is not damaged. Avoid getting a lot of moisture into the joints between the boards so that the floor does not warp.
  • After washing your parquet floor, it is a good idea to let it dry completely and do not stress the floor during this time. Do not walk on the wet surface, do not carry heavy furniture, etc.
  • After you have cleaned the floor and dried the parquet, it can be polished with special products.

This is optional, but polishing will make the floorboard look more attractive and will also give it extra protection. 

HOW TO PROPERLY CLEAN AND CLEAN PARQUET AT HOME

Suppose that for some reason you do not have the opportunity to buy special means to clean and wash the parquet, and you need to clean it as soon as possible.

What is the best thing to do in such a case and how to clean the parquet with improvised means? 

In fact, this is also quite realistic, if you approach the question competently. And we are ready to share some useful tips on how best to clean the parquet in such a situation:

  • To clean parquet, you can prepare the following solution: 1 tablespoon of vinegar (or citric acid) per 2 liters of water. Thoroughly mix the composition, moisten a soft cloth, wring it out and start cleaning. This is an uncomplicated and fairly quick way to clean the parquet without special means and relatively quickly. After washing, do not forget to wipe the floor with a dry cloth and let it finally dry. And do not forget about how often you can wash the parquet. Such procedures should not be carried out on a regular basis, so as not to spoil the floor.
  • To remove stains from the parquet, you can use the following means: hydrogen peroxide, toothpaste, glycerin, alcohol or acetone. But use them with extreme caution! Parquet flooring is very sensitive to any aggressive compositions, it can fade and damage under their influence. If you are not sure that your chosen product is safe for parquet, it is better to first try it in an inconspicuous place. Or do not risk and use the services of professionals. But we will come back to this question.
  • To clean the parquet and restore the shine, you can use olive or linseed oil, beeswax or wood polish. The main rule is that these products should be applied after the hardwood flooring has been washed and dried. Apply the polish evenly in a thin layer, and then let the composition finally dry. And only then you can polish the floor with a soft cloth or a special brush.

Technically, cleaning parquet is not very difficult. But it is extremely important to act carefully and take your time. Otherwise, there is a risk of making serious mistakes, because of which the parquet floor can be hopelessly ruined. And repair and restoration can be really expensive. 

COMMON MISTAKES WHEN CLEANING PARQUET FLOORING

In an effort to clean the floor as soon as possible, many people make serious mistakes that cause the floor to suffer greatly. And often these mistakes involve using inappropriate products and tools. For example:

  • Hot water. If you try to wash parquet with hot water, and even more so with boiling water, it will surely cause cracks and peeling of the protective layer. It is better to use slightly warm water and in a very small amount, wringing the cloth before wiping the parquet. Washing parquet flooring with a wet rather than damp cloth is strongly discouraged.
  • Washing vacuum cleaners and steam cleaners. They may seem like convenient and effective tools to clean your parquet, but in practice, they will ruin your parquet flooring. If too much moisture gets into the gaps between the boards, it will lead to their deformation, swelling and even rotting. Therefore, it is better to refuse such tools.

Finally, we want to say that if you do not know how to properly clean the parquet and fear that the parquet will be spoiled, the most sensible solution in this situation is to contact our cleaning company. We will gladly take on even the most difficult tasks and bring back the former appearance of your home. Our cleaners know exactly how to clean parquet, what means and tools should be used, as well as how not to make mistakes in the work.

Remember that parquet is not a cheap flooring. And it needs to be cleaned properly!

Post thumbnail

How to clean a refrigerator – secrets of fast and effective cleaning

The refrigerator is the most important device in every kitchen. This type of household appliance is one of the most “visited” by all the household. So it gets dirty more often than any other object. In addition to household dirt, which is left by the touch of unwashed hands, yellow grease stains, marks from stickers or felt-tip pens can form on the refrigerator, and inside the cabinet can appear unpleasant odor and even mold.

Even the most meticulous hostesses periodically face the need to clean the refrigerator, especially if there are small children in the house. How to clean the refrigerator so that not a single spot is left on it and spend a minimum of time? Let’s find out.

How to clean the outside of a refrigerator

Cleaning the front of the appliance is actually very quick and easy. We have a number of effective tips and tricks for this, but first you need to do some preparatory work:

Inspect the refrigerator and find out how dirty it is

This will help you stock up on the right detergents and cleaners. For example, for ordinary dirt it is enough to buy a bar of laundry soap or use an ordinary dish liquid, but to remove old grease and yellow stains you will need more serious means.

Unplug the refrigerator from the mains

This is necessary to protect the equipment itself and the person who will be cleaning it – water during washing may cause a short circuit. At the same time, disconnection must be done correctly. If your equipment works on the cooling system “No frost”, then just pull the cord out of the socket, as defrosting these models do not need. In the case of conventional modifications, manufacturers recommend to first set the temperature sensor to 0 degrees, and after 30 minutes completely disconnect the device from the 220V network.

Remove all the contents from the refrigerator cabinet

To do this, find a place in advance where you will place the food, taking into account that it will lie there for some time (while you clean the refrigerator).

What can you clean the outside of your refrigerator with?

There are several proven methods and cleaning products, which we will tell you about:

  • Special products for cleaning refrigeration equipment or kitchen appliances

They are sold in all household departments of stores and wash the surface as gently as possible, leaving no marks and microscratches. If the front of the appliance is covered with yellow stains from grease or natural aging processes, it is better to use special means.

  • Dishwashing liquid

A simple, inexpensive and effective method. Squeeze a couple of drops onto the soft side of a damp sponge, work the surface, rub the yellowed and especially dirty areas well, leave it for 5-10 minutes and remove the foam residue with a clean damp sponge/rag. Then wipe the refrigerator dry.

The detergent will not damage the delicate surface and will refresh the appearance of the appliance.

  • Soap

As they say, everything genius is simple! Grate the soap on a grater, warm it up a little, and apply the resulting mixture to the dirty areas. Leave the remedy for a few minutes until the end of the reaction and wash off. If necessary, lightly rub the stains, but not with the abrasive side of a washcloth! 

  • Soda

You should never rub the refrigerator surface with baking soda – you can only treat stale stains with baking soda solution. To do this, dissolve 1 teaspoon of the substance in water to form a porridge, carefully apply it to the stain and let it stand for about 30 minutes. Then very carefully, so as not to scratch the surface, remove the rest of the soda. The stains tend to lighten very well.

  • Toothpaste

Excellent fights stains without leaving scuffs and scratches due to its homogeneous and smooth structure. It not only gets rid of grease and yellowed areas, but also traces of children’s creativity (markers, ballpoint pen, etc.). Simply apply a little toothpaste to the dirty area, rub lightly, leave to stand for about 15 minutes, rinse off.

And we also want to share with you the secret to getting rid of stickers. In fact, it can be quite difficult to get rid of them, because the adhesive backing hardens over time and literally becomes one with the surface. To peel off the sticker and not leave a trace, use a regular household hair dryer. Blow it close to the sticker, the heated glue comes off very easily!

Once your refrigerator is completely clean from the outside, you only need to wipe it dry to protect it from rusting and treat it with antibacterial wipes to prevent germs from breeding.

How to clean the inside of the refrigerator from mold, dirt and odors?

Cleaning the inside of the refrigerator is the most responsible and important part, because the cleanliness of the cabinet from the inside directly affects the quality of food. Moreover, mold and fungus can provoke the development of health disorders caused by pathogens.

*For cleaning the usual dirt and grease, all the same products are suitable as for cleaning the refrigerator from the outside.

So, cleaning mold

It comes from high levels of humidity and is very dangerous. The most effective remedy for this enemy is 9 percent vinegar. To remove mold:

  • apply the substance to the affected areas in undiluted form;
  • leave it on for 10 minutes;
  • rinse off with water.
  • If not all the mold is gone, repeat the procedure again.

You can also get rid of mold inside the refrigerator with the help of alcohol and chlorine-based preparations. However, it is necessary to perform cleaning with such means only if it is possible to organize quality ventilation of the room. The cabinet itself should be rinsed with clean water after the cleaning procedure to wash off all the residues of the preparations.

Getting rid of odors inside the refrigerator

Odors from the refrigerator can literally poison our lives. For example, week-old shrimp or fish skeletons can give off a stench that lasts for years. And the odor is not only in the air, it permeates absolutely all products. What should we do?

The first thing to do is to find out what stinks and get rid of the source. It can be anywhere – drawers, freezer, shelves and the space between them, rubber seals. Be sure to find and destroy it! Otherwise, all efforts to clean the refrigerator will be in vain.

When the source of stench is eliminated, it remains to get rid of the most unpleasant odor. You can buy a special product for this purpose. It acts exactly on the cause of the problem. If there is no possibility to buy such a product, use the following methods:

  • Sprinkle some baking soda in various places in the refrigerator cabinet and leave it for 24 hours. It will absorb the odors. You can wash the interior with a baking soda solution (dissolve 1 tbsp. of baking soda in 1 liter of water).
  • Spread crushed activated charcoal in the refrigerator. It acts similarly to baking soda.
  • Cut black bread into small pieces and also spread it inside the refrigerator cabinet.
  • Leave bags of steeped tea in the refrigerator overnight, scatter rice or coffee grounds.
  • Treat the interior surfaces with a solution of wine or ordinary vinegar (dilute 2 tbsp. of vinegar concentrate in 1 liter of water).
  • Alternatively, you can cut a lemon in half and rub it on the walls and shelves of the refrigerator. Let it stand for a while, then rinse it off with water. Just do not keep the lemon very long on the surface, so that the acid does not corrode the surface.
  • If everything has been washed, but the odor still remains, check the drain hole on the back wall of the equipment – it should be periodically cleaned, and stagnant water can be a source of stink. An ordinary medical syringe without a needle is suitable for cleaning the hole.

What to do to keep your refrigerator clean for as long as possible

To avoid spending half a day cleaning your refrigerator, all you need to do is perform timely preventive maintenance. Take good care of your refrigeration equipment and spend no more than 30 minutes for general cleaning.

So, 5 tips that will help in keeping your refrigerator clean on a daily basis:

  • Clean it right away. If, for example, you spill food on a shelf, don’t wait for it to dry, brush it off with a damp sponge.
  • Get rid of expired food. Don’t let your kitchen assistant turn into a storehouse of junk in the form of jars with jam on the bottom, dried sandwiches or rotted cabbage. Throw it away immediately! This will help prevent germs from breeding, the same mold, and free up usable space.
  • Wash drawers before each new purchase. Stack the freshest foods at the very bottom and “yesterday’s” foods higher so you can use them before they spoil.
  • Antibacterial treatment with special agents.
  • Do not use abrasive sponges and too aggressive substances, so as not to damage the coating.

By following these simple rules, you will be able to enjoy a perfectly clean, tidy and safe for your health every day! We hope you found our tips useful. If cleaning is not for you, then contact us. Our specialists will perform everything to the highest standard at an affordable price. 

Post thumbnail

When, why and how to do apartment pre-cleaning

Cleaning an apartment before selling it is a difficult and very responsible task. If you show housing to future buyers as it is – it can be sold for a very long time, any realtor will confirm this. After all, the apartment in this case is a commodity, and the goods must necessarily have a marketable appearance.

So, why do you need a pre-sale apartment cleaning?

Imagine that you are the buyer. You are offered to look at 2 different options: a perfectly clean and well-maintained property and a cluttered “barrack” with bins of things and two centimeters of dust on the surfaces. Which of these apartments would you want to stay in?

Some owners, and even realtors claim that cleanliness is not as important as, for example, the condition of communications (pipes, wiring, plumbing, etc.), windows and carpentry. This is not true! When a person enters a dirty house, he no longer wants to look at what condition the piping is in, his only desire is to leave this room as soon as possible.

Order, neatness and cleanliness are paramount things that you just need to pay attention to when selling real estate. Even if you are very busy, and you have no free time at all, and even more so for cleaning, you can not ignore this point. Invite professional cleaners who will quickly, qualitatively and at an affordable price perform professional cleaning of the apartment before the sale. Such service is also available in our cleaning company!

Когда лучше проводить предпродажную уборку квартиры?

Professional cleaners recommend breaking real estate pre-sale cleaning into 3 phases:

  • For photography

To take presentation photos, the premises should have a presentable appearance. Take out of the apartment all the junk, garbage, if necessary, glue wallpaper, mask torn linoleum and all unsightly places.

  • 2-3 days before the show

In this case, a general cleaning is carried out so that the potential buyer gets only positive emotions and impressions from the viewing.

  • On the day of the showing

A light maintenance cleaning is carried out to bring visual gloss. You will need to dust the surfaces and damp mop the floor.

Tools and equipment for cleaning the apartment before sale

Before you start general cleaning, you need to stock up on all the necessary detergents and cleaning products so that you are not caught off guard. For example, you may find that you don’t have anything to clean the toilet bowl from lime scale. We have prepared a list of the most essential cleaning products for you:

  1. Household chemicals

You will most likely need the following products:

  • dishwashing liquid;
  • scouring powder;
  • Sanitary ware and bathtub cleaner (selected according to the coating of the appliance);
  • liquid soap;
  • oven cleaner;
  • universal cleaner for washing surfaces (doors, window sills, cabinet furniture fronts);
  • polish for polished surfaces;
  • glass cleaner;
  • carpet stain remover;
  • toilet bowl cleaner;
  • floor cleaner.
  1. Tools and aids

Pre-sale house cleaning cannot be done without such tools as: safety glasses, respirator, rubber gloves, cleaning brushes (including those with an extension handle), paper towels, sponges, clean rags, dusting brush, broom, vacuum cleaner, basin, bucket, mop.

  1.  Miscellaneous

It’s not unreasonable to stock up on little things like trash bags, light bulbs, a new bathroom curtain.

How to properly do pre-sale cleaning of an apartment without specialists

The first thing to do is to free the area from all extraneous and unnecessary objects that will create inconvenience and interfere with the cleanliness.

If the apartment is equipped with furniture, general cleaning is best to start with cleaning soft sofas and armchairs, as well as sleeping places from various contaminants, crumbs, hair and hair of pets.

Next, you should pay special attention to removing dust from appliances and cabinet furniture. First you need to remove dust accumulations with a rag or cellulose sponge, moistened with a special cleaning solution, and then rub the facades with polish.

Then you can proceed to dry cleaning of floor coverings and carpets with a vacuum cleaner. If dirt or stains remain on the floor after this procedure, they should be removed using detergents and stain remover.

At the same stage, the lighting fixtures are cleaned of dust and dirt.

Wet cleaning. This is the final stage of preparing the apartment for sale. Here it is necessary to pay special attention not only to washing the floor, but also to wet cleaning of window sills, interior doors, front door, baseboards. It is also recommended to rub all glass and mirror surfaces to a shine.

Important! If the windows were washed more than six months ago, it is recommended to perform a full window cleaning (inside and outside) in all rooms, and if necessary to perform their maintenance (adjustment of mechanisms, lubrication or replacement of seals, etc.). 

Once the bedrooms, children’s rooms and living rooms are perfectly cleaned, it is recommended to move on to cleaning the bathroom, toilet and kitchen area. To make these rooms look tidy, you need to perform the following actions:

  • cleaning tiles from lime and grease deposits;
  • removal of dirt from the walls of the shower cubicle;
  • cleaning and disinfection of sanitary ware;
  • washing and polishing of sanitary ware;
  • removal of rust, lime scale and urinary stone in the toilet bowl, sink and bathtub;
  • microwave oven cleaning;
  • thoroughly washing the hood, oven and cooktop.

By performing all these actions in the sequence we suggested and using specialized chemicals and tools, you will be able to make the property look marketable and sell it as soon as possible.

Also you can always order pre-sale cleaning of the apartment in our company. Professional cleaners will perform it at the highest level in the shortest possible time. At the same time you will not have to spend money on purchasing expensive detergents and cleaning agents (and you will need a lot of them) and inventory – we bring everything with us. Contact us!

Post thumbnail

How to clean heating radiators inside

How to clean old batteries, remove dust, layers of cobwebs and accumulated grease? Our experts – collected several effective ways to clean the batteries in the apartment. Before we get to them, let’s consider what kind of batteries there are. 

Types and kinds of heating radiators

  • Depending on the material your radiators are made of and their shape, you will need to choose the best cleaning technique. Pay attention to what your radiators are made of:
  • steel (panel steel radiators, tubular radiators);
  • aluminum (lithium or extrusion radiators);
  • cast iron (the well-known harmonica radiators and modern retro-style models);
  • bimetal.

How to clean the batteries inside

Method 1: This is the most popular option for getting rid of dust from the inside and back walls of bimetallic or steel radiators. To do this, the back wall of the battery should be covered with a suitable-sized wet cloth. And then on the front, “front” side to direct a powerful jet of air from an ordinary hair dryer. The hair dryer will blow out all the dust from inside the radiator, and it will fix on the wet rag at the back. After that, remove the cloth, and go over the external parts of the radiator again with a damp cloth or sponge.

Method 2: If you have cast-iron radiators, simply blowing dust, cobwebs and other contaminants out with the air from a hair dryer will not blow them out. The problem is that often the dust as if “welded” to the coating of cast iron radiators during the heating season. And to get rid of them, you need to be inventive and careful not to hurt the skin of your hands. You can use rag household gloves or just put on the hand wet in water or soap solution unnecessary cotton sock. Then you should use your hand covered with the sock or cloth to go over all the inner and back parts of the radiator. All the dust and cobwebs will remain on the cloth surface. If you are dealing with a dense layer of dust, first soak the dirt in this way and then go over it again with your hand, wiping the radiator clean.

Method 3. For aluminum and cast iron radiators, you can also use this method of cleaning. Dissolve ordinary baking soda in water. Take a bottle brush, dip it in this baking soda solution and thoroughly go over the “ribs” of the radiator. Dust and dirt will come off in 5-10 minutes.

Method 4: Toothpaste or tooth powder will help to remove sticky grease on the radiators in the kitchen. Apply it to an ordinary sponge and rub the dirty areas well.

Method 5: You can spray the radiator with a cleaning agent or detergent solution with citric acid, baking soda, hydrogen peroxide through a spray gun. And after that, as usual, wipe the radiator clean with a sponge or a damp cloth.

Method 6: Very dirty radiators (for example, after repair work) can be cleaned in this way. Put wide trays under radiators, cover wallpaper and nearby objects with oilcloth or construction film, heat water in a kettle and water the radiator with hot water, so that dirty water remains in the tray. When the dirt is soaked in this way, you can use a brush with any cleaning agent.

Useful tips:

  • Before washing the radiators, take care of the safety and security of the wallpaper on the wall behind the radiator itself: cover it with construction film or oilcloth. And under the radiator itself, place a wide basin where dirty water or cleaning agents will run off.
  • To clean the batteries can be used as industrial detergents, and means that are always in every home: soap, toothpaste or tooth powder, hydrogen peroxide, baking soda diluted in water, and citric acid. Pay attention! In order not to provoke the appearance of rust on the batteries, avoid detergents with added chlorine or phosphates.
  • When spraying the radiators with water or detergents, place old newspapers or rags on the floor under the radiator so that the water or detergents do not remain on the floor but are absorbed.

Washing radiators is a rather complicated task that requires a lot of time. That is why it is better to use the services of our company and order their washing from the specialists of TivaCleaners. Our cleaning company will do everything quickly, qualitatively and for an affordable price. 

Post thumbnail

How to get rid of pet odor in the apartment?

How to remove the smell of cat urine? How to get rid of the smell of a dog in the house? How to achieve that the result will please you for a long time? These questions worry all owners of dogs and cats, because the problem of a specific odor in the room is relevant to all without exception. Unfortunately it is not always possible to get rid of it with the help of quality cleaning and washing of the animal. In some cases, the problems may be deeper and may be related to the pet’s health. If you are concerned about how to remove the unpleasant odor in the apartment, then our article will certainly be useful for you. As for determining the causes of its appearance, it is already a question for the veterinarian – you should not neglect this issue.  

Identifying the source of the odor

Before choosing how to neutralize the smell of urine and other unpleasant odor, it is necessary to determine the cause of its appearance. If you do not do this, then all efforts will be like fighting windmills. Among the causes can be noted:

  • hypersecretion. For many breeds of animals, this is the norm. However, if the specific odor of the pet you have not previously noted, it may indicate that the production of sebum has increased (most often caused by endocrine diseases);
  • dermatitis;
  • dental problems in the pet. Unpleasant odor from the oral cavity can appear from gingivitis, periodontal disease, carious teeth, etc.;
  • helminthic diseases;
  • allergic reactions and more. 

Once again, we note that only correctly selected on the basis of the cause of the odor means from the smell of the dog in the apartment, will demonstrate the effectiveness.  

Before moving on to the issues of cleaning the housing, the definition of what to wash the floors after a dog or cat, it should be noted the importance of paying attention to the hygiene of the animal. The pet should be bathed regularly and combed out well (various bacteria, dirt, sebaceous gland secretion, etc. can accumulate in the hairballs). 

Cleaning of furniture and surfaces

Regarding how to remove the odor from the sofa from dog urine, it should be noted the following – it is easiest to do it with the help of special sprays. They are characterized by effectiveness, are characterized by ease of use and rarely cause allergies. Also in the store you can buy various capsules and tablets – such means also demonstrate good efficiency, but the places treated with these means need drying. 

Finding out how to remove the smell of animals from the apartment, we advise you to pay attention also to folk ways:

  • You can dissolve grated laundry soap in hot water and apply the resulting product to the treated area. After about 20-30 minutes it is necessary to remove everything with a wet towel.
  • You can try to spray a solution of iodine on the furniture upholstery.  The solution should be prepared in the following proportion: 10 drops per 0.5 liters of water.
  • To treat dark upholstery, a weak solution of manganese is suitable. This solution should be applied to the fabric and wait until it dries completely.

Floor cleaning

If we are talking about laminate, linoleum or tiles, then everything is easier – you just need to wash the surface. But if you are worried about how to remove the smell of urine from the carpet, then here everything is a little more complicated. Here you can also buy special means, and you can choose folk ways that will help to eliminate stains and odor. Among them we note the following: 

  • Lemon juice is a good answer to the question: “What to remove the smell of dog urine?”. A solution of 1 liter of water and 0.15 liters of juice should be abundantly moisten the place where there was a puddle, after – blot everything with paper towels. This method is also suitable for removing odor from the upholstery of upholstered furniture.
  • You can also prepare a solution of 1 part of vinegar and 4 parts of water. This solution should be poured into the desired area of the carpet and after about 15-20 minutes blot with a napkin. After you need to apply baking soda on the stain, and then pour a solution of 0.1 liters of hydrogen peroxide 3% and half a teaspoon of detergent on top. After about an hour, it is necessary to gently rub the spot with a soft brush (you can use a toothbrush).
  • Well shows itself in the fight against bad odor and stains on the carpet dry mustard. The method is as simple as possible – you need to dilute the powder with water and apply it to the stain. After the porridge dries it is necessary to remove the mustard residue with a vacuum cleaner. 

Ventilation and air freshening

If the cause of the unpleasant odor is eliminated and the animal is healthy, then in any case it is not superfluous to ventilate the room and use air fresheners. Such measures will be preventive and definitely not superfluous. 

If you do not want to understand all the ways of elimination of unpleasant smell of animals in the apartment, read how to get rid of the smell of a cat in the apartment, how vinegar from dog tags will help, then a good idea will be to contact the specialists of the company Tiva Cleaners. Entrusting cleaning to the company you can be sure that they will perform everything quickly, qualitatively and at an affordable price. 

Post thumbnail

Cleaning up after a fire

Unfortunately, short-circuited wiring and a number of other negative moments can lead to a fire in the room and that the search for an answer to the question of how to clean soot after a fire will become relevant. Neither homeowners nor owners of commercial premises of various purposes are immune to this. Regardless of how well-designed fire protection system force majeure can happen to anyone, respectively, cleaning services after the fire may really need everyone. Independently eliminate its consequences is really difficult, if not impossible. Usually the traces of fire remain on all surfaces in the room in the form of black stains, it can be soot and cinders, it is all really very difficult to clean. Therefore, to begin with it is necessary to assess the degree of damage and understand whether it is realistic to put the affected room in order even by specialists. 

In this article we will talk to you about what steps should be taken in order to get rid of soot, ash, etc. 

Ventilation of the room

The smell of burning, unfortunately, will be present in the room for a long time until all surfaces are cleaned. Therefore, it will be necessary to ventilate the room regularly during the entire period of cleaning (and of course this is where you should start). It is recommended to wear a respirator even when in the ventilated room. In the air may remain particles of tar and soot, which are characterized by causticity, are harmful to the human body, as they get into the lungs and settle there, also these particles irritate the mucous membrane of the eyes.

What tools and protective equipment should be prepared for cleaning up after a fire?

Above we have already mentioned that general cleaning after a fire should be carried out in a respirator. However, a respirator is not all you will need. To perform the cleaning should be prepared a number of tools – you will have to deal with different types of surfaces, as well as take care of the means of protection for all these manipulations. 

So, as for tools, you need to have at hand:

  • garbage bags;
  • vacuum cleaner (preferably a construction vacuum cleaner);
  • broom and dustpan;
  • polyethylene film;
  • dry rags;
  • roller and trowel;
  • a metal brush to get rid of adhered plastic particles, etc..;
  • a special sponge with impregnation (it can be glycerin, anionic alloys, etc., water will not be the best solution, as it will smear the dirt on the surface).

As for the means of protection, you will also need safety glasses, thick-soled shoes (there may be splinters on the floor, etc.), gloves, thick clothing. 

Removal of fire residue

First of all, you should get rid of things that were damaged in the fire. In some cases, even if they were not damaged, it is not necessary to keep them at home any longer. This can happen with books – if they were aside and survived, they will in any case smell like cinders and the smell will be emitted for several years. How to remove the odor after the fire in such a case it is difficult to say, it is rather just a matter of time.

Therefore, if it is not a family heirloom and not some rarity, it is better to get rid of them at once. with furniture, curtains, etc. the situation is also difficult, but they can be saved by airing, dry cleaning, etc. 

After you rid the room of unnecessary things it is necessary to sweep out the garbage and take the bags with it to the street. Garbage removal after a fire is probably the easiest stage in terms of approach to it, as the nuances are minimal – the main thing is to have time.

Ash and soot removal

If you will do it on your own, you should be prepared to work long hours for the result. Start cleaning 

It should be understood that water will not help you here, because in most cases it will only drive dirt on the surface – it is better to use sponges with special impregnation. 

Specifics of cleaning different types of surfaces

Cleaning houses after a fire involves a lot of different tasks. Soot and soot must be cleaned from upholstered furniture, ceilings, walls, etc. Each surface has its own nuances concerning its cleaning. Consider some of the moments of eliminating the consequences of the fire:

  • To clean the floor, walls and ceiling, it is best to use a vacuum cleaner with a wet cleaning function. Also for these purposes, a steam generator is suitable. 
  • From the walls, soot should be scrubbed with a damp cloth – in this case, washing after the fire should not be accompanied by the use of a large amount of water. 
  • For heavily soiled places in the room, it is a good idea to use a metal brush. It will also help to cope with such a task as cleaning the facade after the fire. 
  • Wood furniture is best cleaned with a cloth or sponge.

If you do not want to think about how to clean soot after a fire or how to remove soot from the ceiling after a fire, you should order professional cleaning. Having addressed to the company Tiva Cleaners you will definitely be satisfied with the result – the specialists will do everything possible to make your apartment, house or commercial premises after a fire or a flood look as neat as possible. Entrusting this task to the specialists you will not only stop puzzling over what to remove the cinders after the fire, but also save your personal time. The price in Tiva Cleaners is affordable. 

Post thumbnail

HOW TO QUICKLY CLEAN KITCHEN CABINETS FROM GREASE

We spend a lot of time in the kitchen. We prepare food there, have dinner with our families, or just relax with a cup of tea. Of course, we want the house, the place where we live, to be tidy and clean. However, we do not always have time for general cleaning. Sometimes we don’t even have time to rest.

Therefore, in this article, we will tell you how to clean the kitchen cabinets from grease at home. All methods will not take more than 5 minutes. Thanks to these secret methods, you will be able to quickly and efficiently remove and wash grease from all surfaces!

HOW TO TAKE CARE OF DIFFERENT FACADES?

Before cleaning facades, it is important to determine exactly what products and materials can be used for cleaning and what should be avoided. We will analyze the most popular types of facades and discuss their specifics, and you will learn what you can use to clean them)

Glossy/film facades

This material really looks incredibly beautiful. However, behind the beauty lies certain rules that should be followed (if you want to keep the surface safe and sound).

The glossy facade should not be

  • wash with pure alcohol;
  • wash with alkaline substances (soda);
  • clean with a hard sponge;
  • wash with boiling water/hot water.

We are voicing and reciting these rules because later on, there will be methods that are not quite suitable for this facade and that will not be able to remove grease.

Wooden facades

Incredibly beautiful, but problematic to clean. Not only can the wood not be intensively wet, but it also cannot be washed with chemicals that are supposed to help remove grease stains.

This material can be cleaned with hard sponges because it is scratch-resistant, but do not forget about delicacy. The downside is that the wood absorbs grease very quickly. Over time, it becomes more difficult to remove, so you need to react quickly. As for home methods, you can use anything. Anyone can remove and wash grease stains.

Glass

One of the most uncomfortable. They leave stain marks and collect grease more quickly.

It is better to remove stains from glass surfaces with baking soda, vinegar, and alcohol. Therefore, several methods that we will present below are suitable for glass surfaces. Rags should be used only for cleaning glass, no other.

We’ve discussed how to clean kitchen cabinets and now we’ll move on to home methods.

CLEAN KITCHEN CABINETS AT HOME

There are several methods for getting rid of grease on cabinets and other kitchen surfaces. Read carefully about each of them and remember to test the product on a small piece. This way, you will be sure that you will not spoil the kitchen and will be able to clean the surface safely.

96% ALCOHOL – TO CLEAN GREASY STAINS

Let’s start with the most effective one. Alcohol perfectly removes traces of grease from the surface, and it does so in a matter of minutes. In just 10-15 minutes, the cabinets will shine and radiate cleanliness!

It is important to take 96% alcohol. Also, don’t forget that not every facade can be cleaned with alcohol (read above). First, wipe the surface from moisture and crumbs.

To quickly clean the lockers from grease, take:

  • 96% alcohol and water – mix 1:1 (i.e. equal amounts of water and alcohol);
  • Pour the mixture into a spray bottle or use a basin for convenience;
  • dip a microfiber cloth into the solution and start gently scrubbing the surface (do not scrub aggressively, just gently wipe the countertop and cabinets);
  • leave it on for 10 minutes;
  • rinse with warm water.

At the end, go over the surface with another, dry cloth. This way you will remove the remaining moisture and will be able to wash the remaining stains.

RAKE

An unusual and new method that has not been heard much. People keep silent about the effectiveness of baking powder because it is profitable. And that’s because then the sale of chemicals will drop and everyone will start using this wonderful tool, and it’s very cheap.

Baking powder really works wonders on old and dirty surfaces. It can also clean the tops of kitchen cabinets. Yes, it can remove grease even from there. Let’s not delay and proceed to the cleaning steps.

The first thing to do is mix a packet of baking powder with 2 tablespoons of water. You should get this foam. Wait for 2-3 minutes for the composition to infuse, and then you can start washing and cleaning.

Use a dishwashing sponge and start scrubbing the grease stained areas. Leave the composition on for 10 minutes and then rinse with warm water. The emphasis is on warm water, as it helps clean the surface of the grease.

The effects should be visible immediately. This product is the most gentle and helps to remove even the oldest fat stains. Let’s move on to the next home method. It can also be used to clean grease stains in a cool way)

BAKING SODA + VINEGAR + DETERGENT

An excellent combination, as experience shows. This option is not suitable for all types of facades, but it will be effective for steam. It is best to make sure and test the method before using it on a small piece of surface.

How to clean kitchen cabinets from grease with this mixture:

  • take 50 grams of baking soda (this is the proportions for a small part of the surface, for example, 2 cabinets);
  • add 1 tablespoon of vinegar to it;
  • You should get a slurry to which you need to add detergent;
  • mix to a paste and start cleaning the cabinet with it; make soft and smooth movements, no friction;
  • leave the paste on for 15 minutes and then rinse with warm water.

The product works really well and quickly removes greasy marks. Besides, it is cheap and can be found in every home.

HOW TO CLEAN KITCHEN CABINETS: DISHWASHING TABLETS AND AMMONIA

The last and final home method to remove grease from your cabinets. All you need is to take 2 dishwasher tablets. Then, dissolve them in boiling water and add 2 tablespoons of ammonia. Wait 5-10 minutes for the water to cool before pouring in the alcohol. If you pour in immediately, an unpleasant and pungent odor may result.

Add the detergent and mix. After that, all you have to do is soak a glass cleaning cloth with this solution and start removing grease. You don’t need to leave the solution on, just clean/scrub the surface, then rinse with water and wipe dry.

Today we discussed how to clean kitchen cabinets. We also presented the most effective methods to help clean and wash any facade from grease.

We hope that you managed to clean the cabinets from grease at home thanks to our methods. 

If you understand that spending your time resolving issues with washing cabinets is not the best idea, then we advise you to contact our specialists. We guarantee impeccable quality of service at the best prices on the market.

Post thumbnail

HOW TO CLEAN IODINE AND BRILLIANT GREEN STAINS FROM LINOLEUM: HOME METHODS

Sometimes we may accidentally spill water on the sofa or leave a cup of coffee on the bed and knock it over. It can get messy when it comes to light surfaces. That’s okay, though – you can clean up the water or coffee without any problems. But what about tougher stains, such as iodine or brilliant green? Iodine/brilliant green stains are not as difficult to remove as they seem! You need to really try, but you don’t need to do anything supernatural. Everything you need can be found in every home, and if not, the products are available in the store at reasonable prices. So, let’s get started on removing stubborn iodine/green stains from linoleum!

REMOVING IODINE AND BRILLIANT GREEN STAINS FROM LINOLEUM USING FOLK REMEDIES

Perhaps we all know that folk methods are among the best methods in the world. No wonder they have been passed down from generation to generation. Their popularity also stems from the fact that they do not require large expenditures. As already mentioned, you can find most of the folk methods at home, so you can remove iodine or brilliant green stains from linoleum right now. Every minute counts, so hurry up!

HOW TO REMOVE IODINE FROM LINOLEUM?

Iodine stains on linoleum require a quick reaction. Also, iodine is characterized by a bright color and can gradually fade away. This process is called sublimation. In this process, iodine molecules turn into a gaseous state and gradually disappear. Interestingly, this process can occur even at room temperature and in the presence of sunlight.

That is why it is better to wipe off the stain in 1-3 minutes after it gets on the linoleum. If the stain remains on the surface without intervention, the process of removing it may become more difficult and require additional effort.

To remove iodine from linoleum, use such home methods as:

  • Baking soda with vinegar;
  • Citric acid + lemon juice;
  • Starch.

Soda with vinegar

This method has been used for a very long time and for good reason. The effectiveness of soda is really off the charts. Most people know that baking soda can remove literally everything: stains from carpet, remove a stone from the toilet, remove limescale from a kettle, remove carbon deposits from a pan, etc.

To wash iodine from linoleum, wipe the area with Fairy water and then wipe it dry. After that, it’s best to start applying baking soda to the iodine stain. Pour a tablespoon and add the same amount of vinegar. Rub the mixture in with massage movements. Then leave the paste on for 5-6 hours.

This should remove the iodine stain from the linoleum by at least 20%, and it can even be removed if you start cleaning immediately. Also, don’t forget to go over with a damp cloth at the end to remove any baking soda residue.

P.s Use a toothbrush instead of a sponge, it will be easier to remove dirt.

Citric acid with lemon juice

Let’s move on to the next effective home method. Citric acid can whiten and remove almost any stain, so so can iodine.

Take 1 tablespoon of citric acid and apply it to the iodine stain on the linoleum. Only then squeeze Вј of a lemon into the acid. Stir until it becomes a slurry and rub it into the linoleum with light movements. Leave it for 5-7 hours. Remember that the time to leave the product depends on how long the iodine stain has been on the linoleum. For example, if the stain is old, leave it for 10-12 hours, at least. Afterwards, rinse off the mixture with warm water and go over with a dry cloth. This can also help to wash away the bulk of the stain.

Krochmal

Starch is known to absorb fat well. Plus, it has the ability to remove excess moisture and absorb unpleasant odors. Thanks to these characteristics, starch can partially remove iodine from linoleum.

To remove iodine stains from linoleum with starch, follow these steps:

  • Sprinkle starch on the linoleum: Sprinkle the iodine stain on the linoleum with starch to absorb some of the liquid. Leave it on for a while (about 15-20 minutes);
  • Carefully remove: Use a soft brush or cloth to remove the starch from the surface. Be careful not to rub the stain deeper into the surface;
  • Rinsing the area lightly with water will help remove any remaining starch and iodine from the linoleum. After that, dry the surface.

This method can help to partially remove the iodine stain. However, the effectiveness may depend on how deeply the stain has penetrated the linoleum. It is best to check the treated area after the procedure and, if necessary, repeat it to completely wash the stain.

HOW TO REMOVE BRILLIANT GREEN STAINS FROM LINOLEUM?

Stains from brilliant green and stains from iodine can be similar in some respects. Both substances can be bright and saturated in color. However, the chemical properties of these substances are different, which can lead to different methods of removal.

Also, brilliant green has an irritating color, unlike iodine, which merges with the color of linoleum. However, it’s much easier to remove traces of brilliant green. So, let’s get started with the process of cleaning linoleum from unwanted stains!

Potassium permanganate with vinegar:

Potassium permanganate has always been in demand among housewives. It has good antiseptic properties and is used as a disinfectant for cleaning and treating surfaces. And there is nothing to say about vinegar, you already know everything!

The proportions for the solution are as follows:

  • 1-2 tablespoons of potassium permanganate + 1 liter of water;
  • then add 1 tablespoon of vinegar.

After mixing all the ingredients, use a cotton cloth. Dip it into the bowl with the mixture and start to gently scrub the stain. You may notice color changes, and this is normal. Leave the product on for 5-10 minutes, and then rinse it off with warm water and damp mop the floor.

The only thing is to be careful with this product, because it is quite aggressive and can not only remove the stain, but also whiten the floor. However, if you do everything right and do not overexpose the product, you can achieve the desired results!

REMOVING IODINE AND BRILLIANT GREEN STAINS FROM LINOLEUM WITH HOUSEHOLD CHEMICALS

When it comes to household chemicals, they are much more effective than they seem. It can be used to remove iodine/green stains from linoleum in a few hours, and sometimes even minutes. So let’s not hesitate and start removing stains!

Acetone

Yes, acetone will help remove brilliant green stains from linoleum and more. Due to its active effect on the surface, traces are removed easily and effortlessly. All you need to do is moisten a cotton pad in a solution with acetone and start rubbing until the stain disappears (partially disappears). Do not overdo it with the intensity of friction, as you can completely erase the top layer of linoleum.

Whitewash

Another of the most effective methods for removing iodine stains is laundry.

Now we’ll show you how to remove iodine from linoleum with it:

  • Add 2-3 tablespoons of laundry detergent to a liter of water;
  • Take a cotton cloth and soak it with the solution;
  • Cover the stain for 5-10 minutes;
  • Rinse with warm water and wipe the floor dry.

Don’t forget that the laundry is quite aggressive and overexposure to it is fraught with consequences. Therefore, after using it, you should wash the floor several times.

Ammonia

It is an alkaline substance that is usually used in diluted form for cleaning. It can be effective for removing grease stains and some stains from brilliant green or iodine. But ammonia can have a pungent odor and needs good ventilation during use.

Before using the method, wear rubber gloves and open a window wide. Next, dilute ammonia with water 1:10 (1 part ammonia to 10 parts water). Take a cotton pad and blot it. Apply it directly to the stain and wait about 5 minutes. Do not overexpose the product, because you can remove not only the iodine stain, but also the linoleum coating.

Gently wipe the area where the stain was with water and detergent and ventilate the room again. Be careful and observe the proportions!

Sodium thiosulfate

It can be bought at pharmacies at an affordable price. Just a few drops will be enough to make the floor shine again!

Take 1 ampoule of sodium thiosulfate and pour it on the iodine stain. If the trace is new, the stain will be washed off in a few minutes. If it’s an old one, it will take about 10 minutes. There is no need to scrub or wash the iodine stain, you just need to wait until the chemical reaction starts and that’s it! In the end, we usually remove the excess with warm water and floor detergent.

Alcohol

This method can be attributed to both folk methods and household chemicals. The positive effects of alcohol have been known for a long time. Now it is useful to us here!

To remove traces of iodine on linoleum, you need to:

  • moisten a cotton pad with alcohol;
  • put it on the iodine stain;
  • leave it on for 5-10 minutes;
  • rinse with warm water.

This way, it will not be difficult to remove iodine. The only thing you need to pay attention to is how linoleum reacts to alcohol. If after a few minutes you notice that the iodine trace is removed along with the linoleum coating itself, immediately stop using this method and start with a less aggressive one.

Chlorine

And we’ll end this article with one last great way. Yes, chlorine has a specific odor and can cause unpleasant sensations. However, it does an excellent job of removing traces of iodine!

There are two ways to use bleach. Since it is quite aggressive, you need to dilute it with water in a 1:10 ratio (as in the case of ammonia). The second option is to remove traces of iodine with pure chlorine, not diluted with water.

For the second method, we need a rag and a cotton pad. First, wet the cloth with the solution and leave it on the linoleum surface for 5 minutes. If you do not notice any significant results and the linoleum remains unaffected, repeat the procedure for 10 minutes longer. At the end, it would be better to do a wet cleaning and ventilate the room. This will ensure safety and help keep the linoleum surface clean.

Finally, remember that your own safety should be a priority. You can always contact Tiva Cleaners professionals, and they will help you to eliminate the source of the problem.

Post thumbnail

HOW TO CLEAN THE TOILET FROM LIMESCALE AND YELLOWING – THE MOST EFFECTIVE METHODS

Cleaning the bathroom is usually associated with something unpleasant and disgusting, isn’t it? Few people like to do it, let alone clean the toilet. However, this is a necessary process to maintain a clean toilet. Moreover, if you delay regular cleaning, a thick stone can form inside the toilet bowl.

Don’t worry! We have a solution for the lazy. Below, we’ll tell you how to clean off yellow limescale in the toilet and get rid of water stone using home methods. In addition, we will tell you the secrets that will whiten the toilet once and for all!

PLAQUE IN THE TOILET – WHAT AM I DOING WRONG?

As we have already mentioned, rust in the bathroom is not a pleasant thing. It’s irritating to the eye, to you, and to your nerves. Why not find out the causes of limescale? It’s actually quite simple, and it’s caused by 3 things:

  • Bad water: The mineral content of water, such as limestone and magnesium, can lead to limescale. This is especially true in regions with high levels of water hardness.
  • Insufficient ventilation: Poor air circulation in the bathroom can contribute to limescale formation. Also, high humidity can increase the formation of deposits on surfaces.
  • Improper cleaning: Using the wrong cleaning products or not cleaning regularly enough also makes it harder to clean the toilet. Some products may simply not be suitable, so they only spoil the appearance of the surface.

However, regular cleaning and the use of anti-scale products can help keep your toilet in better condition. We will tell you how to clean the toilet at home below.

HOW TO CLEAN THE TOILET FROM PLAQUE AT HOME

Although many people consider store-bought anti-limescale or rust products to be the most effective, in fact, home methods can be just as or even more effective. There’s no need to spend a lot of money on expensive and unnecessary products, as you can use simple folk methods to remove the stone from the toilet. However, do not forget that you will still have to waste your time, so it is still better to contact a cleaning company. 

HOW TO CLEAN THE TOILET FROM LIME?

Let’s figure out how to clean the toilet bowl from limescale quickly and correctly. After all, it affects the aesthetics of the bathroom and indicates tidiness.

When the house is tidy, we feel calm because our brain not only rests but also releases dopamine and serotonin, which increases the level of satisfaction from the work we do. So let’s not waste time and start removing and removing traces of stone!

Vinegar and soda:

The first home method is a solution of vinegar and baking soda. The ratio should be 1:1, i.e. half a cup of vinegar and half a cup of baking soda. Next, pour the mixture into the toilet bowl or down the sides. Leave it on for a few hours, and then wash thoroughly with a brush and rinse with water.

Citric acid:

To use citric acid, you can use 2 cleaning options:

You can take plain citric acid and rub it on the bathroom. No need to add water or dilute the acid with water. You can wet a brush and clean all the necessary places.

The second method is different. It also removes rust from the bottom of the toilet, so you can use it. Unlike the first method, this one involves a more comprehensive cleaning of the toilet inside. Dissolve 2-3 tablespoons of acid in 1 liter of water. After dissolving, pour this mixture into the toilet (especially rub the sides where the sediment has appeared). You should also wash the walls of the bathroom vigorously and use a stiff brush. Leave the acid to dissolve the rust for 1 day, then flush the toilet and enjoy a clean toilet!

Water and salt:

A solution of water and salt is an easy way to remove the stone. Just dissolve half a cup of salt in water and then pour it on the walls of the toilet bowl (you can fill it to the top). Leave it for a few hours, and then brush it thoroughly and rinse with water. But remember that you need to carefully remove the remnants of the solution so as not to be exposed to unpleasant consequences.

HOW TO CLEAN THE TOILET FROM YELLOWING?

Another unpleasant phenomenon in toilets is yellowing. It can ruin the smell in the bathroom and generally affect the aesthetics. Let’s figure out how to clean the toilet from yellow marks.

Use laundry detergent. This is actually a treasure because it helps to remove about 60% of the yellowing. Moreover, everyone has detergent in their home. Please note that the detergent must be loose for the removal process to take place. You just need to pour about 30 grams of powder on the bottom of the toilet. and scrub the walls of the toilet to remove yellowing and limescale. At the end, rinse with water and that’s it.

Baking soda and vinegar are great natural toilet bowl cleaners: First, pour some of the baking soda (about 1/2 cup) down the toilet. Add about 1/2 cup of vinegar. Wait about 10-15 minutes for the mixture to take effect, and then use a brush to scrub the inside thoroughly to remove any limescale.

At the end of each method, it is advisable to use water as the final step. It will perfectly cope with the remnants of the mixtures and remove the lightly aggressive odor. The smell may be present and that’s okay! These methods are safe and not harmful to health!

HOW TO CLEAN THE TOILET FROM RUST INSIDE?

Just like limescale or yellowing, rust can also be removed at home. However, it can be a little more difficult. Rust can be a little more difficult to clean because it penetrates deeper into the material in which it is formed. Therefore, you will need more effective and aggressive means.

For example, hydrochloric acid. It is not exactly a home method, but it is available in chemical stores, hardware stores, and some pharmacies. If the stone has settled at the bottom of the toilet, it is better to pour the substance directly onto the area with the sediment. To do this, pour out all the water from the middle (for example, using a scoop or bowl).

How to use:

Use 0.5 cups of hydrochloric acid and distribute it evenly. Then leave the mixture on for the whole evening or even overnight, and then wash thoroughly with a brush.

Hydrochloric acid is available in liquid form, but using it for cleaning requires caution due to its strong acidic properties. If you need an alternative in the form of a home remedy, water and salt can be used, but it may be less effective than professional hydrochloric acid.

Today we’ve discussed many home methods to remove limescale, scale, and rust from the toilet. The methods are really useful and, what is very important, cheap. However, each of them requires attention and time, which is why you should contact the specialists of the Tiva Cleaners service. 

Post thumbnail

THE BEST WAYS TO WASH A BATHROOM MAT

The bathroom is the place where moisture and bacteria accumulate the most. The bathroom mat is no exception. In this article, we’ll show you how to wash a rug at home.

CAN I WASH RUBBER BATHROOM MATS?

To begin with, let’s figure out what types of mats there are. Nowadays, in the world of fashion and new trends, they can be different: from rubber to leather or wood. However, let’s face it, the most practical ones are still rubber or fabric.

Now, let’s get back to the question of whether rugs can be washed at all. And the answer is obvious: “You can and you should!”. Like any other items in the interior, rugs need to be washed. Manually or in a machine – this is another question, which we will discuss later.

CAN I MACHINE WASH MY BATHROOM MATS?

As mentioned above, the mats are machine washable. There are no contraindications, unless you are talking about rubber/silicone mats.

Here are some of the advantages of washing your mats regularly:

  • improved air quality;
  • less bacteria;
  • prolonging the durability of the mat.

Every day the fabric tends to get dirty (especially if the mat is white). Therefore, regular cleaning will prevent the appearance of yellowing and more.

In the case of a rubber mat, the situation looks a little different and read about it below.

HOW DO I WASH BATHROOM RUGS?

Before you start washing any rug, you should read the label. It usually always indicates how to wash it properly, at what temperature, and so on. It will also help you understand what material the mat is made of, which plays an important role in cleaning.

Rubber mat

One of the most common types is, of course, rubber or silicone. They are relatively easy to use because they do not get wet like fabric ones. That’s why most people choose them. But not everything is as smooth as it seems.

They seem to be practical, but they are not. Why, you may ask? It’s because rubber mats accumulate a lot of bacteria. It’s not very pleasant to realize this, but it is true.

However, there is a solution! You can’t wash a silicone/rubber mat in a machine, but you can wash it by hand.

This is done very simply with soapy water:

Prepare warm water and liquid soap.

Take a soft sponge and start washing the rug.

Rinse with water and wipe dry.

Leave it to dry in an upright position.

Also, do not rub the material vigorously, as it may deteriorate. It is better to stick to delicate cleaning, without overloading.Also, at the end, you need to leave the mat to dry so that all the water drains well.

Fabric rug

With fabric rugs, the situation is much simpler. Here you can safely throw the product into the machine and not worry that something will go bad. You can wash the rug at temperatures up to 60 degrees and speeds of 600-800 rpm.

You should also vacuum the mat before cleaning. If necessary, leave it to soak in a solution (for example, bleach). In general, there is nothing complicated.

Almost all fabric rugs are machine washable, but there are exceptions.

Do not machine wash the following rugs:

  • linen
  • silk;
  • viscose rugs.

The rest can be safely thrown into the laundry room and not worry. But these should be cleaned ONLY by hand.

Life hacks for washing fabric rugs: you can add various fillers when washing (soda, vinegar, salt, any aromatic oils, etc.); this will keep the best smell, and in general, the presentability of the product will improve significantly, the main thing is not to overdo it.

How to wash an anti-slip mat?

Anti-slip mats are also quite popular these days. They can be safely washed in a machine, the main thing is to follow a few rules:

  • wash at a temperature of 40 degrees;
  • do not add any conditioners, bleaches, etc;
  • use a laundry bag.

Since products made of this material are very fragile, you should use only liquid powder. Do not add conditioners, as this will spoil the structure. And using a laundry bag is, of course, optional (but it is much easier with it).

HOW TO BLEACH A BATHROOM MAT?

There are no problems with bleaching fabric mats, but there are problems with rubber ones. Let’s see if it is possible to bleach rubber products at all. And if it is, what specific methods are available.

There are two options: a low-quality and as old as possible mat and a high-quality one. As you might have guessed, inexpensive rubber mats cannot be bleached. The material is already of poor quality, so additional bleaching will only do harm.

But denser mats are another matter. Most often, their material is designed to withstand the effects of aggressive agents, but this is not always the case.

Therefore, it is possible to whiten a rug made of high-quality rubber or silicone, and here are the specific steps:

  • Prepare vinegar and a washcloth (preferably a soft one).
  • Place the rug in the bathroom and pre-soak it.
  • After that, saturate the washcloth with vinegar and rub it all over the mat (remember that it should be wet).
  • Leave it on for 3-5 minutes and then rinse it off with water.
  • Hang the mat to dry.

The main thing is not to overexpose the product, as vinegar (in high doses) can corrode the material. So keep track of time and follow the instructions exactly. And hang it horizontally to dry so that excess water can easily drain away.

RECOMMENDATIONS FOR USING BATHROOM MATS

To extend the life of any product, you need to take proper care of it. This also applies to bathroom mats. Therefore, you should follow a few basic rules.

First, leave the bathroom door open. Since the appearance of moisture is inevitable in any case, you need to prevent its growth. You step on the mat after a shower, don’t you? It gets wet and accumulates moisture. This is followed by bacterial growth, which will soon affect the air quality. So always try to keep the air circulating in the room.

Second, do not hang the rugs in the sun after washing. Rubber or fabric rugs – it doesn’t matter. It is undesirable to leave any of them drying under the active sun.

Third, try to shake out the mats regularly. You can also use a vacuum cleaner. If you clean them once a week, the durability of the item will increase significantly. Therefore, you should think about whether you want to buy a new rug every 2 months.

And in general, in order to save time, we advise you to contact us.

Post thumbnail

HOW TO CLEAN AN ARTIFICIAL STONE SINK?

Comfortable functioning cannot do without basic conditions, such as a sink. Every day, food is prepared in the kitchen and needs to be washed, and hands and various other items are washed daily. However, everything needs to be taken care of. So let’s figure out how to clean a stone sink at home.

WHAT IS THE BEST WAY TO CLEAN AN ARTIFICIAL STONE SINK?

Every sink requires careful maintenance, regardless of the material it is made of. Most people do not know how, with what and why they should not wash their sinks with certain products.

This is what we will focus on now:

  • Soft sponges, sponges and cloths are the key to the durability and proper cleaning of an artificial stone sink.
  • An ordinary detergent can wash even the dirtiest washbasin. Therefore, you do not need to immediately run to try purchased products, first try the methods at hand.
  • Natural home methods that will be presented below: baking soda, citric acid, vinegar, and so on. However, you should not overdo it with the frequency of use; it is not recommended to use them on a regular basis.
  • Special chemicals in stores, such as chlorine or chlorine-based substances, will do the trick. The main thing is to check the label for information on how long it should be kept to avoid unpleasant consequences.
  • Warm water instead of cold water, because warm water helps to quickly dissolve grease marks, stones, and so on.

And in general, you should use gentle, mild, and non-aggressive sink cleaners. Also, if you use purchased products, use them with a neutral pH. This way you won’t spoil anything.

WHAT SHOULD NOT BE USED TO CLEAN AN ARTIFICIAL STONE SINK?

We’ve already talked about what you should use to clean a stone sink, but what about the situation with prohibited items? Everything is simple and easy here, because:

  • An artificial stone sink should not be washed with iron sponges or brushes. This will definitely damage the surface over time, although at first glance it seems that everything is well washed.
  • You should also refrain from using excessive chemicals. You can use it, for example, in case of plaque, but in NO case on a regular basis.
  • Do not use alcohol, ammonia or similar products. They will simply bleach the sink and that’s it.
  • Also, do not try to pull off food debris with a knife/fork. The effect will certainly be good, but you can accidentally damage the surface.

These are the basics, so you should follow the rules if you don’t want to ruin your sink in a year. But if you are satisfied with replacing it every 1-2 years – no problem, you can do so.

HOW TO REMOVE WHITE DEPOSITS FROM AN ARTIFICIAL STONE SINK?

Sometimes it’s unpleasant to look at the white limescale on the surface of a bathtub, washbasin or toilet. It cuts the eye and causes disgust. This is a fairly common problem, so there are many ways to remove this limescale.

Baking soda

The best remedies are folk remedies, and it’s true. Our grandmothers or parents still use home remedies. And not because they are cheap (although this is also true), but because they are the safest and most practical.

For example, to clean an artificial stone sink at home, all you need is baking soda.

It will do the job perfectly and will not cause any harm:

  • Pre-wet the sink with lukewarm water so that it is damp.
  • Prepare a baking soda paste: Mix 5-6 tablespoons of baking soda with 1-3 tablespoons of water. You should get a paste that is easy to apply to the surface of the sink.
  • Using a soft sponge, apply the product to the surface of the sink.
  • Leave it on for 15-30 minutes, no longer.
  • At the end, rinse off with water and wipe dry.

Use only warm water, because limescale is best removed with it. Cold water may not be as effective. Also, do not leave the product on for more than 5 minutes. This is really fraught with consequences that we do not need.

Vinegar

Although vinegar is quite controversial when cleaning an artificial stone sink, there is nothing to be afraid of! If you create the right proportion and apply it to the right places, and not to the entire sink, nothing will happen.

Important! However, if you clean it regularly with vinegar, the sink will be whitened and there will be no trace of the stone.

To clean a stone sink from limescale, prepare paper towels, a vinegar bowl or plate, water, and a film. We need the film to create a floating effect. This will make the plaque disappear.

First, mix the vinegar with water in a 1:1 ratio. Next, dampen it with a paper towel, and then put it on the right place on the sink. Cover with cling film and leave for 15 minutes. You can also use cotton pads if you don’t have paper towels.

In the end, you just need to rinse with water and wipe dry. That’s it, nothing complicated. Plaque no longer seems like a problem.
Citric acid and vinegar

In fact, citric acid has quite aggressive and coarse particles. Therefore, it is impossible and even strictly forbidden to rub plaque. But if you mix the acid with vinegar, you will get an ideal remedy against white plaque.

How to clean the sink with citric acid and vinegar:

  • Prepare 1 sachet of citric acid and add vinegar in a 1:1 ratio.
  • Apply the resulting paste to the desired stains.
  • Leave it on for 15-20 minutes and then rinse thoroughly with water.

If you fail to remove the remnants of the plaque, repeat the method until you get the desired effect. And remember not to overexpose the product to avoid negative side effects.

HOW TO REMOVE A STONE FROM THE SINK AT HOME

The sink can have not only plaque, but also stone/fungus. Imagine washing your face and finding green mold around the faucet. It’s disgusting, right? So run and clean your artificial stone sink as soon as possible!

Tablets for cleaning dentures

A unique, inexpensive, and practical remedy for sink fungus. Yes, you heard right. Ordinary denture cleaning tablets can perfectly whiten an artificial stone sink, both in the kitchen and in the bathroom.

Instead of spending money on expensive store-bought descaling products, try this simple home remedy for pennies:

  • Run water in the sink and close the water drain hole (if possible).
  • Throw in a few denture cleaner tablets.
  • Leave it overnight or at least for a couple of hours.
  • In the morning, flush the water and you’re done.

There is nothing complicated. The only problem may be that there may be no plug. Then it is advised to dissolve 2 tablets in 200 ml of hot water, take a cotton pad and just leave it for a couple of hours. And then rinse it off with water.

OLD AND STUBBORN STAINS ON THE SINK – HOW TO GET RID OF THEM?

Yes, sometimes it can be difficult to remove old stains. Ordinary baking soda may not work anymore, and vinegar is generally depressed. What to do in such cases? The situation is not easy, but there are several other options for cleaning an artificial stone sink.

Soda + cola + citric acid + domestos: In fact, this is a combo of the most effective products, so old stains will definitely be removed. To do this, take 100 ml of cola, mix it with 2-3 tablespoons of baking soda, then add 1 teaspoon of citric acid and finally the same amount of domestos. You should get a liquid substance, which you need to moisten with a cloth and leave on the stain for 25 minutes. Then rinse thoroughly with water and you’re done. There is no need to rub, the stain should be easily washed off with a single swipe of the cloth.

Dishwashing detergent, vinegar, citric acid: The next mixture is also quite interesting. To do this, take 3 tablespoons of detergent, then the same amount of vinegar and finally 2 teaspoons of citric acid. You will get a concentrated mixture that you need to leave on the selected stain. Apply the mixture with a toothbrush or cloth and leave it on for 10 minutes. Then check if the product has worked, and if not, repeat the procedure. At the end, rinse with water and wipe dry.

These methods will help to remove the oldest stains on an artificial stone sink. They are also not dangerous to health and the sink itself.

SECRETS OF PERFECT CLEANLINESS OF AN ARTIFICIAL STONE SINK

The sink is an indicator of cleanliness in the house. No matter how strange or obvious it may sound, it is true. It’s very important to take good care of it, especially if it’s dominated by black. Dark colors show stains, scratches, plaque, and food marks much more clearly.

Therefore, you need to remember a few basic rules:

  • Periodic cleaning, which is so necessary to keep the sink clean, should take place at least 1-2 times every two weeks. Not less often, otherwise the presentable appearance will be lost.
  • Immediate removal of stains. Grease and other stains should be removed immediately if they appear.
  • Be careful with the dishes, as they should not be thrown into the sink. Pay special attention to forks, spoons and knives, which can easily scratch the surface.
  • Do not put hot items, such as pots and pans, in the sink (when draining the water). This is very dangerous, as it can cause white stains, such as from a hot pot on a wooden table.
  • Using detergent as a regular cleaning agent. If you wash the dishes, you can wipe the sink itself, it’s not that difficult. It’s probably much easier than doing regular cleaning every 2 weeks.
  • Wiping the sink dry is a mandatory step that should not be missed. Everyone probably knows that bacteria spread with moisture, and we don’t need them. Therefore, after each use, be sure to wipe dry with a cloth.

And in general, in order to make your home clean and cozy it is best to contact our cleaning company. Specialists of our service will perform everything at the highest level.

Post thumbnail

HOW TO REMOVE WAX FROM FABRIC EASILY AND SIMPLY AT HOME

You wanted to spend a romantic evening, but something went wrong. Or maybe you just wanted to spend time in comfort, but candles and awkwardness decided otherwise? Sometimes we can spill hot wax on our clothes by accident. However, this is not a problem, because TivaCleaners has prepared the best ways to remove wax from clothes. Without exception, everyone has had such situations at some point. And who doesn’t, we are living organisms, right? Perhaps you want to remove paraffin/wax stains from the carpet, or maybe you just accidentally spilled it on your clothes. For example, on your favorite jeans or sweatshirt.

It doesn’t matter, because what you’re interested in is how to get rid of hardened wax stains on fabric. We will analyze different cases and materials to which this situation applies.

WAX ON THE CARPET

A white, beautiful and fluffy carpet – that’s how it was before the wax got on it. Disgusting, most likely dried wax. It is much easier to remove wax marks immediately after they appear.

So if you have just spilled hot wax on the carpet, follow these steps:

  • As soon as the drop hits the carpet, wait until it is completely dry.
  • Then, apply a cold ice pack (this should help remove large marks).
  • After the cold has taken effect, try gently cleaning the wax residue with tweezers or just your hands.

If that doesn’t work, use the iron and parchment paper method: Turn on the iron and place a piece of parchment paper over the stain. Start running the iron over the spot and after a while, the wax will stick to the paper.

The situation should be a little worse with a fluffy carpet, such as one with lint and long hair. The wax can penetrate much deeper and you need to act immediately. If you can’t remove the wax in this way, you should definitely contact a dry cleaner to avoid spoiling anything.

WAX ON A LEATHER SOFA

A beautiful, well-maintained and amazing sofa in the living room. It’s a fairy tale, isn’t it? And how much money does this miracle cost, it’s painful to imagine dried wax on it.

If the wax (due to its high temperature) has not burned the material, it’s good. In this case, you can start cleaning the leather product. This method applies to any genuine leather product. Eco-leather or artificial leather does not really fit into the category, because they are made of synthetic materials (we’ll talk about them later).

So, to remove wax or paraffin from a leather product, follow these steps:

  • After the stain has dried, take any baby oil.
  • Put a sufficient amount on a cotton ball and try to remove the wax.
  • You can also leave the cotton pad on for a while (10 minutes) so that the mark softens and gets completely soaked.
  • Next, try to remove the residue with a knife, but very carefully.

If necessary, repeat the procedure until the desired result is achieved.

This is actually the only solution to the problem, because using an iron is not recommended. Of course, you can try to heat the stain at a low temperature, but it is not known how the skin will react to this.

WAX ON THE TABLECLOTH

Sometimes, during feasts, wax can also be spilled. Someone touched a candle on the table with a careless hand movement, and that’s it. The tablecloth is stained and now there is only one thing on your mind: how to remove the wax from the fabric.

This is not a problem at all, because such situations happen often, so there is a solution:

Remove the stain with your hand: Usually, the tablecloth is made of synthetic materials. Therefore, the wax itself will easily come off.

  • Alcohol: This tool works well with wax marks. You need to take a cotton pad and saturate it with alcohol. Leave it on the stain for 5-15 minutes and then remove it with a knife/fork/tweezers or just your hand.
  • Peroxide: It works in the same way as alcohol. You need to moisten the stain with peroxide and leave it for 5-10 minutes (suitable only for light fabrics).
  • Iron: A great basic solution. Take a piece of parchment paper and place it on the stain. Heat with an iron and repeat the procedure until the desired result is achieved.
  • Freezing: Suitable for those situations when the stain is fresh. You need to take an ice pack and apply it to the right place. Once the ice has set in, try to remove the excess wax with a knife or tweezers.

And voila, you’re done! There is nothing complicated, but it seemed rather the opposite. However, in some cases, the stain may be more difficult to remove. Therefore, you need to act immediately.

HOW TO REMOVE HARDENED WAX FROM CLOTHES AT HOME?

Maybe you spilled wax on your favorite jeans or shirt? This is not a problem either, because it is quite easy to remove wax from clothes!

Almost all clothing, including jeans, shirts, skirts, dresses, and blouses, can be cleaned with alcohol. Alcohol works well with hard wax and acts as a solvent. This method is suitable for both synthetic and natural fabrics.

Sometimes greasy marks may remain after waxing. In this case, we will use a proven home remedy. Take 2 tablespoons of baking soda and add a few drops of vinegar and 200 ml of water. Moisten the desired oily area with the liquid and wait 5-20 minutes. See for yourself whether the stain comes out or not. If not, hold the composition a little longer, and if it does, rinse it off with water.

HOW TO REMOVE PARAFFIN FROM CLOTHES

Paraffin can get on the fabric. It is slightly different from wax. For example, wax is quite plastic and you can feel it, but paraffin is not. If it hardens, it can only be removed with heat. That is, if you heat it up, it will crumble and the stain will disappear by itself.

Therefore, the only effective method for dealing with paraffin on clothes is an iron or a hairdryer:

  • Prepare a napkin or parchment paper.
  • Take an iron or a hairdryer (at your discretion) and heat the stain to the desired state.
  • As soon as the paraffin is absorbed into the paper, stop heating.
  • Remove the remaining stain with tweezers and you’re done.

If the stain is not completely removed, repeat the procedure until the desired result is achieved. It may take some time, but it will help.

THE MOST COMMON MISTAKES WHEN ELIMINATING WAX

When trying to remove paraffin or wax, most people make mistakes. For example:

  • Do not rub the wax stain immediately. You need to wait until it dries and only then resort to cleaning methods.
  • Also, you cannot chip off the marks without using ice. First, you need to freeze the stain, and only then eliminate it.
  • And in general, you need to choose the right cleaning method according to the material on which the stain is located.

Lastly, it is a super big mistake to use a hair dryer to remove wax from a jacket, which can damage the fabric. In such cases, it’s better to use alcohol, peroxide, oil, or one of the above. And, for example, only an iron is suitable for a carpet. Therefore, you should take into account the recommendations.

In general, to keep your home clean and cozy, it is best to contact our cleaning company. Our service specialists will do everything at the highest level.

Post thumbnail

How often does an office need to be cleaned?

The office determines the prestige of the company in the eyes of guests, partners and employees. The first thing that every person who enters an office pays attention to is the interior, comfort and cleanliness. It is these three indicators that form the first impression of the company’s reputation and management. In addition, employees themselves feel more enthusiastic to come to the office and work with dedication when they are in a clean, neat environment. Employee productivity increases when there is no dust on the furniture around them, daylight comes in through clean windows, and carpeting does not emit odors. The order of cleaning the office is different from the home, has its own specifics. Often, completely different methods and professional means are used for this purpose. In dealing with office equipment, special care is required, which is well known to the professional cleaner.

Regardless of the size of the office space, it is necessary to periodically carry out comprehensive cleaning. However, the frequency of cleaning should be selected independently based on the following criteria:

– The number of employees working simultaneously;

– The scope of the company’s activities;

– Type of flooring.

In the office there are always many more people than in an ordinary apartment or house. Just imagine how much dirt from street shoes settles on the floor. And if instead of tiles there is carpeting? This leads to a significant accumulation of dust and dirt, which is then breathed by employees.

Cleaning frequency

If the total area of the office space exceeds 200 square meters, it is best to carry out wet cleaning every day before or after the working day. Since such an area usually involves the work of more than 10 people.

In what other cases it is necessary to do wet cleaning every day:

– Customers or couriers often come into the office wearing street shoes;

-Employees often travel out of the office to perform work duties (for example, if they are appliance repairmen or other service personnel);

– The office has carpeting (it should be vacuumed every day in this case).

Cleaning once a week is only possible in small offices with 1-3 employees who do not leave the office during the working day.

Types of Cleaning

Many people have a question about how often they need to do general cleaning in the office. If you have to mop the floors or vacuum 1-5 times a week, how often do you have to move furniture and wipe down light fixtures? Practice shows that general cleaning in a small, medium or large office should be carried out at least once a month. This involves washing curtains, wiping down lighting, washing windows, and scrubbing the floor behind cabinets and desks.

Factors contributing to the amount of dirt in the office:

– The room is near a busy road or highway (road dust enters the room through windows or vents);

– The office has a large number of cabinets, shelves, desks with stationery (a lot of dust accumulates on all these);

– Employees or visitors without a change of shoes often enter the room directly from the street;

-Toilet in the office is small and there is always a queue.

To keep the office always clean, it is worth to turn to professionals from the cleaning company TivaCleaners.

Why entrust office cleaning to professionals?

It is almost impossible to achieve the desired result on your own, because you may need different equipment and professional products. They are characterized by high concentration of active components and quite high cost. Therefore, turning to professionals becomes the best solution. 

If you order office cleaning from us, you can count on the ideal quality of work, a guarantee of reliability and adequate cost. Employees take full responsibility for how the relevant work in the office will be performed. This excludes the occurrence of force majeure in the form of furniture breakage and other similar difficulties. Perfect cleanliness of the entire office after completion of the work is guaranteed.

Post thumbnail

HOW TO GET RID OF MOLD ON THE WINDOW?

You always want to have order in your home, and everywhere. The question is whether you want to clean it. However, if you don’t clean regularly, mold can appear. Therefore, TivaCleaners will tell you how to remove mold from windows at home.

It’s disgusting to even think about mold. Green fungus sounds disgusting, doesn’t it? Imagine if you come to the window every day and see the whole window frame covered in blackness.

Let’s not forget how fatal this is for your health. Not only are these bacteria, but they also pollute the space around them. The air that your children breathe, you, and even the furniture, where bacteria can also penetrate.

But it doesn’t matter! You can remove mold from windows at home, using both purchased methods and folk remedies.

WHY DOES MOLD APPEAR?

Before getting rid of mold on a window, you need to find out the obvious reasons why it appears there. The main reasons are as follows:

  • high humidity;
  • leaking pipes;
  • insufficient air flow in the room;
  • irregular cleaning.

Let’s talk about each of them in detail. For example, high humidity can be caused by poor-quality protective rubber. And because of this, air can penetrate the cracks, steaming there, which causes humidity.

Leaking pipes can also affect the condition of the window, as batteries or pipes are usually located under the windows. Again, this causes increased humidity and thus bacteria spread even faster.

Insufficient airflow is another reason why bacteria grow. If you ventilate too little or not at all, even more contaminants will appear.

And the last thing is, of course, an insufficient amount of disinfection, i.e. liquid cleaning. To prevent this, windows and their frames should be cleaned of mold REGULARLY (even if there is no mold). If this is not done, the bacteria will soon come out, and then it will be unpleasant.

HOW TO GET RID OF MOLD ON WINDOWS AT HOME?

Let’s slowly figure out what and how to treat areas covered with mold. There’s really nothing complicated, because bacteria is not a death sentence. We only need a few attributes to remove the bacteria.

We will need:

  • a toothbrush;
  • cotton swabs and pads;
  • the chosen cleaning agent;
  • a cloth.

This is more than enough to remove mold on the windows. By the way, a toothbrush is much better at fighting bacteria than ordinary dishwashing sponges. Therefore, it is better to prepare an unnecessary, old toothbrush.

HOW TO GET RID OF MOLD ON WINDOWS WITH FOLK REMEDIES?

Do you think there are more folk remedies or purchased ones? And what do you think works better, purchased or home remedies? Let’s just say that home remedies are often more effective in fighting fungus.

Soda, vinegar, salt or alcohol are still used by our grandmothers. It’s cheaper than purchased methods, and it’s more convenient because you have everything you need at hand. So let’s figure out how to remove mold from windows at home.

Soda

A fairly common method for cleaning windows from black fungus. Baking soda costs a pretty penny, but it works much better than purchased products. Follow these steps to clean the desired surface:

  • Prepare a paste from 3 tablespoons of baking soda and 1 tablespoon of warm water.
  • Mix the product thoroughly and put it on the desired surface.
  • Try rubbing the product in and leave it on for 10 minutes.
  • Then use a toothbrush to clean off the fungus completely.
  • Finally, use a wet cloth to remove any residue and wipe dry. 

If the mold is not completely removed, repeat the procedure until the desired result is achieved.

Vinegar and baking soda

The next, also quite effective method is vinegar and baking soda. Separately, they also work well, so you can try to remove mold with vinegar alone to start with. However, it is recommended to use this active mixture:

  • Mix 3 tablespoons of baking soda with enough vinegar to make a thick paste.
  • Apply the mixture to the fungus and leave it on for 20-40 minutes.
  • After that, scrub off the residue with a toothbrush and warm water.
  • Wipe dry.

This method should be kept for a little longer to maximize the effectiveness. So feel free to try it on your windows. And remember, if the fungus is removed, but not completely, repeat the procedure until you achieve the maximum result.

Citric acid

It is also a household favorite that will always come to the rescue. Whether it’s a fungus or a clogged bathroom. It is used in the same way as soda. They are even similar in consistency, but citric acid has different particles (coarser).

Simply mix 1 packet of citric acid with 1-2 tablespoons of water and apply the resulting paste to the plastic part where the fungus has appeared. Wait about 30 minutes and that’s it, the fungus is gone!

Peroxide or alcohol

This combination works great on blackness on plastic windows, so go ahead and try it!

How to clean mold with peroxide or alcohol: Prepare a cotton ball, alcohol or peroxide and mix it with water in a 1:1 ratio. Pump the resulting liquid into a cotton pad and then wipe the contaminated area. Repeat the procedure until the maximum effect is achieved.

When it comes to the percentage of alcohol, it does not matter. However, it is better to take ethyl alcohol, i.e. 70%, as it is suitable for plastic windows.

Soap, vinegar and baking soda

Sounds very unusual, doesn’t it? You might wonder how these products are compatible with each other. But they are very compatible. Compatible enough to remove mold in half an hour:

  • Mix 2 tablespoons of soap or dishwashing liquid with 3 tablespoons of vinegar and 2 tablespoons of baking soda.
  • Apply the mixture to the mold and leave it on for 15-30 minutes.
  • Then, go over thoroughly with a brush to remove the residue and a cotton pad with water.

The method should work the first time, but if it doesn’t, repeat the procedure until you get the best result.

Washing powder and vinegar

And the last, also effective combination is powder and vinegar. All you need to do is mix 2 tablespoons of powder with 2 tablespoons of vinegar (you should get a paste). After that, apply the product and leave it on for 20 minutes. Then brush it off and wipe dry.

There is absolutely nothing complicated, it’s simple and fast!

HOW TO GET RID OF BLACK FUNGUS ON SLOPES

Sometimes bacteria appear even on window slopes, so let’s figure out how to clean mold on window slopes:

  • Toothpaste: One of the most effective remedies in the fight against fungus. You need to apply the paste to wet slopes (moisten with a cotton pad) and try to wipe off the mold. Leave it on for 10 minutes and rinse again with warm water.
  • Fungus remover: A basic and effective remedy, especially since you don’t need to do anything. Just buy the cheapest one in the store. Follow the instructions and implement the cleaning.
  • Chlorine: Acts in the same way as domestos. Therefore, you can replace it with each other. Leave it on for 5-15 minutes and then rinse it off with water.

Remember that when working with chemicals, it is imperative to ventilate the room. Therefore, immediately after applying one of the methods, you need to ventilate the room well. And remember that you should also wear rubber gloves when working with chemicals.

HOW TO REMOVE OLD BLACK MOLD FROM WINDOWS?

There are also cases when standard methods do not help, because the fungus is so ingrained in the surface that removing it is torture. It is for such cases that there are the most aggressive methods that can be used to remove mold from windows at home.

We’re talking about ammonia. Aggressive, but effective. With its help, you can really forget about the fungus on plastic windows for a long time. However, you need to be very careful when working with ammonia, namely:

  • wear rubber gloves;
  • leave the window open;
  • remove unnecessary objects from the window sill;
  • protect bright places around.

Gloves are a must so you don’t do anything to your hands. And you should also ventilate every 1-2 minutes so that the smell does not get into the apartment or house.

Mix ammonia with water in a 1:3 ratio (1 part ammonia to 3 parts water). Apply this liquid to the mold with a cotton pad and wipe it well. At the end, be sure to rinse with warm water and wipe dry. Ventilate the room several times and you’re done.

Try to make sure that the room is empty (no small children or animals) when you clean it. Ammonia is not so dangerous, but it is better to be wary of its effects.

These were all the ways to remove mold on plastic windows. We hope that we have helped you, but it is better to order cleaning from us and save your precious time with us!

Post thumbnail

Peculiarities of stretch ceilings care

An important advantage of stretch ceilings is their unpretentiousness. They do not yellow, are resistant to the formation of cobwebs and mold. However, to maintain the impeccable appearance of the cloths, you should not forget about the regular removal of dust and other contaminants. There are simple rules, observing which you will achieve perfect cleanliness without compromising the integrity of the structure and without significant physical effort.

When should a stretch ceiling be cleaned?

There are no strict restrictions on the frequency of wet cleaning. In the absence of heavy soiling, it is sufficient to clean the ceilings once every two to three years. Wet cleaning is necessary after partial repair of the room, moving, unpacking and assembling new furniture.

The fastest stretch ceilings get dirty in the kitchen – they are constantly deposited particles of grease, soot, moisture. In the bedroom they stay clean much longer.

Cleaning products for stretch ceilings

During wet cleaning, remember that any ceiling coverings should be cleaned carefully, gently, without pressing hard on the surface. For cleaning you can use ordinary foam sponges without abrasive parts, microfiber cloths, any soft rags. There are special means for cleaning stretch ceilings. Instead of them, it is acceptable to use ordinary dishwashing detergents or sprays for glass and mirrors. Never try to clean stretch ceilings with compositions containing acetone, abrasives, chemically active substances, otherwise you risk ruining the product.  

Liquid means are not recommended to apply directly to the canvas. It is better to dilute a small amount in a container with water, foam and only then proceed to washing, periodically rinsing the sponge or cloth.

When wet cleaning high stretch ceilings, use a stepladder or a mop with a long arm. Most importantly, do not forget that the inventory should be lightweight, without sharp protruding elements. This will prevent accidental damage to the polyvinyl chloride film.

Useful trifles

Often after washing stretch ceilings, especially those with a glossy texture, unaesthetic streaks remain on the surface. A special washing technique will help to avoid this: wipe the cloth without pressure, moving from corner to corner, conditionally dividing the ceiling into several sections. Twist the cloth more often – it should not be too wet. Cobwebs are better removed with a dry cloth, not with a vacuum cleaner or mop. Any sharp movement will lead to the tearing of the film.  

With matte ceilings things are somewhat different. This type of finish is not recommended to install in the kitchen area, as grease stains are strongly embedded in the matte rough coating and very difficult to remove at home. But the matte finish has its own advantage – it is almost invisible streaks, which will greatly facilitate cleaning. 

A good help for cleaning stretch ceilings in the kitchen will be a steam mop with convenient attachments made of microfiber. Intense streams of steam will easily remove even stubborn plaque that has accumulated over the years.

To comply with safety regulations, wet clean your stretch ceilings during the daytime, with the lights off. To prevent lime scale on bathroom ceilings, wipe the ceiling dry after each use.

Washing of fabric ceiling coverings

Fabric ceilings make a room look truly luxurious. They are textured and look like decorative plaster. This type of ceiling perfectly masks all the defects and unevenness of the base. At the same time, you should know that not every fabric has a waterproof impregnation. Therefore, they are cleaned mainly with a dry method – a soft brush for the care of delicate coatings. It is better to refuse washing at all.

Clean very gently and carefully, without pressure, gentle longitudinal movements, because fabric stretch ceilings are quite fragile. Intense rubbing is strictly forbidden – it can disrupt the texture of the finish and spoil the appearance.

How to clean a stretch ceiling from various types of dirt

Let’s understand how and with what to clean ceilings from such types of contaminants as:

Soot

The kitchen is one of the most difficult rooms to clean. Grease stains and soot appear on all surfaces, including the ceiling. In the kitchen it is not recommended to install matte cloths, because it is not an easy task to clean them. The glossy finish requires less scrupulous care in this regard. In this case, strongly rub the surface, in an effort to wash away grease and soot, in any case is not allowed. The process of washing implies compliance with a certain technology:

  • First, the cloth is moistened with a soap solution;
  • is left for 15 minutes so that the dirt soaks away;
  • wiped with a wet sponge;
  • polished with a soft dry cloth.

Nicotine

If there are smokers in the house, yellow nicotine stains will form on the ceilings over time. To get rid of such contaminants, it is better to invite experts – a professional cleaning company. If you decide to clean the stretch ceilings yourself, then:

  • take a soft sponge;
  • make a soapy solution or arm yourself with a store specialized detergent;
  • set up a stepladder;
  • prepare a vacuum cleaner or a mop with a soft pile.

Nicotine stains are removed using a comprehensive approach. First, the ceiling structure is dry cleaned from dust (using a mop with a brush or vacuum cleaner). Then, standing on a stepladder, with a sponge soaked in detergent solution, wash the surface in a circular motion. We pay the greatest attention to the places with the strongest dirt. If necessary, the procedure should be repeated.`

Other types of contamination

Other possible contaminants include post-construction dirt (dust, traces of glue and primer, etc.). In this situation, treat the affected area with soapy water, wait 30 minutes for the dirt to soften, and clean the area with a sponge without pressing or rubbing.

Post thumbnail

Cleaning the apartment or house after cockroach baiting

Recently, many apartment dwellers have forgotten about the appearance of such unpleasant insects as cockroaches. This is due to the fact that for a certain period of time, the pests simply disappeared from human housing. However, such a period has passed and in decent apartments, in kitchens and bathrooms again appeared these unpleasant crawlers.

Under the procedure of destruction of insects means a number of activities, including disinfestation. Disinsection allows you to get rid of toxins, pathogens that are causative agents of diseases of various kinds. To carry out this procedure, they use specially designed poisons, contact with which should be avoided not only by children and animals, but also by adults. Further in the article you will learn how to properly clean the apartment after roach baiting.

How the apartment is cleaned after cockroach baiting

After disinfestation, traces of chemical components remain on surfaces, furnishings and other elements in the apartment. Thanks to professional cleaning of the apartment after disinfestation, the apartment is absolutely safe to live in. Cleaning is the final stage of disinfestation, which guarantees safety for people and animals.

The main difficulty of cleaning the apartment after roach baiting is that for disinfection to be effective, it is necessary to thoroughly treat all places in the house. Therefore, in order to eliminate traces of chemistry in the apartment, it is necessary to thoroughly wash all items in the room.

After 2-3 days after sanitizing, you should:

  • using a soda solution, wash all dishes;
  • get rid of dead cockroaches that may remain after disinfection on the floor or other surfaces;
  • vacuum floors, couches, baseboards and carpeting;
  • using a damp cloth, wipe down all surfaces;
  • using disinfectant, wipe down all room handles.

Ventilating the room after the disinfection procedure

Of course, after sanitizing, everyone wants to air out the apartment from chemicals as soon as possible.

Trusting the professionals of their business, one can not worry about health safety. In the process of cleaning by the specialists of TivaCleaners after cockroach baiting the specialists use only ecological means, which are absolutely safe for people and pets.

That is why after the employees of the cleaning company finish their work, it is not recommended to open the windows for airing immediately. For the effectiveness of the preparations, they should be left for about three hours, and at this point it is better to leave the room, going for a walk.

Clothes and toys: what to do with them?

The best option before disinfection is to pack all clothes, objects and toys in polyethylene. However, not everyone does this, as it increases the risk that pests may hide there and the procedure will be ineffective.

In the event that things have been chemically treated, they need a thorough washing at a temperature of at least 80 degrees. This is also true for curtains, bedspreads, bed linen and other textiles.

Advantages of cleaning

Carrying out cleaning services to clean the apartment after roach baiting allows you to get rid of unpleasant odors after the procedure, as well as clean all surfaces from traces of chemicals.

In the process of work such devices are used as:

  • steam generators;
  • mild household chemicals;
  • equipment for washing;
  • vacuum cleaners.

Turning to the specialists of the cleaning company, you will get an effective result in the form of perfectly clean and safe for living housing and save your own time and money.

Post thumbnail

Cleaning peculiarities in a home bath and sauna

Bathhouses and saunas are popular places of recreation. And the key to good steam in them is competent cleaning of the room. What are the features of cleaning in the bath and sauna, we will tell you in this article. Bath rooms should be cleaned regularly. Because of the increased humidity, steam and high temperature in them creates a favorable environment for the reproduction of pathogenic bacteria. Lime scale, particles of exfoliated skin, wet environment – these and other factors in case of their untimely elimination are a potential threat to sauna visitors. This is why sauna cleaning has a special characteristic: it is not only carried out to clean the sauna room, but also to protect the health of the occupants.

There are signs by which you can understand that the sauna needs cleaning. These are:

  • The presence of stuffiness, the presence of stale air;
  • the feeling of strong humidity in the premises;
  • lack of cleanliness on the floor or shelves;
  • blackening of wooden surfaces;
  • soot accumulation in the stove.

Methods of cleaning a private bathhouse

A private bathhouse should be cleaned once a week. Owners of private baths often neglect cleaning, believing that the absence of strangers reduces the risks. But in fact, even a cozy home sauna is a potential source of pathogens, due to high humidity combined with high temperatures.

Like commercial, private baths are cleaned according to a standardized algorithm:

  • treatment of surfaces with a mild soap solution;
  • cleaning of drains with special means;
  • cleaning of ovens;
  • elimination of detected pockets of mold or fungus.

A complete disinfection of all surfaces and premises of the private bath is also carried out. By following a simple standard method of cleaning it is possible to maintain an impeccable level of cleanliness and guarantee a safe vacation in the bathhouse.

General cleaning of the bathhouse

General cleaning of the bathhouse should be carried out at least twice a month. The whole process can be divided into four stages:

  1. Preparation: furniture, bathing equipment and other things (mats, capes, accessories) are removed from the premises of the bathhouse. If necessary, all these items are treated and disinfected.
  2. Dry cleaning: vacuum cleaners and brushes are used to remove large and small debris, dust and soot. Despite the high level of humidity, there is quite a lot of dust in the bath, so you should not neglect this stage.
  3. Wet cleaning: after thoroughly carried out dry cleaning, wet processing begins. Walls, shelves, floors are treated with soap solution and cleaning agents. Special attention is paid to drains; tiles are washed with water with an antifungal agent. It is worth noting that the pores of the human skin in the bathhouse open and actively absorb everything into themselves, so the cleaning of the sauna has peculiarities: it is not performed with aggressive compositions. When choosing cleaning agents, the specificity of the materials of the finishing of the rooms of the washing complex is also taken into account.
  4. Disinfection: when all the rooms of the sauna are cleaned of impurities, the disinfection stage begins. Different compositions are used as disinfectants; special impregnations and antiseptics are used for wooden surfaces to prevent the appearance of fungus.

In the course of general cleaning in a bath or sauna, the condition of the ventilation system is assessed and all rooms are thoroughly ventilated. The equipment for stoking, lighting devices are checked.

In order not to waste your time on the selection of means for cleaning and boring work, we advise you to leave an application to the specialists of our cleaning company. They will definitely do everything at the highest level for an affordable price. 

What about the stove?

A sauna stove can be large or compact in size, but remains a complex device and requires care in operation. Firing a sauna stove with wood or coal quickly gives a lot of heat, but a side effect of fuel combustion will always be the formation of condensation, soot, ash and stones. More often bath stoves and pipes in bathhouses are clogged not with soot, but with ash. This is due to the high temperature of operation of this device.

This dirt quickly enough forms a dense sediment on the inner surface of the chimney pipe, reducing its lumen. All these contaminants directly affect how effectively the sauna stove will work, as well as how many years it will serve its owner. Leaving it in this form is not only inexpedient, but also unsafe. After all, in addition to poor draft in the pipe, a large amount of ash can threaten an outbreak.

There are specific signs of clogging that signal that you should not delay cleaning the chimney. Among them are the following: the sauna has to be heated with more fuel than before; black and thick smoke comes from the chimney; the color of the flame in the furnace changes from orange to blue.

It should be realized that the sauna stove should be cleaned once a season. This is mandatory not only for the smooth operation of the furnace, but is also a guarantee that the sauna stove will serve you for many years and will be completely safe to use.

At the same time, a thorough inspection for “burn-throughs” and corrosion should be carried out. If the sauna stove was used in “public” domes, then the period of use of such a stove is no more than 5 years, regardless of the manufacturer. In private use, the period of use is much longer, but you should not forget to regularly clean the chimney of the sauna stove.

Before cleaning the chimney in the bath is started, it is necessary to assess the degree of clogging and narrowing of the chimney lumen. For this purpose, a flashlight is used, as well as a flexible cable with a video camera.

The easiest way to clean the chimney is to remove the clog and soot buildup mechanically, i.e. by acting on the principle of brushing. An important nuance is that for cleaning the chimney pipe it is forbidden to use metal-based brushes and brushes because they can easily damage the pipe, leaving scratches on its surface. So, it is better to use a polymer brush made of nylon or plastic.

Another way to effectively and quickly clean the chimney in the sauna is to use chemicals to remove ashes from the chimney. However, such chemicals can be used only if there are no mechanical blockages in the sauna chimney, and the thickness of the plaque does not exceed 2 mm. Chemicals come in the form of powders, briquettes, liquids – conveniently, they are burned together with the fuel.

If the bathhouse is idle for a long time, then before it is thawed, it is necessary to carefully inspect the chimney. And if possible, it is better to use a flexible cable with a video camera. This should be done in case there is a foreign object in the pipe (a bird, a nest, etc.). After all, when burning, the foreign object will emit an unpleasant odor, which will be difficult to remove.

With proper and regular cleaning of the sauna stove, all the dirt inside the device is unloaded and rewashed. All debris, ashes, soot that may have interfered with the smooth operation of the furnace is taken out. This task is also better to entrust to specialists in this field. 

Post thumbnail

What is the difference between general cleaning and maintenance cleaning

Cleanliness is an important component of creating a favorable atmosphere in the apartment, office and other premises, helps to increase concentration and ensures safety of stay in it. Maintaining cleanliness involves 2 types of cleaning – ordinary (complex) and general cleaning. Each of them involves the solution of certain goals and is characterized by its own features. In this article we will consider the difference between general cleaning and ordinary cleaning. 

Why is a general cleaning necessary?

General cleaning of the premises is a long and large-scale process, which consists of many actions to restore order in apartments, houses and other premises. Usually such cleaning is carried out every 2-3 months. However, sometimes there may be life circumstances when you need emergency cleaning. We are talking about situations when relatives suddenly came, it is necessary to eliminate the consequences of a noisy party or it is necessary to prepare housing for moving after the repair.  Therefore, it is difficult to say how often general cleaning should be carried out, everything is individual. 

Why is maintenance cleaning necessary?

Intermediate cleaning is a set of measures aimed at maintaining order in various types of premises. It is carried out in those cases when there are no old, difficult to remove stains and a large layer of dust on the surfaces. Usually such cleaning is carried out once a week, but it can be done every day at will (however, daily cleaning is quite tedious and therefore, to tell the truth, people resort to it very rarely). In general, there are no hard rules here, everything is at the discretion of the owner of the premises.    

To finally determine what is the current cleaning should analyze the list of cases, the performance of which it involves. This includes: 

  • performance of superficial cleaning without thorough cleaning of complex elements;
  • removal of dirt from tiles, laminate or linoleum, as well as removing dust from appliances, furniture, decorative elements in the house, apartment, restaurant or beauty salon;
  • vacuuming floors and carpeting in the premises;
  • wet cleaning of the premises.

What does a general cleaning include?

General cleaning, on the other hand, is a more “serious approach” to cleanliness. This includes a whole list of tasks, including:

  • washing windows and doorways
  • radiator cleaning
  • polishing lacquered and mirrored surfaces
  • wiping down electronics and appliances
  • Dusting of wall constructions
  • cleaning carpets and other floor coverings
  • tidying up up upholstered furniture, etc.

The order of general cleaning of rooms usually includes such an algorithm:

  • twisting tracks and carpets, their knocking out
  • removal of curtains and their washing, also at this stage you should take care of cleaning the decoration
  • kitchen cleaning (washing dishes and kitchen utensils)
  • cupboard cleaning
  • washing windows (to avoid streaks you should resort to certain tricks, but to achieve a good result in fact it will be possible and without experts)
  • washing interior doors and handles
  • removing dust and cobwebs from corners
  • vacuuming surfaces (carpets, upholstered furniture) in the rooms
  • polishing of furniture fronts
  • bathroom cleaning
  • cleaning of hallways, etc.

Tools and equipment used

Complex cleaning of premises implies the use of a huge amount of inventory. It includes: household sponges, mops, buckets, bags for household waste, scoops for cleaning, products for bathrooms, products for cleaning the floor, etc. 

However, wet cleaning of premises from specialists is a different story. It involves the use of steam generators, special sweepers, special vacuum cleaners, etc. Apart from the fact that it provides better cleaning and higher speed of execution, calling a professional cleaner is also about comfort. You don’t have to store around for special cleaning products, think about how a particular surface will react to the product, whether it will be damaged, etc. To be sure that the cleaning will be done at the highest level you should contact our cleaning company.

Post thumbnail

Tips on how to care for your shower enclosure

“What products for the shower cubicle should be bought so that it looks presentable even after a long period of time?” – is a question that is relevant for all owners of the hydrobox. Hard water and frequent use of the cabin negatively affect its appearance and it happens that after a year of using the equipment cabin looks just terrible, it appears lime scale and so on. The fault is improper care. However, aesthetics, or rather its absence is not the biggest problem. Improper maintenance can cause failure of the whirlpool, breakage of the faucet, etc.   
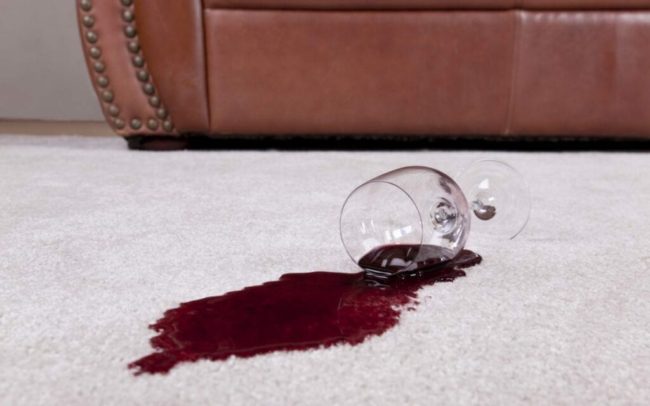
Daily care

Unfortunately, people who are looking for information on how to care for a shower enclosure are faced with many disappointing moments (difficulty in maintenance, the need to use special products, etc.). One of the most important is the fact that it is necessary to take time every day to care for the cabin. True, there are some cleaning tricks – if you use special means, you will be able to delay cleaning a little.

Care of the shower enclosure walls and doors

In order to determine how to clean the doors of the shower cabin, you need to know what material they are made of. After all, what may be suitable for the care of plastic is not suitable for cleaning glass and vice versa. Let’s consider the most popular materials and peculiarities of their cleaning:

  • Tempered glass

It is a material that causes almost no problems and is easy to maintain. It is presented on the market in several variations, so tempered glass can be tinted, frosted or transparent. Due to its high performance characteristics, or rather its strength, the glass does not crack, does not scratch and is able to last for 10 years without losing its appearance. To make it look beautiful you should regularly wipe the walls and doors of the shower cabin dry and treat them with a glass cleaner. The latter is designed to protect the wall surface from dust settling. This, in turn, minimizes the risk of white deposits and streaks on the surface of the shower cubicle, which are difficult to avoid under other conditions, because they are the natural result of the impact of water on the surface of the cubicle. For a good result, the glass cleaner should be used every time after using the cabin, which is of course inconvenient. For this reason, many people are concerned with the question of how to treat the shower cabin, so as not to spend so much time to care for it. In fact, there is a way out – it is necessary to use an anti-plastic coating. It not only prevents dust from settling on the surface, but also repels water from the walls. 

  • Plastic (polystyrene)

If the walls and doors of the shower cubicle in your bathroom are made of polystyrene, then you will have to work harder (and a simple detergent for the shower cubicle will not work – you need to buy special products). This is due to the fact that on the plastic from dried water droplets a white deposit is formed, which gives the shower cabin an untidy look. But here just a remedy from the plaque in the shower cabin will not solve all the problems, as there are often cases when the surface of the cabin begins to yellow for no reason. Only special substances that should be sprayed on the surface after each use of the cabin will help. 

Prevention of mold and mildew

Lack of air circulation in the room, leaky faucets, poor quality sealant can provoke the appearance of mold in the bathroom. Ways to fight mold depend on the localization and type of mold in the shower cabin. The most vulnerable place is the sealant, they treat the joints and seams between the tray and the facing finish. To get rid of mold must first remove the mold from the surface, therefore disinfect it (for this you can use various means, including chlorine, special anti-mold for the cabin, etc.). 

However, only specialists can guarantee to remove mold on the silicone in the shower cabin. After all, only they will be able to assess the degree of surface damage, find the cause of the fungus and select the most suitable antifungal means for the shower cabin.

Cleaning of fittings and drain holes

Thinking about how to clean the glass in the shower enclosure, you should not forget that not only it and the tray are important. In no case should you forget about the fittings. The composition of the means should be chosen based on the characteristics of the material from which the fittings are made. There are matte options, glossy, etc. 

Pallet care 

The most popular material that is used in the production of shower cabins is acrylic, in this regard, people often think about what to clean acrylic shower cabin. The most important thing to remember is that when cleaning it is forbidden to use means that contain abrasive particles (often manufacturers of cabins indicate in the instructions what means are allowed to use to clean acrylic) and hard brushes (you can only use a soft sponge – this rule should not be forgotten). In general, however, washing does not require special efforts – you just need to apply detergent to the surface and wipe it with a soft sponge. 

If you are interested in how to remove limescale in the shower cabin, then everything is simple – you can use vinegar or lemon juice. Any of the compositions should be applied to a soft cloth and gently rub the stain. This is a great way to quickly clean the tray. 

However, determining what to wash the glass in the shower cabin and what to clean the shower tray is only half the battle. In fact, it requires a lot of time. To avoid wasting it, it is better to contact the experts of our cleaning company.

Post thumbnail

How to clean a glossy kitchen quickly and effectively

A kitchen with a glossy facade looks very aesthetic and attractive. But the care of such a headset requires a lot of effort and time. In this article we will tell you how to clean a glossy kitchen as efficiently as possible, so that it will please its owners for a long time.

Types of glossy surfaces

Four main methods are often used to produce furniture fronts with a glossy surface. This can be plastic, paint, PVC film or acrylic coating.

Plastic coating

Plastic-applied kitchens refer to highly durable options. Chipboard or MDF boards are not usually used for this type of coating. A plastic sheet is applied to the front side of the facade. It is usually applied by postforming, under pressure and high temperature.

This coating must be cleaned with non-aggressive detergents.

When washing the plastic sheeting, you do not have to worry about it getting wet. This material is completely waterproof. It has a fairly high strength, so such a kitchen can serve you for a very long time.

However, glossy plastic tends to lose the brightness of the color, so be careful when choosing detergents. It is very important to first try a new product on the least noticeable area. If everything is fine with the color, then safely clean the entire kitchen set with it.

The most universal remedy that can be used for cleaning is an ordinary soap solution. Such a solution is able to remove most contaminants and will absolutely not damage the surface. After the cleaning is completed, it is necessary to dry wipe the coatings to a shine. You can use special rags for glass surfaces, which are sold in most hardware stores. They can easily remove streaks on the glossy surface.

Painted facades

 It is the MDF boards that are most often painted. First, the desired color is applied and then several layers of lacquer are applied on top to achieve a glossy effect. The technology of application is quite complicated. Each layer must be carefully sanded, primed, sanded and dried. But in the end you will get an absolutely even, perfect surface.

Small defects in the process of operation on the painted surface can be corrected, unlike plastic. But it is still necessary to avoid scratches as much as possible. Non-abrasive detergents can be used to clean these facades.  At the end of cleaning, it is necessary to wipe them with a dry microfiber cloth in order to eliminate unnecessary streaks.

For painted facades, you can also apply a soap solution. Also a very good remedy according to the reviews of hosts is an ordinary glass cleaner. Especially it is indispensable for dark surfaces, on which stains are more noticeable. It is recommended to apply the product to the facades and wipe with a dry microfiber cloth.

PVC film

A glossy PVC film is glued onto the MDF facades by vacuum pressing. These kitchens are economical options. This surface can be cleaned with non-abrasive detergents. After all, such a film is quite resistant to damage and discoloration. PVC film can never be washed with abrasives and dry powders, they leave scratches that can not be removed.

Since the film is loyal to most detergents it can also be washed with soap solution and glass cleaner. Also a very effective and fast method of fighting stains on facades are ordinary household wet wipes. They do not leave streaks on the surface and effectively deal with dirt.

Acrylic facades

 For these facades, MDF boards are taken and acrylic plastic is applied to them. A special machine is used for this purpose. Pollution from such a surface can be removed quite easily. These facades, if there are defects on them, can be polished. But in no case should they be washed with aggressive detergents, as you can lose the shine of the glossy facade.
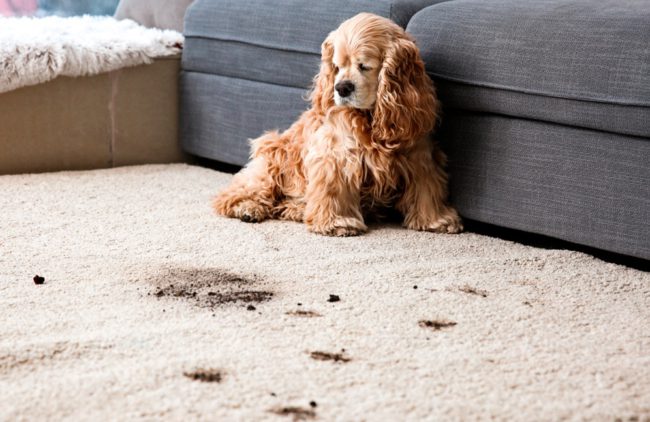
All the previous methods of fighting dirt are applicable to acrylic surfaces. You can use soap solution, glass cleaners, household wipes and any other non-abrasive detergents.

Pros and cons of gloss facades

 The advantages of glossy facades are many. They look very effective and beautiful, and due to the reflection of light they visually increase the space of the kitchen. However, such a kitchen, unfortunately, requires careful cleaning. After all, it gets stains from touching with fingers, from water, from oil and other divorces. This is most likely the most basic disadvantage of glossy surfaces. To make such stains were less noticeable, it is better to buy not a monochrome gloss, but with some flecks. This can be, for example, gold, silver chips or any other colored.

In order to minimize cleaning, you can buy only glossy hinged cabinets, and the bottom of the kitchen to pick up with some other, for example, matte surface. It is also very important to pick the right color. On the dark glossy will be more noticeable contaminants, and on light, respectively, less.

Care of glossy facades

 In order to keep the facades looking attractive at all times, they need proper care. It is very important that the kitchen is kept dry. Otherwise, the shelves and fronts may swell from excessive moisture and even become moldy. It is important to install the kitchen in such a way that sunlight does not fall directly on the glossy facade. This will help to preserve the brightness of the kitchen color for a long time.

If you have purchased a detergent concentrate, it is imperative that you dilute it before using it to wash glossy facades. It is ideal to buy a special paste or wax for kitchen care.

On sale now you can find universal gels for degreasing surfaces. It can even be an ordinary dishwashing detergent, For cleaning you will need a microfiber cloth. Apply the compound to all fronts, then simply wipe with a damp cloth with a little water. Next, you should wipe the fronts dry. It is best to use disposable rags for this purpose, which are sold in large skeins. This will completely avoid streaks. With daily wiping of surfaces, your furniture will always look neat and beautiful.

When buying detergents, it is necessary to pay attention to the composition. Use soft cloths and non-abrasive liquids without aggressive components. Make sure that the products do not have a dissolving and corrosive effect. Otherwise, they may cause the facades to become cloudy or have streaks. It will no longer be possible to get rid of this.

The range of detergents is now just huge, so it is important to know what to wash the glossy kitchen set, so as not to spoil it. As has already been said many times, in no case do not buy abrasive means for washing facades. From the first time they will not scratch the glossy surface, but over time it will darken and stop reflecting light. Sponges should not be stiff for the same reason. Use the softest cloths designed for gloss or glass.

And to make sure that cleaning is not a reason for frustration and your time was not spent on boring walking with a rag around the house, we advise you to leave a request to the cleaners of our company. They will do everything to make your kitchen shine clean and the glossy surface looks attractive after cleaning. 

Post thumbnail

How to clean lime scale from plumbing fixtures with minimal effort and expense?

Tap water contains an excess of potassium and magnesium, which are the main cause of lime scale on the surface of sanitary ware. Limescale stains spoil the appearance of surfaces, especially chrome-plated ones, and the problem can worsen over time if not taken care of in time. In this article we will talk about the peculiarities of cleaning faucets made of different materials. 

Folk ways to get rid of lime scale

1. If we talk about budgetary ways to get rid of lime scale, the first point, of course, will be a folk remedy – soda. For its use you need to dilute with water to form a thick mass, apply to the surface without rubbing, leave for an hour, then carefully remove the residue. If there are still spots – rub with the hard side of the sponge, rinse with water and wipe dry. 

2. You can use baking soda with the addition of laundry soap. Dilute a crushed bar of soap with one teaspoon of baking soda and add a little hot water. Apply the resulting liquid to a washcloth and you can start cleaning starting from the bathtub, ending with the kitchen table. It can be used on absolutely all surfaces as it is hypoallergenic and disinfectant. 

3. The next one of the most affordable means is – 9% vinegar diluted with water 1 to 1. Soak a rag or washcloth in the solution, rinse, requiring cleaning sanitary ware, rinse with water and wipe dry. It is good if after cleaning you rub the washed surfaces with microfiber, which will add shine to the chrome surface.  

4. Citric acid is one of the most indispensable helpers in the kitchen and bathroom. You can clean the surfaces with the lemon itself, cut in half and dipped in salt. And you can use citric acid. To do this, using a damp washcloth or rag, apply it directly to the problem areas, leave it for a while and wash it off with water. In addition to fighting with lime scale, with the help of this means you can get rid of mold in the washing machine. 
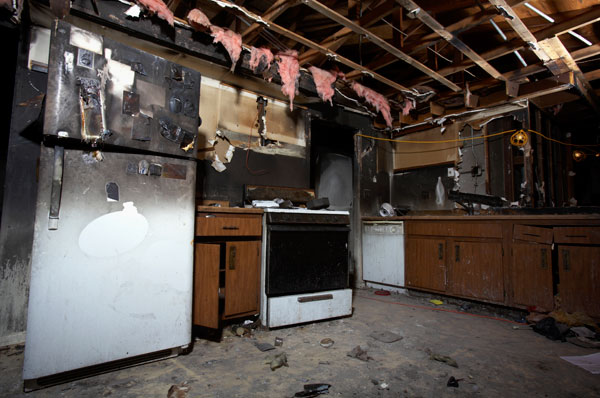
However, if you keep up with the times, you realize that technology does not stand still, and therefore, to reduce the time of cleaning should use the “right” household chemicals, which are analogous to folk remedies, as they also consist of natural components and hypoallergenic. It is important that they do not contain acids, which can spoil the chrome surface. 

How to clean a faucet properly

To clean the faucet is quite simple, but there are peculiarities here. The fact is that lime stone very often accumulates not only on the surface of the faucet, but also in various locking elements, because of which small particles are able to create micro cuts in the threads when closing and opening valves, which will lead to increased accumulation of plaque there and the development of corrosion. Also, dirt often remains in hard-to-reach places, which can be very difficult to remove from. Here are some tips on how to deal with all these problems simply and effectively:

  • Use liquid faucet cleaners in spray form so that the substance gets into even the smallest of grooves.
  • Clean the faucet both open and closed – this way you’ll be able to remove more dirt from hard-to-reach areas.
  • Use a toothbrush to clean hard-to-reach areas. You can use it to clean all the curves of the faucet very conveniently.
  • When using household chemicals, carefully follow the manufacturer’s instructions for use. If you want to take out a strong contamination, it is safer for the faucet to apply the remedy twice than once, but for a long time.
  • Rinse the plumbing well after the residue of household chemicals and, preferably, dry it with a towel or napkin.

By following these ingenuous rules, your faucet will always be clean and will last for many years.

How to clean chrome surfaces

Chrome faucets always look particularly stylish and emphasize the finish of a bathroom or kitchen. Except that such sanitary ware needs regular and reverent care.

Keep in mind that if for just iron faucets were contraindicated hard brushes, then for chrome surfaces their use is prohibited by the police common sense!

To clean a chrome faucet safely and effectively, observe the following rules:

  • Regular maintenance.

In any spare moment, wipe faucets with a slightly damp microfiber cloth. And then dry. In this way you will remove minor dust and grease deposits.

  • For small soiling.

If the dirt is small and mostly organic in nature, you can clean it with a regular dish detergent. Lather a sponge, apply the foam to the faucet for a minute, and then rinse well. It is necessary to repeat several times.

  • For dirt.

If the faucet appeared before you in a completely deplorable state and the fact that under the layer of dirt is a chrome surface, you know only from your happy memories, then take a special household chemical for cleaning and do not try your fate, doing amateur work.

Chrome likes regular maintenance, as most models of sanitary ware have a very thin plating, which can only be prolonged by treating it with care.

Nickel-plated faucet: cleaning features

A nickel-plated faucet can, in fact, be cleaned using the above methods. For its cleaning, it is also strictly not recommended to use any abrasives and hard brushes. Apart from the mentioned techniques, you can add a few more equally effective ones:

  • use a window cleaner for small contaminants – fast, does not require rinsing, does not leave streaks;
  • soap solution with the addition of food salt effectively and gently removes not very dense lime scale, just be sure to rinse the solution well;
  • fish or animal fat – apply it to the stains for a couple of days, then wash it off together with the dirt easily and safely for the nickel surface.

Such techniques are, without exaggeration, ways to prolong the life of your plumbing fixtures many times over.

How to clean bronze faucets

Bronze faucets differ in material structure from their chrome and nickel-plated counterparts. Their matte surface is not so sensitive to physical damage and some acids, but they have another problem – due to the lack of a dense glossy protective layer bronze over time fades, darkens and can even become stained. What to do?

Here you can play a little with different acids. We suggest starting with tomato paste. Just coat the mixer with this substance for half an hour and you will be surprised how citric and malic acid perfectly cope with the darkening of bronze.

Another interesting and simple way is to use flour, salt and vinegar in a 2/2/1 ratio. The resulting mixture should also be applied to the faucet for about half an hour, after which wash the faucet well and dry it with a napkin.

But each of the methods requires time and a certain caution. To be sure not to harm the surface we advise you to contact us. We guarantee impeccable quality of service and safety of your property. 

Post thumbnail

How to clean windows correctly

“How to clean the window, so that it does not leave streaks?”. – a question that sooner or later will interest any owner of the premises. Dust, dirt, traces of insects on the windows are not only the cause of deterioration of the degree of illumination in the room, but also worsen the appearance of the window. Not only is it simply not aesthetically pleasing, but it also affects the reputation of the home or commercial premises owner. To keep your windows shining clean, read the simple and useful tips below.

Preparing for the window cleaning process

First of all, it is necessary to determine what to clean the windows to shine. We are talking about detergents, as well as inventory. As for the inventory, then here you should pay attention to:

  • Sponges, which have a porous structure and a hard layer. Such sponges cope well with various contaminants and absorb moisture well;
  • glass cleaner, which have an adjustable handle. Such inventory allows you to perform cleaning in the most comfortable way – you will not need to move chairs, tables, trying to reach the top of the window – with a slight movement of the hand you will set the necessary length of the product and calmly wash the window. There are different nozzles, so you can achieve the desired result and clean the window without streaks. Allows the wiper to clean windows including the outside. Separately it is worth noting cordless windshield wipers – they are very convenient in operation and their use involves a minimum of effort, but such devices are not very cheap;
  • textile (cotton) rags. It absorbs condensate well, is not magnetic and therefore allows you to quickly cope with the task at hand in the best way.
  • microfiber. This cloth allows you to remove excess water and achieve the desired shine of glass. 

But metal scrapers, available in many stores, are those devices for washing windows, which are not recommended to use. They can leave micro cracks on the glass.

As for detergents for cleaning windows, it is better to give preference to creamy and liquid compositions. They are the safest for the glass surface. You can also wash windows without chemistry – if you plan to use home remedies, it is worth paying attention to laundry soap, alcohol and vinegar. Bulk substances are better not to use, as abrasive particles can scratch the surface and give the glass a matte appearance.

Choosing the right time and weather conditions

When figuring out how to properly clean your windows to make them shine, you should not forget that tools and instruments are not everything, it is also important to know when to clean your windows. The most suitable time to wash windows and achieve a perfect result is a warm, cloudy, windless day. Bright sun and wind are factors that affect the speed of drying of glass and too increase it, as a result – on the surface quickly appear streaks. In the rain, it is difficult to wipe glass surfaces dry and see how clean they are.

Preparation of cleaning solution

If you decide to clean the windows not with means from the store, but with your own handmade solution, then we advise you to use such substances (and proportions) for its preparation: 0.5 liters of water, 70 ml of vinegar and a teaspoon of dishwashing detergent. Especially think about how to wash windows with vinegar in this way is not worth it – everything is extremely simple. Prepared solution just wash the windows, paying special attention to contaminants, after – rinse the surface with clean water and wipe the surface dry.

And you can simplify the task and do without vinegar. Surely you have heard that you can wash the windows with newspaper (your parents definitely know about this kind of lifehacks). Now we will tell you how to do it properly – you roll the newspaper into small balls and wet them in vinegar, then rub the surface of the glass with circular movements and enjoy its transparency. It is worth noting that newspaper (but without vinegar) can be used as the final stage of the above-mentioned method of window cleaning.

Glass and frame cleaning

Thinking about how to clean windows without streaks, do not forget that windows are made of different materials and have certain features. So, determining what and how to wash the glass and frames, we advise you to think about these points:

  • What to wash plastic windows you can read in the manufacturer’s recommendations. Usually they indicate the recommended compositions that will achieve an aesthetic result without yellowing, scratches, etc. Usually there are special means for plastic;
  • wooden windows should be washed as quickly as possible, as moisture can provoke deformation of the frame;
  • start washing from the frame, and then move on to the glass;
  • the window sill is washed last, because in the process of washing it will get dust, moisture, insect residues.

Cleaning of window frames and window sills

Many window manufacturers have thought of everything in detail – so that their customers do not have to think about how to clean windows quickly and with what, they offer ready-made cleaning kits. They include detergents, seal care products, etc.

If you do not want to waste your time thinking about what to wash windows with so that dust does not settle, how to wash windows with a glass cleaner, etc. – contact the specialists of TivaCleaners They will do everything quickly and the gorgeous result will be ensured.

Post thumbnail

HOW TO CLEAN PAINTED WALLS WITHOUT STREAKS

Painting walls is a rather practical solution. After all, painted surfaces are easier to maintain than wallpapered ones, they are easier to clean from various contaminants and in general they are quite unpretentious. But over time they still lose freshness and cleanliness, so it is necessary to carry out timely wet cleaning, remove various stains and other types of contaminants. But how and with what to do it correctly? And how not to make mistakes? How not to spoil the paint?

Today we will tell you how to wash the walls without streaks, how to wash even the most difficult stains and not spoil the coating. And at the same time we will tell you what to wash painted walls, and what is better not to use. Let’s get started!

WALL CLEANING PREPARATION

Nothing complicated at this stage, but still some preparation is necessary. Here’s what you need to do before washing painted walls:

  • Remove from the walls all decorative elements: photos, paintings, posters.
  • If possible, remove all sharp hooks, remove nails and anything you can hurt yourself on. But make sure that the paint does not crumble.
  • Move furniture away from the walls and cover it with foil or cloth to protect it from moisture.
  • Make sure the room is warm enough. Painted walls should dry quickly after washing. If you try to wash them at low temperatures, it can ruin the paint and promote fungus or mold growth.
  • Pre-clean the walls with a vacuum cleaner or mop with a dry soft attachment. This will help remove dust and dirt from the surface and avoid streaks when washing.

After that, you can proceed directly to washing. But first you need to choose what to wash painted walls with.

CHOOSING COMPOUNDS TO CLEAN PAINTED WALLS WITHOUT STREAKS

Depending on the type of paint the walls are painted with, you should choose the right detergent. Usually it is recommended to use neutral or slightly alkaline compositions without abrasive particles and aggressive components. You can also prepare a solution of warm water and a small amount of liquid soap or soda. In any case, before using a detergent, it is necessary to test its effect on a small and inconspicuous area of the wall.

In addition, choosing what to wash the painted walls, it is worth starting from what paint the wall is covered with:

  • Water emulsion – warm water with soap or soda.
  • Acrylic – warm water with soap or mildly alkaline liquid.
  • Silicone – warm water with soap and water or a special silicone cleaner.
  • Alkyd – warm water with soap or mildly alkaline liquid.
  • Oily – warm water with soap or alcohol.

Naturally, you can use and ready-made means for washing the walls, which you will find in household chemical stores. The main thing – choose not too aggressive, so as not to spoil the walls. Otherwise, you will have to do without repairs.

CLEANING TECHNIQUE: HOW TO CLEAN THE WALLS WITHOUT STREAKS

To clean the wall from dirt, you can use different tools: sponge, cloth, napkins or mop. The main thing is that they should be clean and soft, not scratch the surface. Otherwise, the paint will lose its original appearance. And it does not matter whether it is matte or glossy – surface damage spoils the appearance and only contributes to the accumulation of contaminants.

Washing the walls should be slightly damp, but not wet “tool”. Excess water should be removed immediately and thoroughly wrung out after each immersion in water. To wash everything, you need to run the tool along the wall from top to bottom. At the same time, painted walls should not be rubbed in one place for a long time, so that the paint does not rub off. It is better to wash painted surfaces several times, but without unnecessary effort, than to try to scrub everything at once. And after washing, be sure to wipe the walls with a dry and clean cloth or paper towels to remove the residue of moisture and detergent. Plus thanks to this, the washable surface will not collect dust due to humidity.

HOW TO CLEAN YOUR WALLS WITHOUT STREAKS AND REMOVE DIFFICULT STAINS

It is not easy to clean the walls, on which stubborn stains have formed. Many people do not know how and with what to do it, and therefore often only spoil the painted walls, as a result of which the apartment requires cosmetic repairs. In fact, even quite difficult stains can be washed, if you know some tricks.

Stubborn stains, which are not easy to clean, include stains from grease, food, some drinks, blood, ink and other substances. But even these can be cleaned if you know how! And there are several ways to do it:

  • Mix vinegar and water in equal proportions, soak a clean cloth or sponge in the solution and wring it out. Then you can wash the wall, and after washing – rinse the place where the stain was, with clean water and dry.
  • Mix ammonia and water in equal proportions and wash the painted walls in the same way. But not too aggressively, because ammonia can damage painted surfaces.
  • Similarly, mix hydrogen peroxide and water and then wash the stains in the same way and dry the wall surface after washing.
  • Apply some toothpaste on the stain, leave it for a few minutes and then rinse it off with warm water and dry it.
  • Apply some nail polish remover on the stain, leave it on for a couple of minutes and then rinse it off with warm water.

As you can see, it is not so difficult to figure out how and what to wash painted walls, so that the paint is not damaged and again looked like new. However, it is very important not to make common mistakes when you wash painted walls.

MISTAKES THAT MANY PEOPLE MAKE WHEN CLEANING WALLS

Perhaps the most serious and common mistake is washing painted walls with harsh tools. Yes, they can really help to wash and clean the walls from stubborn stains, but at the same time they damage the paint. And that’s when you definitely can’t do without repairs.

Other common mistakes:

  • Washing the walls without preliminary dry cleaning, than you only worsen the situation – on the surface appear divorces and scratches. The paint loses its appearance.
  • Using too much water and detergent. Before washing the walls, and choosing what to wash them with, specify the required amount. Otherwise, there is a risk that the paint will be spoiled. Especially if it is water-soluble.
  • The use of aggressive or abrasive cleaning agents, such as alcohol, gasoline, etc. Because of them, painted walls can lose their appearance, scratches will appear on them, and the paint will lose color, especially enamel paint.
  • Washing the walls without wiping them with a dry cloth or tissue. Because of this, painted walls can become streaked and mold can form on them. Therefore, if you start washing the walls, do not forget to dry them.
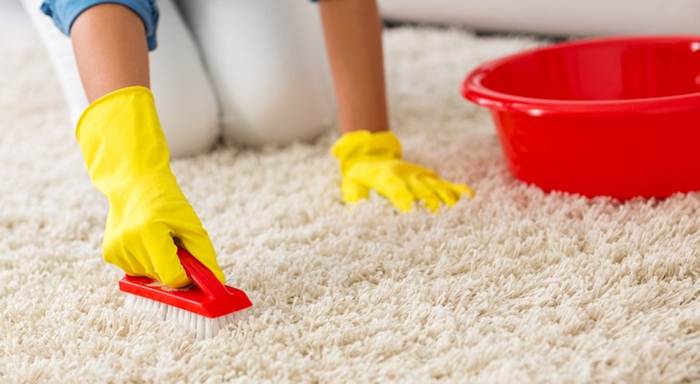
Well, now you know how and what to wash painted walls, as well as how not to make common mistakes in the process. And we remind you that in case of difficult stains, the best solution is to contact our cleaning company.
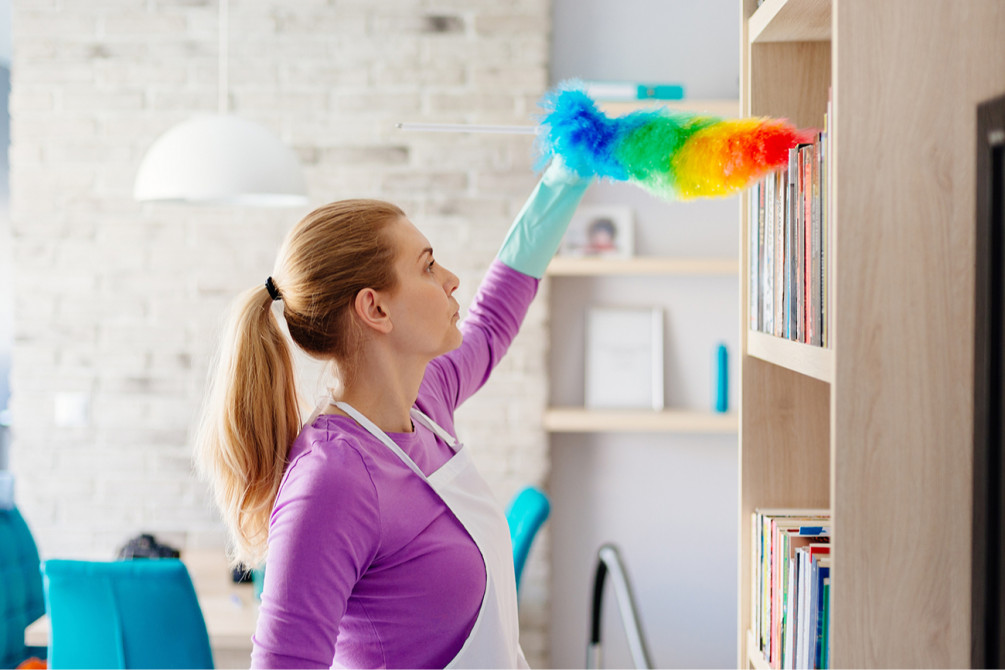
Post thumbnail

HOW TO RESTORE THE SHINE OF LINOLEUM – SECRETS THAT WILL CHANGE YOUR LIFE

Perhaps most of us face the problem of perpetually dirty floors. No matter how much it is washed and polished, the result is the same. After a few days, it’s still dirty and requires another cleaning, and as you know, not all of us have free time to spend on cleaning linoleum.

But what if by following just a few rules you can make your old linoleum shine? Our methods will help you do just that! You’ll learn how to make your floor shine, and you’ll also find out what makes it dull.

WHY DOES LINOLEUM FADE?

It seems not very pleasant to come to a house where the first thing that catches your eye is dirty and old linoleum. It’s one thing when it’s an isolated incident. There are situations when we just didn’t have time to clean or wash the floor, and that’s okay. It’s another thing when linoleum is constantly untidy, no matter how many times it is washed.

The most interesting thing is that many people do not understand why linoleum becomes dirty and immediately begin to rub and wash it with all kinds of different means. Without even thinking about the negative impact of some products on the floor surface. That is why, before you shine your linoleum, you need to find out the reasons why dirt appears on it.

In fact, there are quite a few reasons why linoleum can become dull.

If we analyze this topic in detail, we can identify about 5 main reasons for the appearance of dirt on the floor:

  • Dust and debris from the street: It’s pretty obvious, but if you live near a road, the chances of having shiny linoleum are reduced. Not only can the front door be a source of dirt and dust, but so can the windows, which can bring dirt onto the linoleum.
  • Food and liquids: Spilled drinks, food, or food scraps can cause stains and dirt on the floor. If they are not cleaned up quickly, they can soak into the linoleum, leaving marks;
  • Insufficient cleaning: Failure to clean regularly can lead to a cumulative effect, i.e. the accumulation of dust, debris and dirt on the surface. The less frequent the cleaning, the harder it is to clean the linoleum from the accumulated dirt;
  • Improper care: Many people think that if you rub the floor with oil, it will shine. Or they believe that choosing aggressive detergents will provide more effective floor cleaning. However, these are huge misconceptions. Such “methods” will make linoleum even harder to clean in the future. And what can we say about “washing”, it can be completely ruined if you use the wrong care.
  • Dragging furniture/abrasion of the top layer of linoleum: If you move your furniture frequently or cause it to friction, the linoleum can gradually fade or wear away from the top. Scratches and scuffs appear, and the luster fades, making the surface less attractive and more prone to dirt.

Naturally, there are many more reasons why linoleum loses its shine, but these are the most basic ones. We often do not pay attention to small details or do not realize how much our habitual actions can affect the condition of the floor. For example, we don’t think about how often we drag furniture or what kind of shoes we wear indoors.

These seemingly insignificant little things can significantly affect the condition of the linoleum, and then it will be more difficult to restore and clean it than before. And that’s not even mentioning the luster of the linoleum.

HOW TO CLEAN LINOLEUM FOR SHINE?

Perhaps it’s time to find out how to wash linoleum for shine and the most scandalous thing than washing linoleum to make it shine. The Internet advises: baking soda, vinegar with water, laundry soap, etc. The only thing we can say is that this is a great step towards destroying linoleum! If you wash the floor with such home remedies, its surface will begin to corrode over time.

We also heard that you need to rub linoleum with oil to make it shine. Well, we haven’t heard a stupider piece of advice yet. Think logically, how can oil make linoleum shine? No way, that’s the answer!

SHINY LINOLEUM – SPECIFIC STEPS

There is no need to use fancy methods. The best thing to do is just buy a linoleum cleaner. You can even buy the cheapest one, it doesn’t matter. The main thing is that it is designed for washing. And then mix about 10 ml per 100 grams of water (we do not recommend more) and just wash the floor.

Beforehand, you should do a dry cleaning, that is, sweep the linoleum. Remember this golden rule – first dry cleaning, then wet cleaning. Do not immediately wash the linoleum with water and detergent, as this can only make things worse. This advice will really make life easier and give the linoleum not only a shine, but also keep it in order for a longer period of time.

Tips:

  • Do not use too much water when cleaning linoleum;
  • Dust shelves and surfaces before you start cleaning the floor;
  • If you want to restore the luster of linoleum, contact TivaCleaners;
  • If you still decide to clean the floor at home, it is best to use ercec: 2 tablespoons per 1 liter of water.

A tip that can really bring out the shine in linoleum is regular cleaning! You need to wash, wash, and wash again to keep your linoleum in top condition. If you don’t have the time to spare, contact TivaCleaners. 

We are professionals in our niche. We can not only clean the floor with high quality, but also clean the house after renovation, general house cleaning, bath cleaning, that is, we wash every piece of your room. Is there any need to waste your precious time cleaning linoleum if you can entrust the task to a professional?

Remember that your health and comfort is a priority, so don’t hesitate to contact TivaCleaners. Your linoleum will shine and delight you with its appearance.

Post thumbnail

How to clean an acrylic bathtub from yellowing?

One tiny detail can ruin the whole aesthetic. Especially when it comes to yellowing on an acrylic bathtub. Stains and rust marks have never been pleasant, so let’s figure out how to whiten an acrylic bathtub at home.

Why does an acrylic bathtub turn yellow?

Most people have personally experienced the phenomenon of yellowing and know what it is. But how many people know why it occurs? If you look into the depths of the rust/yellowing process, you can see that everything is quite simple and trivial.

First, it all depends on the water hardness. Hard water contains a large amount of minerals, such as magnesium and calcium. Soon, they cover the acrylic bathtub, forming limescale, which is not easy to clean

Secondly, there is the residue from any shampoos, shower gels, conditioners, etc. Such deposits left by shampoos, shower gels, conditioners, and other products can appear due to certain chemical reactions. For example, if the tap water contains a large amount of minerals or hardness, shower products can interact with these substances to form sediments. This seemingly small detail cannot affect the process of yellowing, but it plays a significant role.

Thirdly, do not rinse the bath after cosmetics. Returning to the second point about shampoo deposits, we can say that if you do not wash the acrylic bathtub from the remnants of the products, they will invincibly form a precipitate.

Fourthly, the use of inappropriate instant products. For example, cheap bleaches that only harm the bathtub, or even worse, aggressive home remedies. We’ll talk about this later and find out what home methods you can NOT use to clean an acrylic bathtub.

How to properly clean an acrylic bathtub?

Acrylic bathtubs require careful cleaning to avoid scratches and surface damage.

CAN be used:

  • Mild detergents designed specifically for acrylic.
  • Gentle home remedies (vinegar solution, baking soda solution).
  • Sponges or soft sponges for cleaning.

DO NOT use:

  • Abrasive or harsh cleaners such as coarse particle cleaners or brushes (only their solution may be used).
  • Solvents containing acetone or paint thinners.
  • Rough cleaning materials such as sponges with a hard metal side or brushes.

Therefore, if you are interested in how to clean an acrylic bathtub from yellowing, you should probably use soft sponges and mild detergents. Now we are moving on to the best home methods to whiten an acrylic bathtub.

How to clean an acrylic bathtub from yellow plaque: home methods 

There are many different home methods for cleaning an acrylic bathtub. These methods do not require a special set of tools. Everything you need is at hand.

Vinegar

Vinegar is the best cleaner for any surface. It can be used to clean windows, rust, grease marks, and virtually every area in the house.

How to clean an acrylic bathtub from yellowing with vinegar:

  • Prepare a bowl of warm water (1 liter) and add 100 ml of vinegar.
  • Take a soft cloth or sponge and soak it with vinegar.
  • Leave the soaked cloth on the yellowing area for 30-45 minutes.
  • At the end, rinse with warm water.

This option is more or less economical and effective. But there is another way to use vinegar. You can take a full bath of warm water and pour in about 3 cups of vinegar. This will definitely remove the yellowness, but keep in mind that it is quite expensive, so it is not for everyone.

Juice from lemon

Lemon juice is also a great tool for fighting plaque. Citrus fruits have the unique ability to absorb odors and whiten the desired areas. That is why it is a great option for an acrylic bathtub. Step by step:

  • Squeeze the juice of a whole lemon into a bowl.
  • Take a cloth and immerse it completely in the liquid.
  • Place the rag on the area where there is the most rust and sediment.
  • Leave it on for 10 minutes and then rinse with water.

After cleaning, a pleasant citrus smell will appear. Therefore, it will not only whiten, but also add a wonderful flavor.

Soda and hydrogen peroxide

A mixture of baking soda and hydrogen peroxide can also be effective. How to clean an acrylic bathtub from yellowing with baking soda and hydrogen peroxide:

  • Mix baking soda with hydrogen peroxide to make a paste.
  • Put this paste on the yellow spots on the bathtub.
  • Let the paste sit for 15-30 minutes to penetrate and dissolve the yellowing.
  • Then remove the paste from the bathtub surface.
  • Rinse off any remaining paste with water.

And you’re done! So, in fact, it is possible to clean an acrylic bathtub from yellowing and you don’t have to call for cleaning. But there is one thing, cleaning will surely do the job safely for your health and the bathtub, and you can ruin the bathtub coating through your own negligence. Therefore, it is always better to call a professional cleaning service – we are ready to do the job in the best possible way at an affordable price.

Post thumbnail

What causes yellow stains on the ceiling and how to get rid of them

Yellow streaks that appear on the ceiling surface spoil the interior of the room with their unpleasant appearance. Such a problem often occurs in the apartments of residents of multi-storey buildings. There are several methods to get rid of yellow stains on the ceiling, and with their own hands.

When you find unsightly streaks, first of all you need to understand why this happened, and only then engage in a search for a variant, how to remove from the ceiling yellowing or other types of stains. Having analyzed the reasons for the appearance of this nuisance, of all the methods you can choose the most effective.

Stain provoking factors can be:

  • Leaks in old piping. As a result of corrosive processes, metal products begin to be covered with rust. In case of water leaks in a faulty system, it gets on the ceiling covering. As a result, yellow stains on the ceiling will need to be removed systematically, if the pipe that has fallen into disrepair is not repaired or replaced.
  • Emergency condition of the roofing system. Atmospheric precipitation flows through its leaking elements and seeps onto the ceiling surface of apartments located on the upper floors. In this case, the solution to the problem of how to remove stains from leaks on the ceiling, will be the replacement of the old roof covering with a new one.
  • Inattention of neighbors living above. They can flood the rooms below by leaving the water faucet unclosed or allowing leaks from unrepaired piping.
  • Increased humidity. In damp conditions, you may see not only yellow streaks on the walls of rooms and ceilings, but mold, which is not easy to remove.
  • Smoke and soot. In this case, the human factor can play a decisive role. After heavy smoke or fire in the room, it is possible to form extensive spots of different colors on the ceiling.

Streaks occurring after flooding

After eliminating the cause of the leak through the fault of neighbors living on the floors above, it is necessary to qualitatively eliminate yellow stains to do it at once and do not return to solve this problem in the future.

It is necessary to prepare:

  • a product containing chlorine;
  • thick rubber gloves;
  • a container for the product;
  • several foam sponges.

Pour the product into a container, put on gloves and start working with the damaged surface. The sponge is soaked in the product and pressed against the yellow stain for only 5 seconds, then re-wet and applied to the still untreated areas. The lower part of the sponge gradually turns red, so it should be changed and continue to perform manipulations until the stains lighten.

Oil stains

When a grease stain on the ceiling appears – what to do with it few owners know. The fact is that oil soaks through the layers of plaster and their surface treatment ends with the fact that these ugly formations again appear on the ceiling plane.

To remove oil stains you will need:

  • roller or brush;
  • a trowel with a width of 5-8 centimeters;
  • a container for the coloring compound;
  • deep penetration primer;
  • water emulsion paint.

The sequence of actions when the ceiling surface shows greasy streaks:

  • Remove the spoiled plaster.
  • Primer is applied in one layer and wait until it completely dries.
  • Roller or brush dipped in water-based paint, remove its excess and carefully apply the coloring composition on the ceiling surface.
  • Painting is done several times until the stain is completely eliminated.

Rust marks on the ceiling

In older apartment buildings, worn-out pipelines often break and leak in the system during operation, so residents often have to think about how to remove yellow stains on the ceiling. Streaks are formed on the ceiling surface again and again.

In this case, to treat the contaminated areas, you will need:

  • 10% solution of copper sulfate;
  • brush or sponge;
  • a container for the mixture;
  • rubber gloves.

To prepare the composition mix 250 grams of copper sulfate, 40 grams of olifa solution, 250 grams of bone glue and shavings of laundry soap. Dip a roller or brush into the liquid and treat the rust-covered area with it.

Smoke and soot stains

If soot and grime have covered the walls and ceiling, partial treatment will not help. It will be necessary to completely remove all the damaged plaster. Such work requires considerable monetary expenses. A major repair takes a lot of time.

Eliminating red streaks on the ceiling surface, the occupation is not easy. The main thing, before you paint a spot on the ceiling, find out the cause of its occurrence and only then to produce high-quality treatment of damaged places and areas.

Carrying out the above-mentioned works is somehow associated with the appearance of contaminants of various types. In order not to spend a lot of personal time on cleaning surfaces, cleaning the floor, etc. leave a request to our specialists. Our specialists of the cleaning company will help you to solve the issue with cleaning and bring cleanliness in the house.

Post thumbnail

How do you clean glass from a fireplace?

A warm evening with the family, hot drinks and a dirty fireplace glass that spoils the whole picture. Doesn’t sound very pleasant, does it?  The formation of soot on the glass of the fireplace door is a standard phenomenon. But its excessively frequent occurrence can speak of improper operation of the device or the use of low-quality combustion materials. If you have to clean the fireplace from soot more than once a day, then it is necessary to look for the cause and take measures to eliminate the identified defect.

What is the best way to clean fireplace glass from soot and grime?

To get rid of the black greasy deposits known as soot on the fireplace glass, you can use both specialized preparations and home remedies.

However, it should be remembered that in the case of specialized preparations, which are usually effective in removing various contaminants, powerful chemical compounds are used. They are known to have a negative impact on human health. However, we are talking only about situations when they are used by people who do not know the nuances of cleaning. 

The fireplace is quite easy to maintain and does not require a lot of effort. However, there are small pitfalls that relate to its cleaning, for example:

  • The fireplace should not be cleaned with hard sponges with metal ends. It is much better to use a microfiber cloth or a regular dishwashing sponge.
  • Also, do not overdo it with chemicals, it is better to take less aggressive means, such as baking soda, vinegar and so on. Chlorine or alcohol will not work.

What you need to clean soot from the fireplace glass:

  • A microfiber cloth;
  • paper towels;
  • a bucket of water;
  • gloves (optional).

Well, and of course you need the cleaning method you have chosen. Just about them we will talk about now. And so, this is quite enough for perfect cleaning of the fireplace glass.

Best ways to clean fireplace glass

To clean fireplace glass properly we only need a few cool products. Each one is unique and effective. 

Denture cleaning tablets

Surprisingly, few people knew about the use of this remedy in the home. Yes, denture cleaning tablets can not only clean dentures, but also clean glass perfectly. Let’s say even more, they can remove the stone from the toilet, clean the sink and not only.

Sounds promising, doesn’t it? Well, since that’s the case, let’s try out this marvelous remedy:

  • First, prepare the right equipment (bucket, rag, and so on).
  • Mix 4 denture cleaning tablets with a few drops of warm water (a paste should come out).
  • Apply this remedy to the glass itself and spread it.
  • Leave it on for 10-15 minutes, and after that, rinse it off with a cloth and clean it.

The remedy is awesome at dealing with soot, cinders, and scale residue. It’s also budget-friendly, so it doesn’t cost a lot of money. It can be found in any cosmetic store or pharmacy.

Vinegar

The next method is, of course, vinegar. It is also great for cleaning windows so that there are no streaks. Therefore, it is great for cleaning fireplace glass. It will remove soot and make the surface shiny:

  • Mix water with vinegar in a 1:1 ratio.
  • Wet a rag/sponge with the solution and apply it to the glass.
  • Wait for literally 3 minutes.
  • Wash off with warm water and wipe dry.

At the end it is better to use warm water, not cold. Cold water can leave streaks and unsightly marks.

Preventing frequent errors

To remove dirt from the fireplace glass, don’t be overzealous in applying a chemical or natural product – just because there’s a lot of it doesn’t mean it will work better. Excess will have to be removed, and streaks and smudges will appear. Everything should be done according to the instructions with compliance with the proportions.

Some owners begin to mix different compositions and end up with a caustic substance that can harm the smooth surface or even hopelessly spoil it.

Be careful with scrapers and brushes, which are sometimes used for hard-to-remove dirt. They should be used only in extreme cases. Scratched glass can not be restored by anything, and dirt will stick to it faster. The best thing is not to bring it to a critical state and regularly carry out a careful gentle cleaning, using the above described advice of masters.

Above we have given several ways to clean the fireplace glass from soot, but it is better still not to resort to these methods and turn to professional cleaners. Only they will be able to guarantee the impeccable quality of cleaning services and that the surface will not be damaged as a result.

Post thumbnail

Peculiarities of tapestry care

Tapestry is first of all associated with a handmade wall rug. Such carpets with various plot compositions decorated palaces and rich houses for centuries. But do not think that tapestry is a relic of the past. In the modern interior is also widely used not only classic tapestry, but also products made of tapestry fabric.

Tapestry fabric is quite heavy and durable material. Therefore, it is used for furniture upholstery, sofa cushions, curtains. Modern light industry for the production of tapestry fabrics uses not only classic cotton, silk and wool, but also various synthetic fibers, which allows you to diversify the pattern and colour range of the cloth. A special way of weaving threads makes the fabric recognisable and unique. A wide range of patterns from classic to modern avant-garde allows it to fit into any interior.

The market of tapestry fabrics today is very diverse: handmade products woven by folk masters, fabrics created with the help of machines, single-sided and double-sided, impregnated with special agents that protect the material from dust and burnout. But all of them have one thing in common – vulnerability to environmental and mechanical influences. Therefore, to preserve the beauty of tapestry products, they need proper care.

Basic rules of tapestry care

1.When buying any product, the first thing to do is to read the instructions for its care and use. If the product is purchased from a master, ask for his recommendations.

2. To wall tapestries can decorate your home, they need to be framed and hung on the wall. Sometimes the picture is sold already in a frame, but sometimes it is necessary to decorate it yourself.

  • Buy a ready-made frame. The fabric should be smoothed beforehand to get rid of folds and creases. If there is a vapourizer, treat the product with steam, if not, you can just iron the trellis. Heat the iron to medium temperature and iron from the wrong side. But there is a need to iron the product from the face, then you need to use wet gauze. When ironing through the gauze, the iron can be heated to the maximum temperature.
  • Stretch the smoothed tapestry onto the stretcher. To do this, place the stretcher on the wrong side of the border. Fix the corners. Secure the tapestry evenly on all sides with thread. Make sure there are no wrinkles or warps. Now you can insert the tapestry into the frame.
  • Another option is to hang the tapestry on a rod (for example, a curtain rod). To do this, brackets are fixed on the wall. Choosing fasteners, be sure to take into account the material from which the walls are made. Pay attention to this point – if the tapestry is heavy, do not hang it on a plasterboard partition, it can crack or even fall.
  • If the tapestry has a ready-made wader, insert the rod into it and fasten it to the brackets. If you want to make the backstrap yourself, sew a strip of sturdy fabric on the wrong side of the top of the tapestry, such as burlap or linen.

3. Do not hang tapestry near fireplaces, so that the products of combustion do not settle on the product and spoil it. It is also undesirable to expose tapestry to direct sunlight. Like any other natural textile, tapestries are afraid of high humidity, so the room should be well ventilated.

Cleaning wall tapestries

The embossed surface of tapestry quickly accumulates dust, which of course harms both the fabric and the people living in the house. Therefore, the main task of care for tapestry is its cleaning. Wall tapestry should not be washed. Only dry cleaning is allowed. Go over the fabric with a soft brush to remove dust. Several times a year vacuum the product, not forgetting to pass not only on the front, but also on the underside.

Try to remove heavy soiling with a neutral detergent, being careful not to apply noticeable force. The water should be slightly warm. It is forbidden to wring the tapestry. If the stain could not be removed by yourself, do not conduct experiments, so as not to spoil the thing permanently, it is best to leave the request to the experts of our cleaning in Calgary. 

Care of furniture with tapestry upholstery

  • Furniture tapestry upholstery is cared for in the same way as wall trellises. Preference is given to dry cleaning with a soft brush or vacuum cleaner. Many models of vacuum cleaners in the set of attachments has a special brush for upholstered furniture. If you do not have such an attachment, you can use improvised means. Wrap the usual brush head with a thin soft cloth, pre-moistened it with a salt solution prepared in the proportion of one teaspoon of salt per one liter of water. Dust residue can be wiped off with a moistened cloth.
  • Dust can be knocked out by covering the sofa or armchair with an old white sheet soaked in water. You can add table white vinegar to the water (one tablespoon per one liter of water). First of all, wring the sheet well. Lay it on the furniture and gently pat the fabric with the palm of your hand or a beater. The wet sheet will absorb the dust. If the dirt is heavy, rinse the sheet and repeat the process again.
  • Alas, sometimes the upholstery of upholstered furniture suffers, even with very careful handling. Then you still have to turn to wet cleaning. Dilute in barely warm water neutral detergent or shampoo, shake to a thick foam. Clean the fabric with the resulting foam, not water.
  • If the dirt can not be cleaned or you do not want to risk the appearance of expensive products, you can invite home cleaning service employees who will clean tapestry upholstery with the help of special professional devices and means right at your home.

Cleaning of tapestry pillowcases and covers

  • Tapestry covers or pillow covers can be washed with slightly warm water if necessary. Do not wring such fabric, it loses its structure and deforms. Dry the product preferably in the fresh air, avoiding sunlight. It is forbidden to use heating devices for drying.
  • If you decide to use a detergent, test it on the underside of the fabric. Select a small area and apply the detergent, wait thirty minutes, if the fabric has not received visible negative changes, you can apply it to the entire product.

Cleaning tapestry curtains

  • Tapestry curtains can also be cleaned with a brush or vacuum cleaner only. A lightly dampened sponge can be used to wipe off dust residue from a surface that has already been vacuumed.

Tapestry curtains are very heavy. To cope with the elimination of stains and other contaminants on your own will be very difficult. Therefore, it is better to use the services of a cleaning company. 

Post thumbnail

Stains on laminate flooring: how to remove quickly and safely?

Laminate flooring is one of the most popular flooring that is good for the home and affordable for everyone. As a floor covering, laminate flooring has at least 7 major benefits:

  • Durability. Modern laminate, if done right, is quite resistant to physical stress, abrasion, and pressure. It is free to move furniture items on wheels.
  • Withstands high temperatures, does not ignite. A cigarette butt, which accidentally fell on the laminate floor, will not damage it.
  • Safe for health. It is made of environmentally friendly materials, harmless even for children’s organism. Provided proper care does not accumulate germs and dirt, does not cause allergies.
  • Easy care. It is enough to wipe the laminate floor with a damp cloth. No specific procedures are required.
  • Simplicity of laying. Before installing the floor, the old flooring can be removed. Especially if it does not have sharp differences and damage. Laminate is laid on any surface.
  • Long service life. High class laminate, its correct laying and proper care increase the longevity of the coating.
  • Reasonable cost. Laminate flooring is much cheaper than, for example, parquet.

It is also suitable for office premises, but here it demonstrates somewhat different wear resistance and even with careful care will last less. Although everything depends on the class of the product. There are moisture-resistant materials on the market. The price of proposals for commercial use is a little higher and comparable, for example, with tiles, so it is important to assess what is more important to you – aesthetics or availability of the material. 

We have prepared for you a couple of tips that will allow you to enjoy the presentable appearance of the product longer. These include: 

Regular cleaning

The basic step in caring for laminate flooring is regular cleaning. Avoid accumulation of dust and dirt on the surface of the laminate as this can cause it to lose its shine and durability. Use a soft brush or microfiber cloth for cleaning to avoid scratching.

Wet cleaning

For deeper cleaning and removing stains or dirt, use a damp cloth. But be careful not to let excessive moisture get on the surface of the laminate as it can damage it. Use a damp cloth that has been wrung out beforehand until damp, but not wet.

Specialized products

To clean laminate flooring more effectively, you can use specialized products designed specifically for this type of flooring. They will not only help to clean the surface, but also give it an additional shine. When choosing a product, pay attention to the manufacturer’s instructions and make sure it is suitable for your particular type of laminate.

Protect against scratches and bumps

Laminate flooring is prone to scratches and damage from furniture and objects. To avoid this, use furniture leg pads and mats under chairs. Also keep an eye on your shoes, especially heels, so that they do not damage the laminate surface.

Moisture prevention

Laminate is not a waterproof material, so avoid getting large amounts of water on its surface. If a liquid spill occurs, wipe it up immediately to avoid moisture absorbing into the flooring and peeling laminate.

Regularly check for wear and tear

Periodically inspect your laminate flooring for loss of luster, scratches or other damage. Make partial replacements of planks or repairs as needed. This will help you maintain the beauty and longevity of your flooring.

It is worth noting that in general the product is unpretentious in care, but in case of contamination it is necessary to know some secrets. Especially relevant is the question of cleaning laminate after repair. 

After the repair to clean the stains on the laminate is not so easy. It is not always possible to cover the laminate completely, there may remain stains on the laminate from assembly foam, stains on the laminate from cement or paint. How to wash laminate after repair, so as not to damage it read in our article. 

Stains on laminate flooring

White stains on laminate flooring can be removed by adding a little vinegar or salt solution to the water.

Clean oil paint stains from laminate flooring

If the paint got on the laminate, it is easy to fix it with the help of solvent, white spirit or any auto chemistry. The main thing is to apply the remedy directly on the stain and quickly enough wipe it off with a slightly wet soft cloth. But there is always a risk that the laminate will remain stains already from the solvent, so it is important to select the means depending on the type of paint (oil, alkyd, etc.).

Remove painter’s tape from laminate flooring

Peel painter’s tape from the laminate can be cleaned with special means “antiskotch”. Vodka or alcohol can also work. You can also use other methods to remove the tape from the laminate surface.

Mounting foam on laminate flooring

It is enough to buy Dimexide from a pharmacy, apply it and wait for 5 minutes, then wipe it off with a damp cloth.

To remove difficult stains from the laminate, you can use alcohol and acetone, but here you should be wary of the fact that these substances can corrode the coating.

And a couple more tips: 

  • Wallpaper glue on laminate flooring can be easily cleaned with warm water.
  • A stain on laminate flooring of unknown origin can be removed with alcohol-based window cleaners.
  • Blood stain on laminate flooring can be removed with denatured alcohol, window cleaner. You can add a little ammonia to the water, or lightly swipe the stain with hydrogen peroxide mixed with a couple drops of ammonia.
  • Footwear marks, black marks will help to remove the eraser, a solution of baking soda.
  • Greasy stains can be removed with warm water and laundry soap.
  • Traces from a pencil will remove whitespirit, or apply toothpaste and rinse immediately.

If you do not want to spend time on cleaning or you just do not have it, contact our cleaning company. Our customers will help you clean up and guarantee that your laminate flooring will not lose its presentable appearance. 

Post thumbnail

How and with what to clean a plastic window sill board

In the process of use the surface of the window sill board gets dirty and looks unkempt. How to clean a plastic window sill – today we will talk about it. Ease of care for the surface is an absolute plus and PVC window sill in this aspect is an unambiguous leader.

In many cases, wash the plastic window sill from stains and dirt can be applied with minimal effort. Stains from dirt and dust are easily washed off with soapy solutions of detergents. But how to wash plastic window sills from rust, from primer, from glue, from mounting foam? How to clean a plastic window sill to white we will talk below. We want to reassure you, even strong contaminants can sometimes be cleaned without a trace.

Tips: How to keep your window sill looking presentable for longer

  • Take into account the nature of the dirt in order to choose the right detergent.
  • Place coasters, saucers and/or silicone mats under flower pots to prolong the life of the product, make cleaning easier and avoid yellow streaks from pot water on the surface.
  • Do not place hot pans and pots on the surface – this can melt the plastic and leave unsightly marks that will lead to replacement of the product as a whole.
  • Care for the surface of the sill board in the kitchen more often. Grease droplets accumulate on it faster, dust adheres to it, so it gets dirty faster.
  • Before using an aggressive detergent, test its effect on a small and inconspicuous area.
  • Be careful with abrasive cleaners, use them carefully as they can leave marks and scratches.
  • Remember that by cleaning PVC with solvents you can ruin the plastic, as a result you will need to replace the product.

How to clean a plastic window sill from yellow stains

Clean the plastic window sill from yellowing can be with such means as hydrogen peroxide, bleach in the form of gel or laundry powder, a solution of baking soda and vinegar.

  • Apply the peroxide to a napkin and wipe the pre-cleaned window sill board, rinse everything with water, wipe dry. The yellow window sill should lighten.
  • The same should be done with bleach, to remove a persistent stain, leave the bleach for 30 minutes, then rinse with water and wipe.
  • Apply vinegar-soda solution on the stain, add liquid soap, rub, leave the composition for some time, then wipe and rinse with water.

How to clean the window sill after mounting foam

This is already a more difficult task. During construction and repair work, it is recommended to protect both the window and the window sill surface from dust and dirt, so as not to damage, not to scratch with construction mixtures and not to acquire complex contamination.  And yet very often people ask the question how to wash the primer from the plastic window sill, wash it from the mounting foam.

  • Remove the side plugs from the sill board and remove all dust, dirt, construction debris.
  • Wash the surface.
  • Residues of putty and primer can be removed with abrasive means, act carefully, otherwise you can spoil the coating. Use a rubber spatula, toothbrush, soft cloth or sponge. Do not use excessive force.
  • Remains of foam can be removed with a special foam remover. These can be purchased at building supply stores. Soak the remaining foam, leave it for a while, remove the contamination with a brush or sponge.
  • Carefully perform all actions, the means are aggressive and can spoil the surface.

How to clean the window sill from paint?

Paint compositions on the snow-white surface should be removed as soon as possible. This applies to ordinary paint, and felt-tip pen, and marker, and even greenery, which is accidentally spilled on the window sill. If you manage to take action before the pigments are absorbed into the plastic, then the process of removing contaminants will be quick and easy. If you want to know how to clean the plastic window sill from the paint that just got on it, then just take a melamine sponge. It, like an eraser erasing a pencil on paper, removes coloring compounds and other persistent contaminants.

Silicate glue can also help. It should be applied to the contamination, but so that it does not go beyond the paint. Solidifying glue will shrink the paint, and when it dries completely, then with the help of a scraper you only need to remove the glue from the surface.

How to remove traces from flower pots?

Yellow streaks on the windowsill often appear due to the watering of flowers in pots. Get rid of the problem will help hydrogen peroxide: apply it to the stain for 2-3 minutes and wash off with water.

And in order not to waste time reading articles, watching various videos on the Internet and putting it into practice, make a request for a call to the cleaner from our company. Cleaning company in Calgary will be happy to take care of your problem, will perform everything quickly, qualitatively and at an affordable price.

Post thumbnail

How to clean copper cookware?

Copper cookware is one of the oldest types of kitchen utensils. Having discovered copper, which is easy to melt in processing, mankind dramatically expanded the horizons of its culinary possibilities. It was from copper that the first metal cookware was made. And how amazing is the fact that it has easily passed through the centuries, despite the invention of new materials, the emergence of new technologies, the emergence of an incredibly vast market of cookware with ultramodern coatings.

Pots, pans, basins and sauté pans made of copper have not just stood the test of time, but have earned the highest recognition, moving from the class of everyday utensils to the category of elite cookware for professionals. Such copper cookware can be found in the kitchens of Michelin restaurants, prestigious culinary schools and show programs. It is loved and appreciated by world-class chefs. Why? Let’s find out.

– Material properties. Copper is superior in its thermal conductivity to all other metals from which cookware is traditionally made. According to this indicator, it is ten times ahead of stainless steel and twice ahead of aluminum. What does this give us in culinary terms? A copper container heats and cools almost instantly throughout its entire volume – and so do its contents. A quality that is indispensable when working with delicate dishes: sauces, syrups, creams.

– Some desserts can be properly cooked only in copper cookware, which provides a fairly rapid cooling after heating.

– Durability. With proper care, the copper product perfectly serves not even for decades, but for centuries.

– Beauty. There is little to compare with polished and polished copper. Delightful retro-style and shapes and lines – everything looks great in copper. And the softness and pliability of the material allows you to create interestingly shaped products with non-trivial designs.

However, as already mentioned, this shining aristocrat requires care commensurate with its high status. Copper oxidizes easily in the air, coating and losing its original luster. It also easily reacts with acids in food – and this can damage the appearance and flavor of the dish. Therefore, almost all copper products have an inner coating of stainless steel or tin. The exception may be basins for jam – sugar syrup blocks the transition of copper ions in the finished product, so you can cook these sweet desserts in a pure copper basin without fear.

It should be noted at once that copper cookware tinned with tin has much more restrictions in operation than that coated with stainless steel. Tin is a fusible metal, it cannot be fried or cooked in a high-temperature oven. The field of application of such utensils is boiling and stewing. But stainless steel will honorably endure any tests.

The main rules that will help to care for these coatings:

  • it is necessary to avoid the use of harsh abrasives: sponges and powders;
  • use mild detergents or soap;
  • do not heat empty dishes on the stove;
  • do not pour boiling water on the dry surface of a pan, basin or pot.

Copper requires careful care. During operation and storage, the copper surface becomes covered with a thin film of oxide. This, on the one hand, protects it from destruction, but on the other hand, the color becomes darker and duller. Dark stains are also formed on the cookware during cooking. If copper is in a humid environment, a characteristic blue-greenish patina appears on it. Patina not only spoils the look of the cookware, but can also enter into undesirable chemical reactions with substances in the products – especially with acids.

How to clean copper at home? How to preserve the beautiful look, shine and functionality of copper cookware? First of all, it is necessary to choose the right methods of its cleaning and polishing.

NOT RECOMMENDED:

  • Use for cleaning any means containing, for example, chlorine or oxygen bleaches – they will provoke cracking of the surface of the dishes.
  • Washing copper utensils with a dishwasher – this is due to the special aggressive agents used by this technique. They can react with the copper surface and damage it, or significantly reduce the service life of the dishes.
  • Do not use metal brushes and sponges, as well as abrasive pastes and powders.

SAFE CLEANING METHODS:

  • Immerse the utensil in hot water with soap or mild detergent and rub with a sponge or cloth.
  • If you need to effectively clean an old or very dirty copper object, boil it slightly in water with vinegar and a couple tablespoons of table salt.
  • If you can not find a large enough container for boiling, rub the copper surface with a slice of lemon and salt, and then remove the solution with a soft cloth.
  • Sometimes you can find recommendations to use tomato paste or ketchup in a similar way. They also contain a lot of acid, in addition, they give copper a beautiful reddish color.
  • To polish the walls of dishes and give them a shine, you should use a rolled up newspaper in a ball. Among folk recipes for polishing mixtures, the most common is a composition of flour and fine salt.

Of course, in no fashionable restaurant or hotel will you see people rubbing salt or tomato paste on copperware. No folk remedies are comparable to specially formulated compositions developed by specialists. As a rule, professional pastes for cleaning and polishing of copper surfaces are offered by the manufacturers of copper products – who but they know all about the subtleties of care for these wonderful products. And of course, our cleaners know the secrets of care for such kitchen utensils. Our cleaning company will do everything to clean your dishes and put them in good order.

Post thumbnail

How to clean a microwave oven – 5 quick methods

Even with careful care, a microwave oven needs cleaning. There are several ways how to clean the microwave easily and effectively. And we are happy to tell you about them.

How to care for your microwave

  • Do not use coarse abrasives, metal and hard scrapers, large amounts of water to remove dirt.
  • After washing, the microwave must be wiped well from the inside and the door must be left open.
  • The internal enamel coating can be cleaned as a special agent from grease, and folk methods. Wash the enamel carefully, without scratching it.
  • Microwave made of ceramic and bio-ceramic is enough to wipe regularly with a damp cloth.
  • The internal coating of stainless steel is rare, it cannot be cleaned with powders, only with special cream and liquid means.

How to clean your microwave with vinegar

Vinegar is a great remedy for grease. To clean the microwave, mix table vinegar and water in equal amounts (if the pollution is not strong, then vinegar can be poured less) and heat the solution for 5-7 minutes at high power. Do not open the door for another 15-20 minutes after turning it off so that the hot steam softens the dirt well. After that, rinse the inside surface thoroughly with clean water and wipe with a dry cloth. The disadvantage of this method is a strong unpleasant odor, so before you start cleaning, be sure to open a window and turn on the hood.

You can also clean the microwave with a mixture of baking soda and vinegar. Mix them to a paste-like state, apply them to the impurities and leave them for half an hour. After that, it is enough to wash everything off with water and wipe dry. The cleaning agent should not get on the grate.

It is important to remember that vinegar is not suitable for cleaning microwave ovens with enameled surfaces.

How to clean the microwave with lemon

An excellent remedy for grease in the kitchen is lemon.

It is enough to squeeze the juice of one lemon into a glass of water, heat the resulting solution in the microwave at maximum power for 5-7 minutes and leave it for another 10 minutes. After that, simply wipe the inside with a cloth.

This method removes not only impurities, but also unpleasant odor. But this method of cleaning, like the past, is not suitable for enamel.

If there is no lemon at hand, it can be replaced with two tablespoons of citric acid.

How to clean the microwave with dishwashing detergent

Detergent for removing grease can easily cope with light to medium soiling. On a wet dishwashing sponge, squeeze a little dishwashing detergent, lather well and put it in the microwave for 20-30 seconds at minimum power. But make sure that the sponge does not start melting. After removing the softened dirt with the same sponge, rinse the surface thoroughly with clean water.

How to clean a microwave with steam

It’s easy to clean your microwave from stale grease using plain water. This is probably the simplest and safest remedy. Pour more water into a wide container and put it in the microwave for 5-8 minutes at maximum power. After switching off, keep the door closed for another 15 minutes. Then wipe the inside with a dry cloth.

How to clean your microwave with special products

A huge selection of cleaning products for the kitchen makes it easy to clean the microwave in just a few minutes. It is important that the chosen household chemistry is suitable for the microwave oven. To get the desired result, it is necessary to follow the instructions on the product packaging.

How to get rid of odor in the microwave oven

Often the problem is not how to clean the microwave, but how to remove the unpleasant odor inside. You can get rid of it in different ways:

  • wipe the inside walls with a solution of coffee and wash it off after a couple hours;
  • pour 100 g of salt or 7-10 powdered activated charcoal tablets into the container and leave it in a closed microwave overnight;
  • heat for a couple of minutes the peel from citrus. After that, be sure to remove the essential oil droplets from the walls.

Any of the above methods will help to keep the microwave clean. But in order not to have to wash away stale grease, you need to wipe it regularly, when heating food, use a special hood or a glass cover.

To save your time and still get a great result, contact our cleaning company.

Post thumbnail

How to clean a kitchen hood grille?

It is impossible to cook food and still keep the kitchen perfectly clean. It goes without saying that the hob and oven are the first to take the brunt of the damage, but many people don’t know or notice that the cooker hood also gets dirty quickly. In the hood, the main blow falls on the grease filter, which has a fine structured base, which makes the cleaning process much more difficult. So, today we will talk about how to clean the grate of the hood.

How often should you clean your hood and why should you do it?

A range hood is one of those devices that makes our life as easy as possible, and makes the process of cooking and subsequent cleaning as fast and comfortable as possible. Its purpose is to capture steam, soot, smoke and unpleasant odors that accompany any cooking. If the humidity in the house is high, the use of a hood will be completely necessary.

The more regularly you use the hood, the faster it will become dirty; this primarily concerns the metal grease filter. It becomes covered with particles of fat, which reduces the performance of the hood, and as a result, the quality of its work. Ultimately, by ignoring regular filter cleaning, grease particles can even get into the engine and damage it.

Methods for cleaning a hood

Traditional methods

  • If you regularly maintain the hood, it will be enough to use available means to remove dirt and it will take a minimum of time. We are sure that in every home there is either vinegar, soda or laundry soap.
  • Acetic acid. You can either soak the grate in the solution or scrub the grate with the solution using a sponge. In addition, gently scrub off the grease deposits with a soft brush, rinse with water, and finally dry.
  • Laundry soap. Grate it, pour the resulting shavings into a large bowl of warm water (water at a temperature of about 60°C). Soak the filter in soapy water for at least half an hour. If dirt begins to flake off, carefully go over the grate with a scraper or brush.
  • Lemon juice. Rub the surface of the grease filter with a slice of lemon to ensure that a sufficient amount of juice reaches the grate. Instead of lemon, you can use citric acid. To do this, you need to dissolve 3 tablespoons citric acid in 1 liter of warm water, immerse the grate in this solution and leave to sour for 15-30 minutes.
  • Hot solution. You will need a glass of baking soda, laundry soap, a tablespoon of table salt and 5 liters of water. Boil water in a larger container on the stove. Next, add the previously specified components one by one. Lower the mesh into the solution and cook it over low heat until contamination begins. Finally, gently wipe with a sponge or brush. Cool the filter in advance to avoid burns.

Use of specialized household chemicals

Homemade recipes are, not to say, convenient, although all the ingredients are often on hand. And questions may arise about the quality of cleaning itself, especially if the filter has accumulated a lot of grease.

That is why there are specialized household chemicals, the use of which does not require any boiling or mixing of “potions”. Chemistry is often much better at removing contaminants by breaking down its very structure. But we strongly recommend using only proven household chemicals from well-known manufacturers. Often, these funds are not included in the budget price category. It should be understood that the use of funds of such a plan should be as careful as possible. Firstly, you need to choose the right product based on the design features (material of manufacture, etc.), and secondly, strictly follow the instructions, because you can harm the skin of your hands.

To ensure that nothing happens and the result is great, it is best to delegate the task to us. We will handle it wonderfully and save your time and money.

Post thumbnail

How to remove marker from clothes, carpets and upholstered furniture

Markers are a great option to keep your child busy. But only with such games, you need to watch him even more carefully than usual.

You have provided the baby with paper, a special board, wadding… But turn away for a minute, and he diligently began to draw the sofa, his clothes, and what is there – everything he could reach.

What to do? Take the kid to the bathroom, and you clean up the mess. You can wash off the marker from the fabric, but you’ll have to work a little harder.

Chalk/water-based marker: Wash off immediately

Chalk/water-based markers are very easy to remove, provided they have not dried out. Therefore, never leave the washing “for later”.

Take an ordinary soap or stain remover. If the fabric is delicate, white or silk – it is better to use a gel-like stain remover.

Or you can use hydrogen peroxide. If you “missed” the stain or it was not possible to wash it at once, it had time to dry – take baking soda, mixing it with a small amount of water.

Washing off alcohol-based marker marks

The main rule – do not rub the stain. Take a cotton disk and moisten it with vodka (medical alcohol), solvent or lotion. Put a rag flap under the stain so that the paint is not imprinted on the other side of the product. Carefully and gently soak the stain with a cotton disk until it disappears, and then wash the clothes in the usual way. With upholstery of course it will be more difficult, but if you have a cover on the upholstered furniture, it will greatly simplify the task. 

Also with traces of alcohol-containing marker can cope with a solution of vinegar (1 tablespoon per 250 ml of water) or glycerin (apply to the stain, soak, rinse in salt water).

How to wash off oil marker marks

Oil-based marker can be washed off with oil. Take the most common sunflower oil and apply it to the stain. Leave the fabric for a few hours, and then wash the thing, adding to the water grease remover – dishwashing detergent, or food starch.

Another method involves using toothpaste. Apply it to the stain and let it dry, and then wash the thing. If the stain is on furniture upholstery – remove toothpaste residue with a brush.

Paint-based marker: the most “dangerous” enemy

This marker is the most difficult to remove. For natural fabrics you can use a solvent or acetone (but in the case of synthetics you can not use them – these substances will lead to loss of color).

You can also use nail polish remover, benzine. Remove the stain with their help, you can use a cotton disk.

Universal methods

There are universal methods and recommendations that apply to any markers and marks from them. When removing marker stains, don’t forget about them:

  • always try the product from the wrong side – to control how the fabric will react. In the case of furniture, try to test on the side that is adjacent to the wall or is at least not too visible;
  • don’t wait for the marker to dry, try to wash it right away;
  • for any marker you can use vinegar or ammonia, in the proportion of a tablespoon per 250 ml of water. They are suitable for natural fabrics and synthetics;
  • using a stain remover, carefully read the instructions.

If you do not want to spend time to perform tasks of this plan and there are doubts that the product will not lose its presentable appearance, it is best to delegate cleaning to specialists. Leaving a request to our specialists you will receive impeccable service for quite affordable money.  Cleaning company in Calgary – a guarantee of your peace of mind.

Post thumbnail

Interesting facts about cleaning that you definitely don’t know!

Do you still think that cleaning is simple and straightforward? Put on rubber gloves, prepare soapy water and go! It would seem, what could be easier? But keeping your home clean, as it turns out, is not so easy. 

We have picked up some interesting facts about cleaning, which will definitely surprise you and make you look at rubber gloves differently.

Rubber gloves are a nursery of bacteria!

Everyone thinks that using rubber gloves protects you from germs and dirt. But have you ever wondered what is hiding inside those gloves? It’s the perfect breeding ground for bacteria because it’s warm and moist. We recommend washing your gloves regularly with hot water and a little detergent. Be sure to make sure they are completely dry before use. In general, it is best to use disposable gloves for cleaning. 

Replace your rag and sponge!

Your dishwashing sponge contains millions of germs. Clean your sponge regularly with hot water and dishwashing detergent to avoid these bacteria. The rag also contains billions of live germs. Try to change your rag daily to prevent the spread of germs.

Germs can live on surfaces for up to 3 days!

Germs can live for up to 3 days on wet surfaces such as the kitchen sink and bathroom sink. On dry surfaces, such as toys and furniture, they can live for several hours. To prevent germs from breeding, make sure you clean all surfaces thoroughly. It’s best to do your cleaning every day. 

Wash your doorknobs!

Doorknobs contain a lot of bacteria because people don’t wash their hands well. Clean door handles regularly with disinfectant or wipes to prevent these germs from multiplying. 

Vacuum cleaners release dust, bacteria, and allergens into the atmosphere!

Some dust, bacteria and allergens are released into the atmosphere by vacuum cleaners. To prevent this from happening, make sure your vacuum cleaner has a high-efficiency particulate filter. You should clean or change the filter on a regular basis. This will help in improving the indoor air quality. 

Wash your refrigerators without sanitizers!

Using sanitizers when washing your refrigerator can spoil food, giving it an unpleasant taste and odor. Use warm, soapy water instead. If you do use sanitizers, leave the door open for a few hours to air out and then wipe the inside of the refrigerator with hot water to avoid leaving harmful residue.

Antibacterial detergents want to live longer!

They should be left on surfaces for 30-60 seconds before wiping them off. So don’t spray the surfaces and wipe them right away, as you will leave the little germs to multiply. 

As for the nuances of cleaning, believe me there are many more. And that’s why it’s best to entrust the cleaning to the experts at a cleaning company in Calgary. They know how to properly clean a velour sofa, dust blinds, how to get rid of mold in the bathroom and more. Our cleaners in Calgary will gladly take on a task of any complexity and will do everything to perfection. In addition to the impeccable quality of service delivery, we also boast affordable prices in the market, so leave a request for a cleaning company and continue to enjoy life.  Our experienced professionals will do everything for you. It does not matter whether you need to clean your office, apartment or dental office – we can cope with the task of any complexity.

Post thumbnail

Interesting facts about cleaning around the world

The approach to apartment cleaning may differ depending on the cultural values and traditions of different nations. In this article we will present interesting facts about apartment cleaning in certain countries and regions…

On the territory of our planet there are about two hundred states, each of which has its own history and culture. The population of each country honors specific traditions, some of which are atypical for the rest of the world. Even trivial cleaning of apartments in their performance can be quite surprising. And it is this aspect that we will talk about today.

Further we will give examples of interesting solutions related to cleaning of apartments in different countries and parts of the world. Some of the further mentioned traditions may surprise you, but all the information given corresponds to reality, and you should not doubt it.

Cleaning apartments in Germany

Germans are a very pedantic people. They do apartment cleaning without hurry, planning literally every action. The process of putting things in order in the premises is not characterized by something unusual, but the approach to the removal and disposal of garbage is interesting. For example, almost all Germans leave used batteries in special boxes (we have been trying to introduce this practice for a long time). Glass, paper, plastic and some other materials are placed in separate containers. And even household appliances and furniture are left only in designated places.

Cleaning apartments in Scandinavia

Residents of Sweden, Denmark and Norway do not consider it necessary to clean apartments in the summer, but closer to winter their activity in terms of putting things in order increases significantly. Another “trick” of these peoples is the habit of vacuuming in underwear or without clothes at all. The tradition is supported by a very high percentage of the population.

Cleaning of apartments in South America

In Colombia and Brazil, people prefer to clean their apartments to upbeat music. The preferred genres are pop and rock. Also, South Americans often do not clean in certain rooms. In particular, Colombians rarely vacuum in living rooms, and many residents of Argentina prefer not to clean their bedrooms.

Cleaning of apartments in Turkey

The inhabitants of this country love cleanliness. Women perform wet cleaning almost daily, and general cleaning is carried out at least once every 2-3 weeks. Vacuuming the apartment several times a day is a common solution for locals. By the way, cleaning in Turkey is a woman’s business. Men do not take part in putting things in order.

Cleaning apartments in Israel

Israelis are very religious and never clean at Saturday. On this day they do not wipe the dust or even wash dishes. Taking out the garbage is also forbidden. But before the Holy Passover Israelis traditionally arrange a general cleaning and for several days washed everything to a shine. Not a single speck is left in the houses. And even old furniture shines clean.

Cleaning of apartments in China

Most Chinese people live in rather dirty apartments, carrying out general cleaning once a year, mostly before the Chinese New Year celebrations. A simple broom is usually used to get rid of dust and debris. Vacuuming is infrequent, up to twice a month.

Apartment cleaning in other Asian countries

Koreans treat this matter very responsibly and clean in special suits. The Japanese consciously refuse music, preferring to clean rooms in silence, indulging in reflection. In many Asian countries of the post-Soviet space, major cleaning is carried out mainly before traditional holidays, such as the arrival of spring.

Post thumbnail

Marie Kondo’s cleaning methodology

Marie Kondo is a famous cleaning consultant and author of books on home organization. We advise you to familiarize yourself with the main rules of cleaning according to this method. 

Distribute things by size

Traditionally, it is believed that the best way to sort things is by “like with like”. Marie Kondo goes further and advises to stack items that are not only similarly used, but also similar in size. If small items are stacked next to each other, you don’t have to worry about them getting lost. 

Just like the other rules of Kondo method, this tip ensures that you can always remember where in your home an item is stored. Kondo recommends storing things in drawers if possible.

When storing things, consider how often they are used 

Most of Marie Kondo’s advice is based on simple logic. One of her rules is that frequently used items should be placed where you can get to them quickly, while less frequently used items can be placed in hard-to-reach places. This means that plates, glasses and mugs should be on an accessible shelf, while a rice cooker that you hardly use can be left in the far side of the cupboard.

It will get worse before it gets better

Because the method involves “stacking” items by category (all of your clothes, for example), it can lead to a small disaster for the time you’re in the process of sorting. It’s important to realize that this is normal and very soon you will see the light at the end of the tunnel. You shouldn’t expect to be able to sort everything in one or two days, so it’s best to stop at one category a day unless you want your house to look like a cyclone went through it.

Put things in a pile

Another of Marie Kondo’s tips for deciding what to keep and what to get rid of is to gather things in a huge pile and try to quantify them. That way you’ll quickly realize that you probably don’t need 17 belts, and you’ll see which things are fit for use and which need to be replaced.

Thank your home

Not all of Kondo’s advice is strictly practical, and many of it touches on the emotional and even spiritual side of things. Much of the KonMari method is based on paying attention to the place where you live. So it’s important to thank your home for the roof over your head and take a moment to praise it, whether it’s a huge mansion or a small apartment. Marie Kondo also suggests thanking every single thing that you have decided to part with, but that once meant something to you.

Give every item a home

You probably know that everything has its place. And this is definitely the principle that Marie Kondo suggests to follow. She talks about a strategy that’s as old as time: make sure every single thing has a home. Designate a special shelf for winter gloves, tongs or waffle maker, and then they are more likely to be stored properly and not lost. 

Stack things according to the Marie Kondo’s system

Once you’ve decided what to keep and what to throw away, use Marie Kondo’s unique folding method, which stores clothes vertically instead of horizontally. All closet items are folded into thick rectangles and then stacked on top of each other in clear drawers so you can easily see what you have. This may seem difficult at the beginning of the journey, but gradually this method will make your closet and shelves as neat as possible.

Use transparent containers

You may find it tempting to hide something you rarely use out of sight. However, Marie Kondo advises to do the opposite and store everything in transparent containers, especially in areas like basements, warehouses and attics where it’s important to see exactly what’s in a particular box to find things faster. 

And before we present the top tip of this compilation, here are a couple of lifehacks worthy of note: 

  • carefully choose a place to store things that are special to you;
  • involve your family in sorting clothes;
  • use small storage boxes.

Make sure everything you store brings you joy

One of the most talked about tips in the KonMari system is the idea of items that give joy. Kondo believes that most things in your life should bring you joy. This may seem too bold, but it carries a deep meaning. After all, if something doesn’t make you happy, why do you need it at all?

Cleaning and storing things like this is definitely important, but when it comes to general house cleaning, getting rid of dust, etc., it is best to contact a cleaning company in Calgary. Our specialists will be happy to clean your house or apartment at a comfortable time for you. It should be noted that in addition to the high quality of service, our cleaning company also boasts affordable prices for services.

Post thumbnail

Care of induction stove 

Induction stove has become a real trend of cooking equipment among consumers over the past couple of years. This is really an indispensable economical assistant in the kitchen. But after the first cooking on it, a lot of questions arise: how to care for the induction cooking surface? How to clean an induction hob? What are the best ways to clean induction from grease and stains? Find answers to all these questions you can find in our article. By following the simple rules of induction cooktop care described below, you will be able to keep it perfectly clean, thereby extending the maximum life of its operation. So, let’s get started.

Features of induction cooktops

Induction cooking surfaces are characterized by their stylish design, ease of use, food is cooked on them several times faster than on gas or conventional electric stoves. They do not require any special care. Yes, this technique has a complex design, but at the same time it is not at all fastidious. The key to the long service life of this device is just following the instructions for proper cleaning and operation of the device.

Induction cooktop is a glass-ceramic electric panel that heats dishes by means of a magnetic field that creates electromagnetic induction. It is safe to use as it is virtually heat free. When food is cooked on the stove, the induction currents heat the bottom of the cookware, hence the food in it is heated. It receives some degree of heat from the pot or pan. That is, when working induction energy is not spent on heating the external environment, but directly on the objects of cooking, so that the cost of electricity is minimal, and the food is cooked much faster. Also a distinctive feature of this technique is that it automatically turns off after the dishes have been removed from it. It goes cold in a matter of minutes. This is ideal from a safety point of view for families with small children or pets.

How to clean an induction hob

To make cleaning an induction hob easy and fun, and to ensure that your induction hob will keep it working and looking beautiful and well-maintained for a long time to come, we recommend following 5 very important rules:

  • Use only utensils designed for induction stoves.
  • To avoid scratches, do not move pans, sauté pans, saucepans, pots and other kitchen utensils on the surface of the hob.
  • Make sure that the bottom of the cookware is dry and only then place it on the hob. 
  • It is advisable to wash dishes and vegetables away from the cooking surface. This is to prevent water droplets and other contaminants (such as soil, which can leave scratches on the stove) from getting on it.
  • Do not use powder cleaners. As a rule, they do not dissolve completely in water and can damage the hob when washing.

How to get rid of stains on the stove

Getting rid of stains on an induction stove is very easy. To ensure that your appliances are always perfectly clean, use a window cleaner. It perfectly copes with streaks on a surface that is not heavily soiled. For this cleaning, do the following:

  • Wipe the panel with a dry, soft cloth.
  • Spray the panel with window cleaner.
  • Wipe the surface dry.

How to get rid of soot and grease

  1. Getting rid of grease and grime is quite simple. Here are 5 simple ways:
  • Use an ordinary dishwashing detergent. It is definitely available in every home. Carry out the following actions:
  • Apply it to the cold soiled surface with a microfiber cloth or sponge.
  • Leave it on for about 10-15 minutes.
  • Gently rinse it off with water. Be careful not to damage the glass ceramic.
  • After washing, wipe the surface of the stove with a soft cotton or paper towel.
  • This method is very simple and does not require any additional costs.
  1. Cleaning glass ceramic tiles with baking soda. This method is also very good in case there is a trace of the frying pan left on the induction hob. To do this:
  • Mix baking soda with a small amount of water.
  • Apply the mixture on the cooking surface, especially on the heavily soiled areas.
  • Leave it on for 5 minutes.
  • After the time has elapsed, wipe the stove with a soft cloth.
  • If some stains could not be removed in this way, add a little vinegar to the baking soda. This reaction will help wash away stubborn contaminants.
  • It is also important to note that baking soda is not only good for getting rid of dirt, it also has a disinfecting effect. Vinegar removes unpleasant odors and removes stains from the panel.
  1. Buy a special product for cleaning glass ceramic surfaces. The special chemicals that are included in such household chemicals are excellent at removing dried-on grease and grime.
  1. Use a special scraper or rubber spatula:
  • Moisten the contamination with water and leave it for a few minutes.
  • Hold the scraper/spatula at an angle of 300, remove the dirt.
  • Remove all dirt from the surface of the hob with a damp cloth.
  • Wipe the hob with a dry soft towel.

How to clean an induction hob

An excellent remedy for induction cooktops is a common household dishwashing detergent or special formulations for cleaning glass-ceramic cooktops.

What NOT to do when cleaning an induction hob

  • Start cleaning the hob before it has cooled down completely. Wait until the appliance has cooled down completely. This way you will not only avoid soap scum, but also prevent cracks from forming.
  • Do not scrape off burnt spots with a knife, metal brush or other abrasive materials.
  • Use aluminum cookware – it leaves marks on the glass ceramic that are almost impossible to remove.
  • Use pots and pans of poor quality – after their use they leave scratches and soot on the surface of the induction stove.
  • Postpone cleaning the surface “for later”. In order for the stove to serve you long and well, you need to wash it very carefully after EVERY cooking!
  • Leave plastic or silicone objects near the dishes in which food is being cooked. They will melt, drip on the surface of the panel, and after removing these stains will be extremely difficult.

Care instructions for induction hobs

  • Wipe the surface of the induction hob every time after cooking and only after it has cooled down completely. If the hob is still clean, it is sufficient to wipe it with a damp microfiber or soft sponge cloth, which can be purchased in car care departments.
  • Use a separate cloth to clean the induction hob. If you use the same cloth that you use to wash dishes, you will leave a greasy residue on the hob surface that is difficult to get rid of.
  • Use a window cleaner or dishwashing detergent to clean the glass ceramic hob (if there are stains and grease on the hob).
  • Never use abrasive detergents, rough sponges or metal scrapers to clean the induction. Their impact spoils the surface of the stove. As a rule, a special scraper for induction stove is included with the hob.
  • If sugar or salt is scattered on the hob, remove it immediately! Simply gently sweep the sugar or salt crystals off the surface of the induction hob with a soft, dry cloth.

Now you are armed with the knowledge of how to properly care for your induction cooktop. Compliance with these simple recommendations is the key to a long and quality work of this indispensable kitchen appliance. Such tips will help you keep your home clean. And for general cleaning of your home, in particular your kitchen, we advise you to contact our cleaning company in Calgary. 

Post thumbnail

Cleaning curtains: is it worth turning to specialists?

In this article we will tell you about the most affordable ways of cleaning curtains, which do not require manual or automatic washing. Tulle and curtains with the addition of synthetic fiber can easily be refreshed in the washing machine. But what to do with heavy curtains made of expensive natural fabrics, what kind of care should they provide? It should be taken into account that they require more delicate treatment – accordingly, they should be cleaned very carefully. Let’s talk about this below.

The most popular ways of cleaning curtains

In order to properly clean curtains at home, it is necessary:

  • Clean the soiled areas with soap. If the curtains got splashes from drinks, dirt or dust stains appeared, there is no need to clean the whole fabric. For local cleaning you will need laundry soap and an old toothbrush. Having slightly moistened the fabric, it is rubbed with soap, after which the softened contamination is scrubbed off with a toothbrush and rinsed with clean water. This method is suitable for eliminating harmless stains and practically does not carry any danger, but the main thing is not to overdo it in the use of the brush, so as not to leave scuffs.
  • Remove dust with a vacuum cleaner. In rooms and halls with windows on the roadway side, curtains are very susceptible to dust contamination. A vacuum cleaner running at minimum power will help to freshen them up. Leading manufacturers of household appliances equip their products with nozzles specially designed for this purpose. To clean the curtains is also suitable furniture nozzle or a homemade device in the form of a gauze bandage, which is fixed with an elastic band on the vacuum cleaner tube.
  • Use a steam jet. Steam cleaners are a great invention not only for cleaning upholstered furniture, but also for maintaining the appearance of curtains. Cleaning with hot steam jets replaces delicate washing and is suitable for many fabrics. Steam cleaning is not the same as full-fledged washing, because the collected dust still remains in the texture of the fabric (because the steam cleaner does not suck it inside). Before you start steam cleaning, be sure to find out if this method can be used in your particular case. Also remember that if the fibers of the fabrics from which the curtains are made are prone to shrinkage, they should not be washed or steamed.

If your curtains or drapes are made of expensive materials: batiste, silk, linen, muslin, brocade, moire or velvet and require additional care, we advise you to contact us. It is definitely not worth saving money, because spoiled material will cost a lot in the end. And so, delegating such a delicate task to the specialists of cleaning in Calgary you can be absolutely calm, because our cleaning specialists perfectly understand all the nuances of cleaning curtains from different fabrics, know how to get rid of stains of different origins. It should be noted that we guarantee not only a perfect result, but also that in the case of damage to the material will fully compensate for the damage. Cleaning in Calgary is the key to your peace of mind and a beautiful and clean home.

Post thumbnail

How to choose a dirt mat for a home or commercial space?

In the period of fall-winter-spring, the question of choosing a court mat becomes very acute. Its main purpose is protection from dirt, moisture absorption, and aesthetic appeal. As a rule, we are talking about not even one, but two mats – in front of the front door and inside the room. An important requirement for both is their hygiene. Rugs should be easy to wash, because their cleaning should be carried out at least once a week (in the case when it comes to a private house or apartment) and once every few days when it comes to commercial premises, as well as quickly dry, because the humid environment is the most favorable conditions for the development of bacteria. The larger the area of the mat, the more it retains dirt.

Entrance mat

The exterior mat takes the brunt of the impact, so the most important quality for it is a ribbed or bristled surface to remove dirt from the soles of shoes in hard-to-reach places. Consequently, the more complex the structural pattern of the mat or the longer the pile, the better it copes with its task. To care for such a mat is not difficult, it is easy to wash. Also in front of the entrance to the house are very convenient mesh mats, they clean shoes well and at the same time do not require frequent washing, as small debris spills through the holes on the floor, so it is enough just to sweep under it. The most wear-resistant are rubber mats. A mat for the front door made of rubber can withstand temperature fluctuations without deforming or crumbling, and the rubber base prevents it from sliding on the floor.

If you have a mat in front of the front door, the mat in the room performs more of an auxiliary cleaning function, as well as aesthetic and organizational. A mat in the hallway is needed to clean dirt and dust from shoes more thoroughly. The mat under the door separates the “dirty zone” of the hallway, and prevents dirt from spreading throughout the house.

Entrance hall rug

Hallway mat for hallways most often has a rectangular shape, there are also semicircular and shaped. It is better if the size of the mat is larger than the width of the entrance door. For them it is also desirable non-slip rubber base, the rest of their characteristics should be chosen based on the habits and needs of the owners. Floor mat in the hallway is usually chosen from structural materials such as pile, microfiber, coconut fiber, rubber, foam materials.

Rugs made of synthetic materials such as polyamide and polypropylene are very durable and can last up to 10 years. They perfectly collect moisture and do not require special care – they can be washed in water and vacuumed. Their only drawback is their simple design, which is unlikely to be a decorative addition.

Microfiber mats usually have a very long pile. Their main advantage – high moisture absorption and the possibility of washing in washing machines. But such mats cannot boast of durability.

Pile-coated mats perfectly cope with shoe cleaning, moisture absorption due to a huge number of small lint. Care for such mats is more complicated – consists of cleaning it with a brush, but its moisture absorption and dirt-proofness quite pays for this hassle. An edged and pile mat prevents dirt from spreading around the house. Mud-proof mats with pile have a wider choice of colors and patterns – you can choose with an inscription or a patterned design that will complement the interior.

Mats made of natural coconut fiber take longer to dry, but have an attractive appearance while performing its main function of protection from moisture and dirt. Mudproof mat from coconut fiber is durable, does not lose its color over time. Such mats are not recommended to shake, it is enough to turn them inside out to knock out the dust. Rugs made of coconut fiber have a variety of designs: funny drawings, friendly inscriptions and original ornaments. Such a mat will be a wonderful addition to the interior of the hallway.

A functional and practical doormat protects your home from dust and dirt and reduces the time needed for cleaning. But when it comes to cleaning, we can help you. Our cleaning company specialists will be happy to help you with this task. Our cleaning in Calgary is the best solution for every homeowner or commercial premises.

Post thumbnail

Advantages of stained glass window cleaning by professional cleaners

View glazing is characterized by a large area and provides maximum visibility. Stained glass windows are not only beautiful but also very expensive. They are most often handmade by virtuoso craftsmen and are used in authentic style buildings, as well as in church establishments. At the same time, the owners of such windows are incredibly difficult to keep them clean, which is due to the large area and complexity of the window structures themselves:

  • the presence of hand-painted, decorative elements
  • non-opening frame
  • limited access to the facade side, etc.

A presentable appearance undoubtedly requires regular cleaning of windows and facades, snow and ice clearing, exterior cosmetic and serious installation work. Given the height and, as a consequence, the inaccessibility of some places, the performance of these standard works will involve additional difficulties. The usual erection of scaffolding and other devices in the course of maintenance of high-rise buildings is quite costly, inefficient and requires a large amount of time to carry out the work. On their own, without the help of specialists, to perform washing of stained glass windows is definitely not possible. It requires special equipment and a high level of professionalism.

Stained glass windows should also be cleaned using gentle detergents to avoid damaging the expensive coating. Panoramic window cleaning will require the use of special gear and cleaning equipment, especially if the glazing is located at a high altitude.

We help our clients to solve these types of problems. “Tivacleaners” craftsmen are experienced in performing such tasks and have the necessary certifications and permits to work at heights. They will get to any point of your panoramic glazing – from the bottom, side or top. We have the necessary equipment to perform panoramic window cleaning at the highest level, in a short time, with a quality guarantee. We will wash your stained glass windows at a time when there will be no visitors (before opening or after closing the establishment), so as not to create discomfort for them.

Technology of cleaning panoramic windows

Cleaners thoroughly but gently clean the panoramic windows from all types of contamination using a scraper or a special chemical abrasive (if the first method is not suitable due to the peculiarities of the coating), which does not leave scratches.

Chemistry is selected taking into account the specific type of surface, as well as the level of dirt.

If the dirt cannot be cleaned by standard methods, high-pressure units are used. This equipment is used on large areas and only when the physical properties of the surface allow it. After washing, the windows are rubbed with soft sponges to give a mirror-like shine.

To make the view windows perfectly transparent after cleaning without streaks and streaks, they are subjected to additional drying – excess moisture is removed with the help of a rubber screed.

Can I be sure that my windows will remain unharmed after cleaning?

Our cleaning service employs only experienced cleaners with certificates of completion of special training courses. They know perfectly the peculiarities of their work and perform it responsibly and accurately. At the same time, in an emergency situation, in case of damage to property, we undertake to compensate for the damage.

To summarize, we note that stained glass washing by the specialists of the cleaning company in Calgary is basically the only possible option for surface care. This is because stained glass and panoramic windows are difficult to maintain. In addition, we can also boast: pleasant prices for services, quality assurance, safety of cooperation for the client and more.

Post thumbnail

Cleaning a billiard table at home


Billiard table is a stylish interior item and a mandatory element of sports clubs. Over time, its surface gets stains from beer, wine and other drinks, chalk marks, grease and other contaminants. To keep its presentable appearance for a long time, it is recommended to clean it regularly. Let’s consider how to clean a billiard table at home, what means should be used for different elements, as well as common mistakes in caring for it.

How to clean the cloth on the billiard table

Billiard table, like other sports equipment, needs regular maintenance. First of all, you should pay attention to the table cloth, which quickly gets dirty. When caring for it, it is forbidden to use ordinary detergents and cleaners. They are not only ineffective in most cases, but can also cause damage to the expensive cloth or wooden elements of the billiard table. This also applies to the brushes, sponges and other tools used. Therefore, you will have to buy special accessories and cleaning products to take care of the table. 

Cleaning the billiard table will require several items:

  • A special cleaner for the cloth;
  • wood polish;
  • microfiber cloth;
  • a soft rag used to polish the wooden elements of the table;
  • horsehair brush;
  • a vacuum cleaner and a special round and long nozzle.

The most common time to clean a cloth is when the surface is already heavily stained. Therefore, cleaning requires the use of professional detergents. As a rule, there are traces of chalk, spilled drinks, tobacco and food on the billiard table.

If there are chalk crumbs on the billiard style, it is better to use a special aerosol to remove them, otherwise you can smear chalk all over the cloth. With a large amount of debris and dust, you can remove them with a vacuum cleaner. But you need to be very careful. The cloth has a certain tension, which is easily damaged by this procedure. Therefore, the use of a vacuum cleaner is allowed only if you are able to clean without risk to the structure.

Among the most difficult are stains from wine and beer. These can be not only drops of drink, but also traces from the glasses left on the cloth itself or the sides of the table. There are specialized products that help to remove such stains. However, they should be applied to a dry cloth and then removed with a damp microfiber.

How to clean a billiard table

Regardless of the frequency of use, a pool table needs regular maintenance. And if it is in a bar or sports club, cleaning a pool table will be quite difficult. It is necessary to arm yourself with special detergents, a brush with horsehair and rags. At the same time, different elements of the table will require a different approach and cleaning agents.

Table cloth cleaning

Cleaning the cloth on the billiard table is the most difficult process. The material quickly absorbs spilled drinks, and it is almost impossible to get rid of chalk marks without special means. Therefore, it is recommended to carry out regular preventive cleaning to avoid the appearance of ingrained stains.

To do this, you should have a whole set of brushes made of horsehair or nylon. The first option is preferable, but will cost more. If the cleaning of the table is infrequent, you can use one combined brush that has a long and short pile. To remove the dust, you should perform jerky movements in the direction of the pile towards the sides and then sweep it into the puddles.

After dry cleaning, wet cleaning should be performed. To do this, you should use a microfiber or other cloth that does not leave traces on the cloth. It should be slightly soaked in water or add a little special detergent. At the same time, you should pay special attention to hard-to-reach places, such as corners and the edge. After wet cleaning, you should once again use a special brush to smooth the pile of the cloth.

Regular cleaning of the billiard table takes minimum time and allows you to extend the shelf life of even inexpensive cloth. But to clean the billiard table cloth from stains is much more difficult.

Cleaning other parts of the table

In addition to cleaning the cloth, you should also pay attention to the pockets where dust accumulates. For this you can use the same cloth brush or vacuum cleaner.

Next, it is necessary to pay attention to wooden elements. For the manufacture of a billiard table, expensive wood is used, which needs careful care. It is covered with a special varnish or paint, which prolong the service life and give the billiard table a solid appearance.

Therefore, to care for the wooden elements of the billiard table you should use a soft rag. It allows you to give these parts a shine without the risk of leaving scratches and scuffs. Additionally, it is recommended to use wood polish. Preference should be given to products that are specially designed for the care of billiard tables.

Ball and cue care

When caring for the cues, special attention should be paid to the stickers on them. It is important that they are not knocked off and not crumbled. Otherwise, such a cue can spoil expensive cloth, because of which the billiard table will be in disrepair. The cue should be stored in a special case that protects it from high humidity, direct sunlight and temperature changes. It should not lie near heating devices. It is better to store the cue in a horizontal position.

If you follow the rules of cue care, it will serve for a long time and your hands will glide on it perfectly. And if after a few months of use the cue hangs, it means that the rules of care and storage were violated.

Special attention should be paid to cleaning balls. To do this, use a special polish, which will not damage the cloth. It is not recommended to replace them with folk remedies. To remove strong contaminants, you can use a microfiber soaked in alcohol. After that, thoroughly treat the balls with polishes.

Balls should be stored in a place protected from light. After the game should not leave them on the table. There are special boxes for this purpose. If deep damage appears on them, the balls should be replaced. Otherwise, the cloth will have to be replaced, and this will cost more.

Mistakes in billiard table care

There are a number of mistakes that can be made when caring for a pool table. These include:

  • using chemicals that are not designed for the billiard table;
  • use abrasive rags and washcloths that cause damage to the smooth surface of the cue, balls and wooden elements of the cloth;
  • use vacuum cleaner carelessly;
  • remove dirt from the cloth with chlorine-based stain removers;
  • leave the table, cue and balls in constant exposure to light – they should be stored in boxes and special covers.
  • If you follow the rules of care and operation, the billiard table will last a long time without the need to re-tighten the cloth or change the cue and balls.

Table dry cleaning services

Our company offers professional billiard table cleaning services. Experienced specialists of the cleaning company in Calgary clean all elements of the billiard table using professional equipment and specialized detergents.

Even stubborn dirt is removed, returning the pool table to its appearance and performance. You can order both regular and general cleaning at a convenient time for the customer.

Post thumbnail

Bathroom cleaning: main features

The bathroom is the most important place in every home, requiring reverent attention when cleaning. Maintaining hygiene and cleanliness in this space plays a key role for your comfort and health. Therefore, when cleaning the bathroom, it is important to understand the various aspects that make this type of cleaning unique.

Professional bathroom cleaning: subtleties of the procedure 

There are the following important rules of bathroom cleaning that should not be overlooked: 

  • Removal of accumulated mold and excessive moisture 

Humidity creates ideal conditions for the development of fungus. These unpleasant guests love hidden corners where moisture is trapped and will actively multiply if given the opportunity. To keep your bathroom clean and free of these problems, it’s important to keep an eye on humidity levels, ensure good ventilation and regularly clean surfaces thoroughly. 

  • Disinfecting and cleaning surfaces

Effective cleaning requires not only effort, but also the right choice of cleaning products. Using specialized products that can fight dirt as well as kill bacteria and germs becomes an integral part of keeping clean. 

  • Cleaning bathroom fixtures and shower stalls 

When cleaning the restroom, it’s easy to forget the importance of cleaning faucets, faucets, tubs and toilets, but these are the elements that play a key role in creating the overall impression of a clean room.

  • Cleaning mirrors and glass

Mirrors and glasses in the restroom are like a reflection of its overall condition. They are a kind of business card of cleanliness and order in the room. It is extremely important to clean these surfaces, because they not only reflect ourselves, but also expand the bathroom, so cleaning the bathroom is also cleaning glass surfaces and mirrors. 

  • Storage area and accessories

In addition to cleaning the main surfaces, general bathroom cleaning is of undeniable importance, namely cleaning the storage areas and accessories in the bathroom. Often forgotten or overlooked, they can become breeding grounds for dirt and bacteria. Shelves, cabinets and soap holders all require regular cleaning to keep your bathroom looking spotless and hygienic. Cleanliness is essential to your comfort and well-being. Regular maintenance and general bathroom cleaning will keep your bathroom clean, cozy and safe for you and your family.

Bathroom cleaning done by cleaning companies is extremely valuable in ensuring impeccable cleanliness and hygiene. “Tivacleaners” is a leader in the cleaning industry with a wealth of experience and professionalism. Our professionals are trained in exceptional cleaning techniques, taking into account all the features of the room for optimal results. That’s why a bathroom cleaning service performed by us is guaranteed to be top-notch. We are equipped with advanced equipment and specialized tools for gentle and powerful cleaning. In their work, our specialists use safe but effective products that ensure a high level of cleanliness without damaging surfaces. Steam cleaner bathroom cleaning is also available for our customers to suit your requirements. We understand that every bathroom cleaning is unique, which is why we offer a personalized approach to each customer. Our services are customized according to the customer’s requirements and the specifics of the room. We strive for perfect cleanliness, paying attention to every detail and providing flawless results, so every general bathroom cleaning done by us is always high-quality and professional. “Tivacleaners” cleaning company in Calgary is your trusted partner in keeping your home clean and hygienic. Leave it to the professionals and enjoy your clean and comfortable space every day. You won’t have to waste your own time or worry about ruining any surfaces.

Post thumbnail

How to quickly clean horizontal blinds

Wooden, bamboo, plastic, aluminum blinds are a stylish and beautiful solution for decorating a window opening. However, when they hang for a long time, they become a real dust collector. How to clean blinds at home? To do this, you can invite a cleaning company or try to solve the problem on your own. The first option, of course, will be better and our cleaning company in Calgary will cope with the task better than others, but in this article we will tell you how you can do the cleaning yourself. But whether you want to spend time on this or not is your business.

USEFUL INVENTORY

Washing wooden, bamboo and aluminum blinds is not an easy task. The main goal is to get rid of dust. To do this you will need a special brush. Its fibers pass perfectly between the slats, sweeping away dust particles. To effectively remove all dust, you must:

  • close the blinds and brush them;
  • position the slats perpendicularly and brush off the dust again;
  • unfold the slats upwards and use the brush again.

You can find special washcloths on sale. They resemble a clothespin that grips one or more strips (depending on the configuration). With this tool, cleaning will take more time, but the result will be better. The dense fabric texture carefully fits each lamella, effectively removing dust. This brush is suitable for general cleaning and removing old dirt.

SPECIAL INVENTORY YOU CAN PRODUCE YOURSELF:

in the first case, you will need kitchen tongs. We wrap two soft cloths around them. We tie them at the base. The special brush for blinds is ready;

The second option is to use a large dish sponge. It should not be completely cut in the middle. These two halves will help clean even the most dusty and dirty blinds.

If a little dust has accumulated on the horizontal slats, you can get rid of it with a vacuum cleaner. Turn it on low and use a high-bristled brush.

WHERE DOES GENERAL CLEANING START?

Regardless of the model, before starting cleaning it is worth assessing the level of contamination. If the blinds are slightly dusty, the methods described above will work. If the contamination is significant, there are old stains and stains, the planks should be thoroughly cleaned. For this you will need:

  • detergent (liquid powder, special compositions for blinds, dishwashing liquid);
  • cotton and flannel napkins;
  • sponge or stiff bristle brush.

For aluminum blinds, it is recommended to use a dry microfiber cloth. If you clean with damp (or slightly wet) material, they may fade over time. For wooden and bamboo products, use a special cloth and wipe dry.

HOW TO WASH DIFFERENT TYPES OF BLINDS

Regardless of the material from which the lamellas are made, work must begin by thoroughly cleaning all elements from dust. If you neglect this stage, stains will remain after wet cleaning. How to clean horizontal blinds? Let’s look at the care features for each material:

  • PVC and plastic. The slats should be washed with warm water and a small amount of dishwashing liquid. After getting rid of the top layer of dust, remove dirt, grease and stains: gently wipe each plank with a damp cloth, then wipe dry. If the blinds are very dirty, you can completely immerse the blinds in warm water and add a mild detergent, such as dishwashing liquid. Wipe with a foam sponge and dry well. Cleaning bathtub blinds is easy, but disassembling and reassembling can be a hassle. Don’t forget about additional elements: top fastenings, cords for adjustment.
  • Aluminum. Such blinds can only be vacuumed and wiped with a dry flannel cloth. The material becomes dull from moisture.
  • Tree. Dry cleaning is best for these items. Additionally, you can use a special polish in the form of Pronto wood polish. If the blinds have not been cleaned for a long time, dry wiping is not enough. In this case, you will need warm water with added washing liquid. Wipe all slats individually with a damp cloth and then dry.
  • Bamboo. These blinds are made from glued and pressed plant stems. They should be wet cleaned after dust removal. After washing, be sure to dry each plank.
  • Textile. Models must be cleaned strictly according to the manufacturer’s recommendations. Basically, a dry microfiber cloth is used for this. If the contamination is intense, do wet cleaning.

If you don’t have the strength or ability to regularly care for your interior items, contact a cleaning company in Calgary. Our employees will not only professionally take care of the cleanliness of the blinds and windows, but will also tidy up the furniture, flooring, kitchen and bathroom. Thanks to the use of powerful equipment and special detergents, we will effectively and carefully remove even old stains.

Post thumbnail

How to clean a velvet or velour sofa

Every hostess wants her furniture to look like new for a long time. Different materials require a special approach to themselves and it is very important to provide proper care. Especially velvet covering requires careful care. It is quite finicky in terms of care, yet many people still choose furniture with such upholstery. After all, furniture with such upholstery looks spectacular and expensive, especially if its color is carefully matched to curtains and carpets. Velour sofa, armchairs, poufiki create an atmosphere of noble luxury, not pompous, but cozy and smart. Before cleaning your velvet sofa or chair, study the label. Often it contains the right information on how to care for the furniture. This way you will know if the upholstery can be washed or if it is only dry cleanable. In this article we will tell you more about how to clean velvet at home.

“Standard” cleaning of a velvet sofa

Fill a handheld clothes steamer. Hold the nozzle of the steamer a few centimeters from the surface of the velvet. Then wipe the wet velvet with a dry microfiber towel to rinse away the dirt. Add some foam for general cleaning Mix two cups of warm water and 1/2 teaspoon of dishwashing liquid in a large bowl. Create foam using your hands or the pressure from the faucet. Dip the dampened microfiber cloth into the foam only (it should not drip). Start at the top of the sofa and gently wipe it with the damp cloth in circular motions. Continue to move to a clean area of the cloth as the dirt is transferred. After each area has been cleaned, wipe it with a clean, damp microfiber cloth to wash away any soap residue.

If you don’t have a special product on hand, you can use a soap solution or a mixture of lemon juice and baking soda instead. Such a remedy effectively removes even stubborn stains. And here’s what you need to do for this:

  • Mix the juice of a small lemon and 2 teaspoons of baking soda.
  • When the mixture gives a rich foam, apply it to the upholstery with a soft sponge or washcloth.
  • Gently blot the stain, but do not rub the solution in to avoid damaging the fabric.
  • When the stain is gone, remove any residue from the furniture with a slightly damp sponge.
  • After cleaning, let the velvet dry for at least three to four hours, and then comb the pile with a soft brush.

We recommend that any home remedies for cleaning velvet should first be tested on small, inconspicuous areas of the fabric. After all, there is a risk that the color will become duller in the place where the material is cleaned.

How do I remove dirt?

  • To remove surface dirt from velvet, use a medium-hard bristle brush, a vacuum cleaner, and a woolen cloth. First clean the velvet from dust with a vacuum cleaner, but clean very carefully.
  • Red wine, berries are removed with a solution of laundry soap, vinegar and ammonia dissolved in cool water. All components take the same amount, for example, 2 tbsp. spoons.
  • Stains from velvet can be removed with gasoline, alcohol or vodka.
  • Tea, coffee and milk stains are removed with a weak solution of vinegar. 
  • Greasy, glossy stains can be removed by pouring heated sand into a bag. The contents will absorb the grease, and the stain will become invisible. After such treatment, the place where the stain was, you need to wipe with a sponge soaked in alcohol.
  • Sprinkle a fresh grease stain with starch, talcum powder or food salt. They absorb grease well. Gently wash the stain with a soapy solution of dish gel (1:1 water solution of vinegar). Wipe with a clean damp cloth and blot dry with a clean cotton cloth.
  • A solution of 1 aspirin tablet per glass of water will remove dried blood stains, red wine, berries.
  • Freeze plasticine, chewing gum, wax with ice from the refrigerator and carefully remove from velour with the blunt side of a knife.

Remember that the use of household chemicals and stain removers will most likely leave streaks and halos on the velvet surface. If the velvet pile is combed in the wrong direction, it will permanently lose its attractive appearance.

To ensure that the result is gorgeous and your furniture does not lose its aesthetic appearance, please contact our cleaning company. Our specialists will gladly take care of cleaning your sofa and armchairs and will do everything at the highest level. Our cleaning in Calgary, in addition to the high quality of our services, also boasts affordable prices for our services.

Post thumbnail

Features of care for mosaics made of marble, glass and other materials 

Mosaic is one of the oldest art forms in the world, practiced for thousands of years in almost all corners of the globe. Today, mosaic tiles are still popular among designers and architects, and the variety of materials and patterns is greater than ever: from ceramics to glass, with classic square or non-standard patterns. Thus, mosaics can be used to decorate
– kitchen apron. Increased strength, good heat resistance, low maintenance and good aesthetic characteristics make mosaic one of the most favorite options for decorating this part of the kitchen space for many people;
– built-in shelves. Mosaic made of glass or travertine allows you to correctly place accents and highlight individual elements of the room;
– an accent wall in the room, or a panel (it will perfectly emphasize the peculiar aesthetic image of the interior, creating a visual bright accent in it);
– hammam in the house. In addition to its beauty, the mosaic has high performance characteristics, excellent water repellency and wear resistance. It can be used at any temperature and can even be used to cover curved surfaces. For this room, the mosaic will become a source of decoration and pride for many years;
– floors in the house. This material is used to lay out floors with imitation carpets and artistic panels, with the beauty of which no other facing material can compete. In addition to the practicality of the coating, the mosaic in this case performs decorative functions, refreshing the interior. A high-quality floor mosaic will serve for a long time and flawlessly. It consists of durable materials (glass, ceramics, marble fragments), carefully polished and coated with substances that increase surface adhesion. Even when water gets on such a coating, it does not slip;
– swimming pools, etc.
However, regardless of whether you use marble or glass mosaics in your home, they require some care.
Here are some tips that will help make it easier to maintain your mosaic:
– avoid chemicals and abrasive products. To care for the mosaic, it is better to use products based on organic soap or household floor cleaners without ammonia in their composition. As for the “tools”, you should not use rags with steel elements, etc.; only soft sponges are ideal for cleaning;
– remember to clean as often as possible. Do not wait until dust and other contaminants accumulate on the mosaic, because all dirt particles are abrasive substances that deteriorate the appearance of the surface over time;
– We should not forget about the need to provide additional surface protection. This can be done by treating the surface with special strengthening impregnations or sealants that increase the service life of the concrete floor. Apply them according to the instructions. A greater decorative effect can be achieved by coating the floor with a special varnish (however, such actions should be coordinated with one of the specialized specialists, because failure to comply with the technology can lead to the opposite result);
– decorative glass mosaic can be cleaned with a glass cleaner and then polished with a dry cloth;
if the mosaic is heavily soiled, you can use cleaning agents with a low acid content, and you should strictly follow the instructions on the package. After cleaning the mosaic with products containing acids, rinse it thoroughly with plenty of warm water to wash off the remaining solution;
– a mixture of acetic acid and mustard can be used to remove scratches from the surface of glass mosaic tiles. The resulting paste is applied to a dry cloth and the damaged surface is thoroughly treated. By grinding the glass with such a “scrub”, small scratches disappear forever and repairs do not have to be made as soon as the surface appearance is damaged.

If you don’t have time for maintenance, or if you need to clean the surface from the glue after laying the mosaic, then it is better to contact our cleaning company in Calgary. Cleaning in Calgary is the best solution for you, because we guarantee impeccable quality and at the same time set affordable prices for our services.

Post thumbnail

Floor coverings for offices and their care

When setting up an office, you can’t ignore the issue of choosing flooring and, of course, caring for it – determining whether you can clean the flooring yourself or call a specialized cleaning company in Calgary to do the cleaning. After all, no design detail should distract employees from the workflow, not even the floor. At the same time, nothing should make employees feel discouraged. To make the choice easier, we suggest considering a few requirements for the right flooring for office spaces.

Design
Considering the flooring for the office from an aesthetic point of view it is worth paying attention to the area of the room, corporate style, specialization of the company. Even global corporations pay special attention to the design of floors: the aesthetic content of coverings can be very different (let’s not forget that competent design can attract potential customers).

Convenience
In terms of practicality, office flooring should be safe, hard-wearing and easy to maintain. It is good if the flooring meets noise insulation standards. This will help employees not to be distracted by extraneous sounds and focus on their work. The installation of the flooring is also important. The faster and easier it is, the less costly the whole installation process will be. Also, don’t forget that the office is almost never empty. Pay attention to materials that will be easy to maintain

Functionality
It is worth choosing a floor covering on which it will be comfortable and pleasant to walk. True, this is not the only task with which the flooring of the office space should cope. We advise you to choose environmentally friendly materials that are not harmful to the health of employees. Often office owners use soundproof floors. Let’s not forget that different flooring materials can be used for zoning the space. Thus, it is possible to separate workplaces from recreation and other common areas.

The most practical and suitable floor coverings for office spaces are:

  • PVC flooring has many advantages, including moisture resistance, durability, elasticity, resistance to alkalis and acids. However, the most important advantage of using PVC coatings in your design project is the variety of color variations, among which you can choose the colors that perfectly fit into the style of your office space. PVC coating colors can vary from bright to soft, and the texture – from rough and smooth to glossy and matte. In addition, thanks to the use of modern technology, coatings of this type can look like any natural material (stone, wood, marble). By the way, it is PVC-tile is an excellent solution that will not only complement the overall design of the office, but also separate different zones from each other inside the room.
  • Carpeting. For office spaces, choose carpeting made of durable synthetic fibers. The ideal carpet for office premises will be a floor covering made of polyamide. This type of carpeting is characterized by high wear resistance and ease of cleaning. Coverings with a short pile are a priority. Carpeting is the best flooring option for meeting rooms, executive offices, recreation areas.
  • Marmoleum. The material is made of natural raw materials, the composition of which is dominated by environmentally friendly components: resins, linseed oil, wood flour. These components have a positive effect on the respiratory system, which in turn creates a favorable atmosphere for office workers who spend most of their time indoors. Marmoleum is ideal for laying in different areas of office premises. For example, acoustic variants of Marmoleum can be used for meeting rooms. Strict designs will be an excellent solution for reception areas or individual office rooms. For recreation areas or open spaces it is better to choose brightly colored variants.

Before you buy flooring for your office space, you need to consider all factors, from safety to practicality. The above options are the most suitable solutions to ensure the comfort and safety of employees in office spaces, which, thanks to their versatility, will create an ideal working environment, becoming an indispensable addition to your design project.

No matter what type of flooring you choose, we can help you keep it clean. Our cleaning company will be happy to help clean marmoleum, laminate, tiles, etc. Cleaning company in Calgary is your key to success, because a beautiful and well-maintained office is the business card of any company. The way it positions itself directly affects sales, the desire to cooperate with it from the contractors and not only.

Post thumbnail

How to clean a crystal chandelier?


The direct function of lighting fixtures in the house – quality lighting, but they are also direct elements of the decor of each home. Crystal chandelier can decorate any interior, with its brilliance it harmoniously transforms the house. To shining product always had an attractive appearance, the cleanliness of lighting fixtures is also important. Dusty lamp will not give sophistication to any interior.

How to clean a crystal chandelier with pendants?

Crystal chandelier is the dream of every housewife, and regular cleaning is simply a necessity, because the luster of the product quickly fades under a layer of dust. It is, thanks to the shimmering under the sunlight, many housewives are so fond of this type of glass. But dust from the street, flying insects quickly contaminate the surface of the product, the shining luster is lost. A difficult question arises – how to wash a crystal chandelier? It is important to remember the basic rules for washing any lamps, because if it is located in the kitchen, there is a soot deposit on it, and if in the bathtub, there is a soap scum from water vapor. Different soiling requires different approaches to cleaning. It is necessary to regularly clean the lighting fixtures from fresh dirt by sweeping with a dust broom. Dry cloth should be removed formed cobwebs, wipe the lamps, clean the bases.  But, crystal chandelier requires periodic “general cleaning”, which implies a thorough cleaning of each element.

How to remove a crystal chandelier?

How to remove and wash, with what and how you can wash, a crystal chandelier with pendants to shine, not every hostess knows. First, disconnect it from the power supply, i.e. turn it off. Let the bulbs cool down completely, then unscrew them. After wiping the base with a dry cloth, the lamps with a slightly damp cloth. Remove all removable elements, pendants, decor.

It is ideal to remove all pendants and resort to cleaning by soaking.  

Among the available means for washing the chandelier are:

  • Ammonium hydroxide solution 10% (ammonia) + water

Mix 200 ml of warm water with a tablespoon (15 ml) of ammonia. Soak pendants, all removable elements in the solution for 5-10 minutes, then wash well, wipe dry. Crystal chandelier acquires its original shine, transparency, even the most stale stains are cleaned.

  • Table salt + table vinegar 9%

Mix in equal proportions (1 to 1) ordinary pure salt (without seasonings) and vinegar 9%. Pour the resulting solution into a basin with barely warm water (about 20-25 °). The crystal chandelier is placed all in the solution or only the pendants (that you managed to remove). Each element should be washed with a piece of bandage, gauze or cotton sponge in order to clean the surface of the product without scratches. Wipe each item dry. Good at cleaning contaminants from grease, soot, and cinders. Ideal to clean products that hang in the kitchen. Removes yellow deposits from cigarette smoke, the crystal chandelier is very shiny after washing it in this composition.

  • Baking soda (sodium bicarbonate) + 72% laundry soap.

Prepare a solution 1:1, soap can be rubbed or use liquid soap, pour into a basin of water, foam. Soak the parts for 5-10 minutes. After it is necessary to wash with an ordinary cloth, rinse. At the end, wipe dry. Soap will help to remove even old plaque on the parts, soda will give a fresh shine to all elements.

  • Calcined soda

For a basin of 10 liters, use 100 grams of soda ash, dissolve it well, wash all removable parts in the solution. Calcined soda is a universal cleaning agent that will help to easily remove soap scum, soot, returning shine to the product. 

It is good when all elements are removable and can be washed separately, but there are such fixtures that are quite difficult to remove from the ceiling. Here we will help and tell you: how to wash a crystal chandelier without removing it.

How to clean a crystal chandelier without removing it? 

If the main frame cannot be removed, first clean it with a damp cloth soaked in a solution of ammonia or glass cleaner. Afterwards, wipe the products dry well, as any remaining moisture or drops may cause a short circuit.

Today, there are some products on the market that help to keep lighting fixtures clean – these are antistatic sprays. If your crystal chandelier after treatment with a broom has acquired a fresh look, and it is not necessary to wash it thoroughly, then treat the pendants spray-antistatic. The composition of this product allows you to prolong the purity of crystal, and dust will not settle on the elements for a long time. With this regular cleaning and antistatic treatment, you can keep it clean for a long time.

When “dry” cleaning without removing the lamp, use special microfiber cloths that do not leave streaks and microscratches on the surface, or a gauze piece that will replace the microfiber.

We have considered the main options of how to clean the lighting fixture, if it can be removed. Of course, this option will perfectly remove all contaminants, but it is important to remember that it is important not to harm the crystal when washing. There are a few basic rules that should be followed, whether you clean the crystal light fixture without removing or soaking it.

How to clean a crystal chandelier from dirt without damaging it?

  • Water temperature should not exceed 27 °, crystal fades at high temperatures and return the former transparency and shine will be quite difficult;
  • use a plastic basin for washing, because metal can be scratched or broken elements;
  • to enhance the shine, at the end of any cleaning, dip the pendants in a solution of vinegar (5 liters of water + 100 ml of vinegar 9%), if you use “dry” cleaning without removing the chandelier, then wipe with a cloth soaked in this solution all the elements, and then wipe with a dry microfiber cloth.

To get a good result for sure it is best to contact a cleaning company in Calgary. Our specialists guarantee impeccable quality of services – you will definitely be satisfied.

Post thumbnail

How to clean tiles without leaving streaks on them?

Tile on the floor or walls, as a variant of interior decoration of the bathroom or kitchen, has a lot of advantages, including the aesthetic appearance of the tiled surface. But this wonderful property, can be easily lost as a result of everyday human activity, in the rooms finished with ceramic tiles. No matter how often you clean the kitchen, and try to wash the floor and walls in the bathroom, on the ceramic surface, one way or another, there are traces, the nature of their origin may be different, as well as methods and means of combating them. Many, of course, know what to wash the tiles, so that there were no streaks, and what detergents to use for floor ceramics, and what better to wash the glossy surface. development of the chemical industry in the field of production of household chemicals does not stand still and there is a large selection of effective means that can successfully counteract the problem of streaks on ceramic tiles in the process of washing the floor and walls of the bathroom or tile surface of the kitchen.

The nature of streaks on ceramics

Before answering the question of how to wash the tile so that it does not leave traces of detergent, dirt streaks or whitish stains from water, you need to have an idea of how these defects are formed.

This is necessary in order to correctly select the means for a particular type of pollution and the purpose of the room in which you need to clean the ceramic surface.

Let us consider the most common causes of the formation of different types of dirt:

  • Streaks from poorly washed dirt. A fairly common type of contamination, when the dust and dirt on the ceramic surface of the floor or walls, bathroom and kitchen, poorly cleaned. To wash off such streaks is most problematic.
  • Contaminated water. This is often the cause of streaks due to dirt that gets into the water during the cleaning process. Frequent water changes are a good preventative measure.
  • Water chemistry (hardness). With increased water hardness, there are characteristic white marks on ceramic tiles due to the high content of various salts in it. Most often such contamination is inherent in the bathroom, especially on the floor, where a large amount of moisture can accumulate.
  • Detergent. Often, after the use of cleaning and detergent compositions, there are traces on the tiles, especially those with a glossy surface.
  • Dirty sponge or rags. The cloth used for cleaning must be clean, otherwise the dirt and dust it contains will cause marks on the surface.

Chemicals that position themselves on the best side today are very many. However, in order not to spoil the coating it is necessary to read the composition of each of them very carefully. If possible, you should delegate the task to a cleaning company in Calgary, because our experts know exactly what products for which surfaces are best to use.

Folk remedies

Like all chemicals, household detergents have some disadvantages, such as an unpleasant odor, strong active ingredients can spoil the ceramic coating or dissolve the grout in the joints between the tiles, as well as the need to use protective equipment when working with strong acids. However, this all applies to cases when cleaning is performed by the owners of the premises, and not by cleaning specialists in Calgary. They know all the peculiarities of selecting cleaning products and use only time-tested cleaning methods in cleaning.

As for still folk ways, there are such:

  • Ammonia. A solution is prepared from a tablespoon of ammonia alcohol and one liter of ordinary water. The resulting mixture can be poured into a sprayer and then apply it to the tile, wash and thoroughly wipe the surface to be treated.
  • Table vinegar. The composition for washing is obtained by dissolving three tablespoons of vinegar in a liter of water. It is used similarly to the previous composition.
  • Citric acid. Crystals of citric acid are placed on a slightly moistened sponge, and light movements are rubbed into the contaminated areas. Sometimes used and natural juice from lemon, given the costliness of such a method, is used to eliminate small contaminants.
  • Chalk. Paper rubbed with chalk, it is good to clean the glossy surface of ceramics.
  • Chlorine. Or substances based on it, are used to care for white-colored ceramics.

At the end of the cleaning process, the surface of the tiles should be wiped dry, for which you can use paper napkins or towels.

Technology of cleaning ceramics from streaks

To achieve the desired result, and ceramic cladding after washing was clean and without streaks, it is necessary to follow some rules and observe the order of operations:

  • Large debris is removed.
  • Dust is removed from the cladding with a dry rag.
  • A soap solution is used to pre-wash off the dirt.
  • Clean water completely removes the foam residue from the soap solution.
  • The selected means is processed tile from stale stains of grease, dirt and traces.
  • After cleaning the tiles, the used preparation is washed off with a clean cloth.
  • To give the surface a shine, tiles can be treated with means for the care of glass and mirrors.

However, it is important to realize that a flawless result can be obtained only if you devote a lot of time to this task. Therefore, it is best to contact a cleaning company in Calgary.

Post thumbnail

How to clean a leather chair?

Furniture covered with leather, has always been a prototype of solidity, wealth of the owners, and now remains a prestigious, stylish part of the environment. But do not forget that the leather chair is still a household item, and in the process of use can rub off, lose its former beauty. How to prevent this? Are there universal methods of care? Is it possible to keep your favorite chair in pristine condition for a long time? Today’s article is devoted to these exciting questions, as well as ways of leather restoration. Make yourself comfortable, we’re getting started.

General recommendations for cleaning leather armchairs

Modern leather, like any other material, has a lot of variations, so care for it should start with the instructions attached by the furniture manufacturer. We emphasize the word modern, because the leather upholstery of the 90s is significantly different from the current one. Earlier, for furniture upholstery used quite rough, dense horned animal skin, which stood for years without special treatment, while not cracking. Modern material, having increased in assortment, is slightly inferior in properties. It needs regular care, the use of special means, without aggressive impurities, and polishing. The type of processing of raw materials plays not the last role in the choice of care products, so you can not skip the stage of studying the instructions. If the manufacturer’s recommendations are not at hand, or they are lost, we offer a universal algorithm for cleaning soiled leather surfaces (if you want to save money and not contact a cleaning company in Calgary).

  1. Remove small particles of debris with a vacuum cleaner. To do this, use a soft nozzle that will not create scratches. It is important to pay special attention to joints, depressions, hard-to-reach places, in which the concentration of dust is higher than on the surface.
  2. Treatment of the chair with a warm soap solution. This is the next stage of cleaning, produced with a flannel or microfiber cloth. Soap can be taken household soap, experience shows that it best copes with contaminants. Do not wet the surface, but slightly moisten it with circular movements, leave it for five minutes. After you need a clean, damp cloth, remove the soap residue, and wipe the seat dry.
  3. Removing stains. If there are visible stains on the surface, treat them with a product designed for this type of leather, according to the instructions. Again, it is better to contact professional cleaners in Calgary, they know all the nuances of this type of work. 
  4. Polishing the chair. The final stage of furniture cleaning is the restoration of the lipid layer of the leather, its polishing. For these purposes, both special impregnations and ordinary castor oil are suitable. A small amount of the product is applied to a sponge, and light, circular movements, rubbed on the surface. The oil is almost immediately absorbed by the porous structure, but the coating still needs to be polished with a clean, dry cloth.

Proper care of white leather surfaces

Caring for a white leather chair is not too different from standard care, and the cleaning company in Calgary knows this very well. It’s just that you need to pay attention to the chair a little more often, because dirt is more visible on the light-colored surface. So, weekly vacuuming, wiping with a damp cloth, will cope with the settling dust, and to keep the chair to continue to please with its whiteness, we offer a few lifehacks:

  • silted armrests, embedded dirt, you can wash from a light-colored chair with ammonia alcohol. It should be diluted in water (in the proportion of 1:4), and sponge gently go over the surface;
  • refresh the graying seat will help a solution of vinegar. It is treated with a white chair without excess moisture, and wipe dry. But this is a folk method and therefore say that the result will be flawless is not worth it;
  • soften the surface and return it to color will help warm milk. Wiping it on the chair, you can remove particles of dirt, and at the same time moisturize the skin, because the milk contains fats that nourish the protective, lipid layer;
  • traces of coloring substances (cosmetics, felt-tip pens, pens), from a light seat are removed with acetone. So that it does not damage the structure, you do not need to apply a lot of means to the absorbent cotton and rub hard.

After all these manipulations (except for treatment with milk), it is desirable to polish the surface with a stearin sponge, or another means that protects the skin from drying out.

Restoration of leather armrests and other parts of the chair

Unfortunately, leather is not immune to mechanical damage. Small scratches, claw marks, wiped paint, over time begin to catch the eye, and give a solid product a pathetic look. Is it possible to restore worn armrests? What to cover the holes with? How to remove scratches? Answers to the questions below.

Let’s start perhaps with the most common problem that can be encountered immediately after buying a chair. These are accidental scratches when the furniture is brought in, or formed during the cleaning process. Such damage is the easiest to eliminate, it is enough to pick up in the catalog liquid leather of the desired shade, and carefully apply it to the surface. This product “tightens” the imperfections, merges with the skin, creating the effect of a smooth, beautiful coating. The only disadvantage is that the method works only on a small area, it is impossible to “cure” a large area of skin.

The hole on the leather chair is restored in another way, namely overlay applique. To do this, a fragment of the necessary size (to completely cover the hole), color. The surface is pre-greased, a thin layer of furniture glue is applied, and the patch is applied. After drying, the edges of the application can be treated with liquid leather, so that it does not stand out too much against the general background.

Restore tattered armrests is also possible at home. Before starting work, the cracked area is degreased and covered with a layer of neutral paint. It will fill all the cracks, slightly smooth out the roughness. After drying, the surface is sanded to a smooth state, and apply the main paint. To achieve the desired shade, you can use several layers, not forgetting to dry them. The final result is treated with a water-repellent spray or other preservative.

How to keep your chair looking good for a long time

To keep your leather chair looking presentable during use, you need to take the time to clean it and take care of it in a timely manner. Regular cleaning will preserve the color of the furniture, will not allow the appearance of ingrained stains. Treatment once every few months with moisturizers will prevent drying out and cracks, and quick removal of defects will preserve the structure of the leather, not letting it spread to holes. In other words, the basis of beauty and long service of the chair is a careful attitude to it. Well-groomed furniture always looks attractive, and causes the desire to sit down on it.

And to make sure that everything is in order we advise you to contact our cleaning company in Calgary. Our specialists will cope with cleaning of any complexity.

Post thumbnail

Cleaning of cafes and restaurants

Regular cleaning of restaurants and other catering establishments is essential. The image of a place of rest depends on the cleanliness of the hall and sanitary facilities, and the health of customers depends on the state of the kitchen. Some people mistakenly believe that cleaning in HoReCa sphere is cleaning of dining and banquet halls only. Not at all. Hygienic cleanliness in the restaurant kitchen and other rooms is a part of normal operation of the establishment, not to mention the fact that such requirements are imposed by the controlling sanitary authorities. Professional cleaning in HoReCa industry is also an opportunity to save money on major and current repairs. Practice shows that special technologies within the framework of complex cleaning can increase the continuous service life of upholstered furniture, coverings, etc. by at least one third.

Compliance with hygiene standards, speed and discreetness – these are probably the main principles that must be followed during cleaning in order to achieve the desired result and… not to scare away visitors. That is why the cleaning of the hall is carried out after hours, and the cleaning of the kitchen – during the working break. And in general dust on surfaces, dirty spots can ruin the reputation of any institution, so the quality of cleaning should be taken care of in advance, even before opening. Tiva Cleaners can easily cope with cleaning of any complexity, dry cleaning of upholstered furniture, cleaning after repair. Our specialists know all the subtleties of cleaning different types of coatings and not only.

Catering establishments are subject to strict requirements. Failure to comply with sanitary norms can lead to fines and even the closure of cafes or restaurants. To avoid this, regular cleaning of cafes and restaurants is necessary. To maintain cleanliness, it is necessary to take care of such types of cleaning as:

  • Daily cleaning is a service that is ordered on a regular basis. As part of this service, cleaners are engaged in cleaning, disinfection of bathroom fixtures, tiles, door handles and other surfaces in bathrooms, removal of dirt from floor coverings. Also daily cleaning involves wet cleaning of all rooms, wiping baseboards, tables and chairs, shelves, bar counters. Also, when performing this cleaning, it is necessary to take care that contaminants are removed from cooking surfaces, stoves, clean sinks, tables, work surfaces.
  • Post-renovation cleaning – required before opening, after moving into a new premises or after renovation. The work involves cleaning the walls, ceiling, floor, wet cleaning. An obligatory stage – cleaning and washing of the bathroom, kitchen. Our specialists cleaning company in Calgary will remove lime scale from the surfaces of sinks, toilets, tiles, etc. We will clean cooktops, stoves from contaminants – household and construction. We will wash windows, remove dust and dirt from glass and mirror surfaces, polish furniture. If necessary, our cleaners will carry out dry cleaning of carpets, upholstery of sofas, armchairs. We have all the necessary equipment and tools that are needed to perform this type of work. You can be sure that the surfaces will look clean and will not be damaged in any way during the cleaning process.

General cleaning of restaurants, cafes or bars includes work that cleaners do not perform during daily cleaning. This includes washing windows, facades, cleaning window frames, removing dirt from external and internal surfaces. Our cleaners will carry out deep cleaning of carpeting or other floor coverings, remove stains and dirt from them, treat them with disinfectants. General cleaning of bars includes putting the kitchen in order: disinfection of vertical and horizontal surfaces, cleaning of hoods, treatment of stoves, ovens, cooking surfaces. Cleaners will remove dust and dirt from the walls, ceiling, floor, clean lighting fixtures. In the hall we perform dry cleaning of upholstered furniture, polishing of wooden and glass surfaces. General cleaning includes cleaning of bathroom fixtures in the toilet room, disinfection of surfaces, polishing of mirrors.

By contacting our cleaning company in Calgary you will save your personal time and get impeccable results for an affordable price.

Post thumbnail

10 REASONS TO ORDER CLEANING

Cleaning is something no business can live without. It is an urgent necessity. Because every company has certain areas that need to be kept in good condition. It does not matter whether these areas are office, commercial or industrial. In any case, you need to make sure that they are in a form that promotes comfortable work or customer service. And so you need to decide whether to hire your own employees for cleaning, or leave it to an outside organization. What are the advantages of the second solution?

Why is it better to order cleaning from professionals?

  1. A cleaning company can provide high quality cleaning. It is not just mop cleaning, it is a fundamentally new approach. And it contributes to the fact that the premises become really clean, not just to ensure the movement of dirt from place to place. Cleanliness is very important and this applies to absolutely all areas of commercial activity and plays a key role for everyone. Both for employees and visitors to the office, store, beauty salon, etc. Cleanliness is built into our value system for a reason. Cleanliness is safety. People on an intuitive level try to avoid dirty places and maintain cleanliness where they live and work. Let’s take the example of a store. We pay attention to a lot of little things when entering a store. And each of them affects our feelings and the final desire to buy something or leave without buying. And cleanliness and order are at the top of the list. When a customer notices that the room is not cleaned, he realizes that the store is unprofessional. And since he has allowed himself unprofessionalism in this area, what can be expected from his goods. The same goes for salespeople. An experienced salesman, one who knows his price, will not go to work in a place where cleanliness is not maintained at the proper level. And it’s not just a question of squeamishness or self-respect.  Today, in times of pandemic, people’s need for a clean space around them has become to the point of absurdity, so objectively a dirty space is also repulsive due to health concerns.
  2. Modern cleaning is the key to a long service life of the flooring. If new methods are used, there is no doubt that the floor will not last five to seven years, but much longer. Thus, the savings are more than substantial. If you contact our cleaning company in Calgary, you can rest assured that your laminate, linoleum or carpets will last longer, because our cleaning is all about professionalism and knowledge of how to handle different types of flooring.
  3. The ability to clean complex technologies. This is especially true of machinery. A room where equipment worth several thousand dollars is installed, there is no way you want to trust an employee without special training to clean it. And a professional is able to do this without any risk.
  4. Quality control is carried out by representatives of the company. The head of the company ordering such a service will not have to spend his time on this point. Our reputation is important to us, so we take a responsible approach to all stages of cleaning in Calgary and guarantee impeccable quality of the result.
  5. Staffing Solutions. The cleaning company hires and fires its own employees. Therefore, if someone there gets sick or doesn’t show up for work, it’s the headache of the HR manager, and in any case, the cleaning will start on schedule, even if other staffing is required. So your premises will always be clean and ready to receive customers.
  6. Financial Responsibility. Even if the cleaning results in damage to equipment or anything else, the cleaning company in Calgary will pay compensation. This allows you not to worry or fear of incurring unexpected losses.
  7. Cleaning with modern technology looks much more dignified – this is another plus to the company’s reputation. Visitors will surely appreciate the fact that the company enlists the help of professionals to maintain cleanliness. 
  8. The use of modern ways and means allows not only cleaning but also disinfecting even very large areas, and for many businesses, this is extremely important.
  9. The use of progressive detergents that are not so harmful and allergic.
  10. Special approach to each type of surface, which allows you to keep it in perfect condition.

Rest assured that if you contact our cleaning company, all work will be done professionally and on time! All you have to do is enjoy the comfort and brilliant cleanliness.

Post thumbnail

Cleaning in a beauty salon: rules and requirements

For a beauty salon, cleanliness is fundamental. This is an indicator of how much the establishment’s employees care about their safety and the safety of their customers. Not all beauty salons follow this rule, and this can be the reason for low salon occupancy and poor profit margins. How to properly clean? How often should this be done? These and many other questions can be answered in this article.

Why is it so important to clean a beauty salon?

High-quality cleaning in a beauty salon is the key to a good reputation and stability of the business. In service establishments, in particular, beauty salons, the service must be at the top. This applies to the professionalism of masters, the level of service, cleanliness.

Customers can stop visiting some beauty salon because they will not feel safe in it. Destroy the reputation can destroy any error: the remnants of trimmed hair on the floor, traces of dyes. This is not only sloppy, but in addition dirt can contribute to the spread of infection, which is a danger to the masters and visitors to the salon. Responsibility for the cleanliness of the premises lies on the administrator of the institution. He should definitely pay attention to it.

Daily and general cleaning of the salon

Each room of the beauty salon must be kept clean. Cleaning with detergents should be carried out at least twice a day, at the end of the working day it should be cleaned with disinfectant solutions.

Every week general cleaning should be performed in the salon in accordance with the approved schedule. Furniture, equipment, surfaces are washed and treated with disinfectants, because the range of services that are provided in the beauty salon may vary and may include, including “beauty shots”.

To clean the main and auxiliary rooms, special tools are used, which must be labeled and stored in special places. Most often a cupboard or a utility room is used for storing tools. Depending on the room in which it is used, it must have an appropriate marking. It can be applied with paint, stickers to distinguish the inventory for cleaning the main room and auxiliary rooms. It is unacceptable to clean with tools that are designed for other rooms. After cleaning, all tools must be treated with detergents, disinfected and dried. Brushes, buckets and containers must not be stored together.

Requirements for disinfection of working areas during customer service:

  • The pedicure cushion, which is placed under the client’s foot, must be covered with a cover. It must be wiped down after each client;
  • The tub for performing hand and foot steaming shall be washed after each client. It is disinfected and washed with special means;
  • The manicure table should be wiped with disinfectant after each client;
  • Disposable wipes or cotton disks can be used to remove the residue of cut hair from the face and neck of the client. Do not use brushes, which cannot be disinfected and sterilized.
  • Good waste disposal is of great importance in maintaining cleanliness. Hair residue, nails, consumables and dangerous tools can be disposed of. To prevent the spread of infection, you should first disinfect the tools, and afterwards – pack them in airtight containers or bags. Only then can they be sent for disposal.

And while you can still do it yourself, general cleaning should be entrusted to the experts of a cleaning company in Calgary. Quite a few beauty salons entrust the cleaning to services that provide cleaning services. This method has many advantages:

  • Fast and high-quality general cleaning with the use of professional inventory and means for washing, cleaning and disinfection;
  • Possibility to carry out general cleaning after hours;
  • No need to involve your employees to maintain cleanliness in the beauty salon. It is much easier to resort to the services of professionals.
  • Cooperation with a cleaning company provides for the conclusion of a contract for the provision of services. It specifies all the nuances of cleaning, their order and list.

Rules for general cleaning

General cleaning should be carried out in such premises:

  • The main premises of the beauty salon, where hairdressing, cosmetology, nail services are provided;
  • General premises – waiting room, reception, hall, corridor;
  • Rooms for personnel;
  • Sanitary rooms.

Requirements for general cleaning:

  • During the general cleaning, disinfection of service areas and sanitary facilities is carried out. Furniture, equipment, tools and surfaces are treated;
  • General cleaning consists of washing, dusting of surfaces, furniture, windows, walls, floors, lighting fixtures;
  • During general cleaning, garbage is collected and removed.
Post thumbnail

Cleaning linoleum after renovation

Renovation can be compared to a natural disaster. It leaves behind a lot of traces: dust, stains, sweat. It is especially difficult to get rid of them on linoleum. In order not to have to change the coating, spend extra money, mask pollution with carpet, you need to familiarize yourself with the methods and techniques of removing dirt and stains.

In general, cleaning after repair is associated with a lot of labor-intensive processes and a lot of time. After all, it is not so difficult to damage, stain or scratch something during cleaning – which is a shame, because the repair is just finished, and you can already prepare for the next one.

If you are not confident in your abilities or you don’t have time for a thorough and meticulous cleaning, a cleaning company in Calgary is exactly what you need.

Lime and cement: how to clean properly

After whitewashing ceilings, leveling and plastering walls, hard-to-clean white stains can remain on the floor. You can minimize the risk of their formation by using newspapers and film. If this preparatory step is missed, you will have to do a little work when the repair is completed.

Do not resort to the use of aggressive chemicals. They can damage the top decorative and protective layer of the floor covering. Linoleum will fade, become prone to scratches and scuffs. It will have to be replaced in the near future.

Suitable compositions for the elimination of lime and cement solutions will be:

  • warm water with soap;
  • manganese solution;
  • water-milk mixture.

To prepare a soap solution, you will need warm water, crushed laundry soap, a few tablespoons of sea salt. All ingredients should be mixed in a bucket. Soaked in this liquid with a rag, you need to wash the floor several times. Then the procedure will have to be repeated with clean water. See the effectiveness of washing is possible after drying.

A weak solution of manganese copes well with the tasks at hand. But it should not be used on light-colored surfaces. Incorrectly calculating the proportions, you can face the darkening of the coating.

Water with milk washes away construction contaminants on linoleum. The optimal ratio of the mixture is 1:1. After its use, an improvement in shine is observed. But if a large area needs care, this method will require significant costs.

Important: Before cleaning the floor, you should remove dried plaster pieces, sweep up dust or vacuum the floor with a construction vacuum cleaner.

Primer on linoleum: how to get rid of it

Similar to lime and mortars, the primer mixture leaves traces. It is desirable to remove it immediately after getting on the linoleum. In this case, you will not need additional means. If the composition has dried up, you can try to wash it off:

  • nail polish remover;
  • a solution of water and acetone (the ratio should be 3 to 1);
  • diluted alcohol or vodka.

Any of the above means is applied to the sponge. It can be left for a few minutes on the problem areas. After cleaning, the floor should be washed with water.

How to remove paint marks correctly

It is only possible to remove the paint completely at once by rubbing off the drops with a sponge. Once dry, they can be carefully scraped off with a knife. If the paint has penetrated into the coating, you will have to resort to serious measures. Need at the stage of cleaning white spirit, kerosene, solvents. They should moisten a small piece of coarse cloth.

It is impossible to predict how the aggressive liquid will affect the linoleum. In order not to spoil the entire coating, it is necessary to conduct a test on a small inconspicuous area (under the carpeting, at the wall, behind the furniture).

Important! Do not use soda and alkaline means. They make linoleum fragile and brittle. The coating will crack, be damaged from the slightest mechanical impact.

Soften fresh drops of paint can be softened with sunflower or linseed oil. Such means not only remove contaminants, but also perfectly polish surfaces, returning them to an attractive shine.

How to clean linoleum from assembly foam?

Foam is widely used in the installation of interior doors and windows. Getting on the surface of the linoleum, it quickly hardens, firmly adheres. It can be removed in a soft and dried state. In the first case, it is possible to avoid adhesion. To eliminate flakes, a wooden or rubber trowel will be required. It is important to move from the edges to the center. If there are traces left on the site of the foam, solvents will help to get rid of them. The most accessible means is acetone. After its use, the floor should be rubbed with linseed oil using a flannel.

Elimination of dried foam involves the use of a different algorithm. At the first stage, it is necessary to very carefully cut the lump, holding the knife as close to the coating as possible, but not touching it. Next, the method of scraping should be used to get rid of the residue.

Professional means for cleaning linoleum effectively eliminate even the oldest traces. The most convenient in application are aerosol ones. They are applied for 15-25 minutes. After softening the building material is easily wiped off with a napkin or rag.

Fans of folk remedies can recommend the use of ice, vegetable oil, vinegar. Their effectiveness is questionable. To clean it is necessary to treat the problem areas, leave it for 20-30 minutes, remove the residue.

Other stains on linoleum

The floor covering gets dirty not only during repairs, but also in everyday life. Most often with difficult contaminations are faced by parents of small children. Flomasters, inks and paints are almost impossible to completely eliminate. The only way is mechanical stripping with the removal of a small part of the top coating.

Coffee, wine, food dyes can be tried to eliminate with gasoline, kerosene or turpentine. But all of the above means reduce the resistance to wear and tear and the service life of the floor covering. The most sensitive to such influences synthetic cheap materials.

Sometimes apartment owners accidentally spill on the linoleum iodine, green. Even a small amount of these liquids quickly “spreads”, forming huge stains. Proceed to their cleaning should be immediately. Iodine comes off if it is covered with soda. It is not necessary to rub the contaminated area. Repeat the procedure several times, constantly moistening the napkin.

The listed instructions and tips do not guarantee a hundred percent cleaning of linoleum after repair and other contaminants. But thanks to them, the coating can be given a more presentable appearance. Any means should be applied first on an inconspicuous area. At the final stage, it is desirable to resort to polishing, refreshing and returning the shine.

Post thumbnail

Cleaning after renovation of commercial premises

In the renovation of new restaurants, cafes, beauty salons or stores their owners put all their heart and soul. Firstly, when you start a business you just want to be the best among competitors, and secondly – a well-designed image and attractive to visitors is a guarantee of success. But, repair is repair, and cleaning after it must be done. The institution, which has just opened, should shine with cleanliness – it is necessary in order not to spoil the first impression. However, after the completion of construction work, not everything looks exactly as you want. That is why it is worth ordering a general cleaning of the premises just before the opening, because it is extremely difficult to cope with everything on your own. Not to mention the fact that cleaning the room after repair with your own hands requires a huge amount of all kinds of special equipment. For cleaning up after renovations in a commercial space, you may need:

  • special stiff brushes or metal spatulas to remove dirt from surfaces;
  • cleaners: separately for window cleaning, separately for plumbing, floors, and if necessary for wallpaper (if washable);
  • double-sided sponges and microfiber cloths;
  • broom and dustpan, mop;
  • protective gloves;
  • furniture care products: polish, wax, etc. – everything that allows surfaces to retain an attractive appearance for a long time.

Just imagine how much all of these products will cost and how long it will take to learn how to use them. Of course, they will be needed later – in the process of using the premises, and not only after the renovation of commercial premises in Calgary, but it is unlikely that your employees or you will clean the premises yourself, and each specialist uses different means and methods of cleaning in commercial premises, so the purchase will not justify itself. No matter how qualitatively you do not approach the cleaning in a restaurant, office or beauty salon to cope with cleaning at the level of professionals will not come out exactly, so do not look for an extra reason to stress and waste time. It is better to order cleaning in Calgary at once in our company.

Why is it necessary to order the services of a cleaning company?

Usually, catering establishments, salons and stores have a lot of decorative elements and glass surfaces on which dust can settle. In addition, the construction team does not have to clean up after themselves perfectly – at best they just sweep up and take out the garbage – but the premises must meet all sanitary requirements. Therefore, before opening a new establishment or commissioning a house, the following work should be done:

  • Removal of residues of construction and finishing materials – glue, plaster, concrete, plaster, putty;
  • Wiping dust on the walls, ceiling, equipment, furniture and elements of decor. Dust after the repair is really a lot. More often than not, it is not enough just to vacuum and clean the floor once. It is necessary to wash everything where it can be and many times. And after, as well, it is necessary to wait until the dust in the air to settle and wash everything again – it is all exhausting, especially when it comes to a large area. Without the right detergents to effectively remove the dust, the process can take a long time;
  • Thorough wet cleaning, especially of various seams, recesses, niches;
  • Washing and rubbing windows, mirrors, display cases, light fixtures, tables and other glass surfaces. For dedusting floors, removing grout, glue and everything else, the usual means from the store is not enough, stickers on the glass, putty, glue with a simple knife can not be scraped off, in addition, you can easily scratch the new glass on the windows and other surfaces. Washing the surface of cabinets or kitchens with a sponge is also not recommended, as you have all chances to leave micro scratches, which you, unfortunately, will not immediately see. About aesthetics also want to add a few words, perfectly rub furniture, glass, chandeliers, lamps, hoods and stretch ceilings without divorces, without a certain experience and labor intensity, as practice shows, is also unlikely to succeed;
  • Disinfection and polishing of sanitary facilities (rubbing walls, floors, plumbing fixtures, shower stalls, etc. to a shine).

Our specialists choose the most effective and safe detergents, the latest equipment, apply advanced technologies, and send an optimal number of personnel to the site. This approach ensures perfect cleaning of premises from specific construction dust and other contaminants. You can always trust us with your creation, because we will make it even more beautiful.

Post thumbnail

6 kitchen cleaning tips that work wonders

Kitchen is one of the most frequented rooms in your home. As such, it requires constant attention and cleaning efforts. If you don’t take the time to clean it, soon enough it will turn into a complete mess, and that’s not good. After all, it is where you cook and prepare your food. If you want to learn about some very smart and effective ways to clean your kitchen, keep reading.

How to clean your microwave easily

There are several ways to tackle your microwave. One is to heat some damp paper towels inside for 2-3 minutes. This will create steam that will easily soften the dirt inside and make it easier to clean the appliance. You can even use the same towels to clean the inside of the microwave when the time is up. Another way to clean your oven is to use steam, only this time from lemons and water. Cut a lemon in half, squeeze the juice into a bowl and fill with water. Put it in the microwave for 3 minutes and then wipe the inside. This will be easier than ever.

Keep your sponge in good condition

A kitchen sponge builds up a lot of bacteria over time. If it’s not time to replace it yet, you can put it in the microwave for a few minutes. One of the reasons why the oven gets dirty over time is the moisture left behind. It’s best to keep it upright when possible, as it will dry out much faster.

Keep your refrigerator clean and fresh

Over time, your refrigerator can develop an unpleasant odor. You don’t need to use any specialized solution to combat this. What works well is baking soda. Just fill a cup and leave it inside. It will absorb all the bad odors. As for cleaning the interior, you can try a bit of a preventive approach by covering it with food wrap. This way, you will rid the area of unwanted stains.

Dealing with the oven quickly and easily

One of the most time-consuming kitchen cleaning chores is cleaning the oven. To tackle the task without any problems, mix water and baking soda into a paste-like compound. Spread it inside the oven and leave it like that for a few hours. After that, wipe with water or vinegar if there are areas with a lot of growths. This way, you will not only get the job done, but also save yourself from having to use heavy chemicals.

The brilliance of stainless steel appliances

Stainless steel certainly contributes to the modern look of your kitchen. However, sometimes it can be difficult to clean it, especially if you don’t know what to use. As it turns out, vodka does a great job cleaning stainless steel. Dampen a paper towel a little bit and then wipe the problem area. You’ll notice that vodka removes any stains or marks with ease.

Sink cleaning

Cleaning the sink is essential to keeping your kitchen clean. After all, the sink is one of the dirtiest places. To solve this problem, mix equal parts of water and vinegar. Apply it to the surface and wipe it down. When you’re done, you can try applying some olive oil, baby oil, or some oil-based wood cleaner. The goal is not only to make the surface look shiny clean, but also to create a film that prevents water and stains from penetrating.

By applying all of these tips when cleaning the kitchen, you will be able to effectively tackle what many consider to be the most important room in the house.

If spending time doing a chore is not something you want to do simply contact our Calgary cleaning company. Our cleaning professionals in Calgary are always ready to perform a high level of cleaning at an affordable price and in the shortest possible time.

Post thumbnail

HOW TO MOTIVATE YOURSELF TO CLEAN YOUR APARTMENT?

The question is not an easy one, especially if the body asks for rest after a hard day.

And you seem to be ready to clean up, but these insidious “I’ll lie down for 5 minutes and work” chain you to the sofa like a concrete layer… But there are little secrets that will make cleaning easier!

And who, if not the masters of cleanliness TIVA Cleaners, will reveal them for you.

  1. Clean every day. It sounds paradoxical (you can barely persuade yourself to do one cleaning, but here you do it every day), but it’s a fact. By constantly maintaining cleanliness, you deprive yourself of the “pleasure” of seeing tons of dust and mountains of scattered things before general cleaning. How to accustom yourself to a routine? It’s very simple – distribute tasks over days. For example, Monday – we clean the kitchen, Tuesday – the children’s room, etc. You can split one room into several days. This way, every corner of your apartment or house will always be clean.
  1. Think of cleaning as a workout. Do not be surprised, cleaning requires several hours of intense aerobic and strength exercises. Therefore, when cleaning your apartment, remember that lost pounds and a toned body will be a great bonus.
  1. Know a friend in need. If you are attacked by spring cleaning, your friends will be your saviors. Offer to help them carry out cleaning work in your house, and in return, if they need help cleaning their apartment, you will definitely take on part of the work yourself. In this way, the friendship will become stronger and the apartment will be cleaner.
  1. Give yourself a reward. Everything is quite simple: if it’s too difficult to start cleaning, figure out how to please yourself after you’ve done it. Promise yourself a delicious dessert or another episode of your favorite TV series.
  2. Turn on active music. Calm and melancholic songs will not work. Turn on the music that makes you want to start moving. She will set the rhythm and lift your spirits, and time will fly by faster with her – you will be surprised that washing the floors takes only four or five tracks.
  3. Close social networks. Cleaning may end at the previous point – when you sat down at the computer to select music, and didn’t get up because of it. Or you decided to turn on the radio on your phone and saw a new message. Close all chats and turn off notifications.
  4. Start with the most difficult one. Find the most annoying thing about cleaning and do that first. The visual result and the feeling that the most difficult thing has been done motivates you to move on. If you’re cleaning the bathroom, start by cleaning the toilet. When you need to change your bed linen, remove the duvet cover first. The rest will take care of itself.
  5. Get rid of unnecessary things. Stop endlessly rearranging, wiping, and arranging things that you don’t need at all. When you free up space, you will immediately want to tidy it up, arrange it neatly and keep it clean. Take out all the old and unnecessary things and immediately put them in bags. The main thing is not to hide it on the balcony or in the pantry, but try to immediately take it out of the apartment so that there is no temptation to return everything back. And you don’t need any extra rubble.
  6. Add something new to your interior. Buy a bright vase or lamp, place decorative candles or hang new curtains. Bring any little thing that will decorate your home. And if your apartment is a mess, you realize that no matter where you put new things, nothing can decorate your home like cleanliness.

And if these tips don’t work, we have the last secret solution for you – a cleaning service at TIVA Cleaners. Our specialists cleaning in Calgary will do all the work for you quickly, efficiently and at an affordable price. Your apartment, home and office will surprise even the most dedicated cleaning fan with its cleanliness after their visit.

Post thumbnail

HOW OFTEN DO YOU NEED TO CLEAN YOUR OFFICE?

The office determines the prestige of the company in the eyes of guests, partners, and employees. The first thing every person who enters the office notices is the interior, comfort, and cleanliness. These three indicators form the first impression of the company’s reputation and management. In addition, employees themselves feel more enthusiastic about coming to the office and working hard when they are in a clean, tidy environment. Employee productivity increases when there is no dust on the furniture around them, daylight enters through clean windows, and the carpet does not emit odors. The procedure for cleaning an office differs from a home office and has its own specifics. It often involves completely different methods and professional tools. Special care is required when handling office equipment, and a professional cleaner from our Calgary cleaning company is well aware of this.

OFFICE CLEANING STANDARDS

The duties of the cleaners and specialists of a Calgary cleaning company include cleaning all the rooms in the office. In some cases, the management and the cleaner agree on which rooms require cleaning.  There are a number of duties that a cleaner needs to perform on a daily, weekly, or monthly basis. 

This is due to the following specific features of the office environment and life: 

  • Employees move around in street shoes. Only in winter and demi-season do some of them prefer to change into clean shoes; 
  • There is always a lot of office equipment, papers, and stationery in the office that requires careful and delicate handling. It often happens that, out of ignorance, a cleaner accidentally turns off equipment, moves documents, or harms himself or herself by ignoring safety rules;
  •  Cleaning should be not only inside but also outside. Facade cleaning is an important service, because the exterior should attract customers and partners. Windows, doors, handles, and thresholds should be cleaned regularly or seasonally, as precipitation always leaves unwanted marks; 
  • The furniture in the lobby, meeting rooms, and the management office is constantly in use. Stains from spilled coffee, tea, and ballpoint pen paste are commonplace, and should be monitored regularly; 
  • Garbage accumulates in the kitchen and restrooms, which must be removed regularly and disposed of properly. Also, if necessary, disinfect and sanitize walls, floors, and window sills.

THE PROCEDURE FOR PERIODIC CLEANING OF OFFICE PREMISES 

A room that is not littered will always be cleaner than one that is regularly cleaned. In a large office, there will always be unwashed cups, a lot of office waste, and street dust. This is quite a common occurrence.  However, one way or another, a number of activities must be carried out to maintain cleanliness in the office space. Among them: 

  • Wipe dust off furniture, desks, and shelves; 
  • Wipe dust from fixtures, lamps, blinds; Wipe office equipment with a special product without using water;
  • Wipe sockets and switches; 
  • Remove garbage from baskets and buckets, change garbage bags; 
  • Vacuum the carpet; 
  • Clean the kitchen – wash dishes, sink, wipe countertops. 
  • For most companies, it is advisable to clean before the start of the working day or after it ends, so that there are no employees on site. 
  • Polish the furniture and reception desk; 
  • Dust off certificates and photographs covered with glass;
  •  Wash the tiles, especially glossy ones, with special products; 
  • Clean the refrigerator and throw away bad food;
  • Clean ventilation openings and grilles. If there are glass or plastic partitions, windows, and mirrors in the office, they should also be wiped down to remove stains. 
  • Wet clean the carpet with a cleaning agent;
  • Dry cleaning of upholstered furniture; 
  • Disinfecting trash cans and plumbing; 
  • Washing windows and frames; 
  • Applying varnish, wax, antistatic agents to furniture. 

This general cleaning can take all day depending on the size of the premises. It is good if the management allows you to allocate one working day or a full day off when the team is not on site.

HOW OFTEN THE OFFICE SHOULD BE CLEANED 

The frequency of cleaning is discussed with the office management. It can be regular, on demand, or seasonal. In the summer, when many employees go on vacation and the office itself is small, you may need to clean 2-3 times a week. And in the spring and winter, every day. If the company often receives guests and clients, cleaning can be carried out with a frequency of 2 times a day – in the morning and in the evening. The duration of the cleaner’s work should also be discussed in advance. It can be 1-2 hours a day or depending on the amount of work, because they can also be different every day. For example, in winter and autumn, cleaning office carpet and tiles will take longer.

HOW OFTEN TO DO GENERAL OFFICE CLEANING

General office cleaning should involve a complete cleaning of the premises from floor to ceiling, regardless of the height of the walls – from 3 to 4 times a year. All furniture, even large furniture, should be moved away. Remove cobwebs and dust from hard-to-reach places, such as tall cabinets. The joints between tiles should be cleaned of fungus and mold, and disinfected. If there is a kitchen in the company’s office, all appliances need to be cleaned and the refrigerator additionally defrosted. 

In any case, our cleaning company in Calgary will help you with this task.

Post thumbnail

HOW TO DEAL WITH DOG HAIR IN THE HOUSE

First, you need to understand that a dog cannot stop shedding. This is a natural process that occurs twice a year and lasts from 1 to 2 weeks. If the hair falls off your pet for a longer period of time or more than a couple of times a year, contact your veterinarian, as your dog may need help. And during the natural shedding, don’t be too lazy to take care of your dog thoroughly. What you can do: 

  • Comb your pet. Preferably every day, as this will help the dog get rid of dead hair and accelerate the growth of new hair. This will reduce the amount of hair in the house. 
  • Massage procedures. Make an impromptu spa for your pet by gently massaging its back and tummy. The procedure favorably affects blood circulation, which means that the dog’s hair will grow strong and healthy; 
  • be sure to buy tools for combing the hair. A nickel-plated comb for tangles, a fluffer brush for delicate areas of the pet, and a silicone glove brush that will collect all the dead hairs from the coat, which settle over the entire area of the home; 
  • add B vitamins, as well as copper and zinc, to the dog’s diet, which will promote the growth and health of the coat.

What is not recommended: 

  • Use of a furminator – a brush resembling a garden rake. This tool is used to lift the undercoat layer, thereby gaining access to hard-to-reach places. But the furminator is not suitable for all dogs, and if there are bruises, abrasions, or ulcers on the pet’s skin, it is better to put the furminator aside. 
  • Bathing. During a period of heavy shedding, it is not recommended to bathe your dog often. But a shower with protein shampoo is allowed, but also in moderation. An option is to use dry shampoos and conditioners.

HOW TO DEAL WITH WOOL IN THE HOUSE

It would be easy to say that you need to arm yourself with cleaning products and the necessary equipment to get rid of wool and fluff in the house. The fact is that you will need different products for cleaning different surfaces: what will help to clean the carpet will not be suitable for cleaning a tile or a leather sofa. And the owners of our little brothers do not always have time to fully clean their apartments, let alone a medium-sized private house. This is where our cleaning company Tiva Cleaners comes to the rescue. Our specialists will quickly and efficiently clean your apartment or house and help you get rid of the problem of wool and fluff accumulation.

We always guarantee the result, and after our specialists have cleaned in Calgary, you won’t find a single hair from your pet, and the room will sparkle and smell.

What we work with: 

  • A special vacuum cleaner. The tool allows you to collect wool and clean hard-to-reach areas in the room, while simultaneously cleaning the surface from dust and dirt accumulation;
  • a mop with rubber bristles. It will easily collect loose hairs and easily separate them from the carpet pile. You will only have to pick up the clumps and throw them away. (By the way, you can use this cleaning tool yourself if you have the time and desire to keep your home perfectly clean – if you don’t have a mop, even an ordinary window scraper with rubberized edges will help. It is recommended to clean such a mop from time to time with antibacterial agents – this way the device will last a long time and the cleaning will be more thorough);
  • special solutions. Don’t worry about your favorite carpet or rug. Professional dry cleaning of the carpet will not harm it (as well as you and your four-legged pets). After cleaning, there will be no stains or stains on the surface of the carpet, and its appearance will be close to the original thanks to our deep cleaning products.  Moreover, we use only products that are safe for human and animal health.

Advantages of Tiva Cleaners:

  • We give you comfort. The cleaning procedure will not disturb you at all and will be completed in the shortest possible time. All you have to do is enjoy the view of the work done and the cleanliness of your home; 
  • We give you quality. The equipment we use from leading cleaning brands is non-toxic, energy-efficient and virtually silent. 
  • Our cleaning services are affordable. We have affordable prices, so absolutely every client can afford cleaning services in Calgary. 

Contact Tiva Cleaners at any time convenient for you. Forget about the monotonous and tedious cleaning, it is better to spend this time on yourself and your leisure. Better yet, take advantage of your free time and go for a walk with your favorite pet!

Post thumbnail

How to clean up after tenants

Tenants who leave behind a mess and destroyed property, unfortunately, – a frequent situation. Mold on the walls and soffits, stains from insects, dirty windowsills, odor from cats and dogs, unwashed windows and not washed curtains – the consequences of tenants sometimes resemble vandalism. But even if you have dealt with decent tenants, they leave behind household trash, unwashed dishes, dirt and dust. Therefore, the most important task – to return the housing cleanliness and tidiness – all that we put in the concept of “coziness”.

It happens that the owners of the apartment, although they do not want to clean up after the tenants themselves, do not turn to the services of professional cleaners – and for nothing, because our cleaning in Calgary will help to solve this issue in the shortest possible time. In this case, all cleaning and cleanliness falls on the shoulders of the next tenants. But who would choose to rent a neglected apartment?

Especially since after the tenants need not only cleaning, but also disinfection. 

No matter how good the tenants are, after they leave the apartment should be perfectly clean and sanitized. Therefore, when cleaning, use cleaning products with enhanced properties to remove heavy dirt and kill microorganisms – bacteria and fungi. Remember that it is not easy to eliminate the smell of dust and dampness by airing the room.

Thorough cleaning should be done in two stages: first dry cleaning, then wet cleaning of all surfaces. It is important to be attentive to the details of cleaning, and not to miss any of the most important stages of the work. Since tenants often do not clean hard-to-reach places in the apartment at all, this is the first thing you should focus on during the cleaning process.

Cleaning algorithm

If you don’t want to use professional cleaning services in Calgary, then you will have to do everything yourself. 

First of all, you should prepare detergents and cleaning tools in the form of a bucket, basin, rags, sprayer, mop and other small things. Once everything is ready, you can start planning the cleaning.

Detergents and other little things:

  • Window cleaner and glass cleaner;
  • Detergents to remove soot and grease stains;
  • Cleaning powders and gels;
  • Carpet and upholstery treatments;
  • Polish;
  • Rubber gloves, cloths, rags, cleaning sponges.

Cleaning Plan

  • Windows – Start cleaning rooms and spaces by washing windows, both exterior and interior.
  • Kitchen – After that, continue cleaning from the kitchen as it is the most “smelly” place in your apartment.
  • Bedroom – After the kitchen, you can start unloading cleaning your bedroom.
  • Living room – Next, follow up with cleaning the living room.
  • Toilet and Bathroom – Finish cleaning your bathtub and toilet.
  • Hallway and hall – Where the most dirt “comes in” from, that’s where you should finish.

Such a choice was made not accidentally, since it is such cleaning will give you maximum productivity. If you notice that the cleaning alternates with lighter and heavier cleaning, which will allow you to distribute your forces and not so much tired after the general cleaning.

Windows

If everything is more or less clear with the windows, then the next thing to do is to start cleaning the kitchen, but now we recommend you to pay attention to a couple of simple window-washing tips.

  • Never wash your windows immediately with detergent.
  • First, wipe the windows with a dry or spruce damp cloth before sawing the glass cleaner.
  • Alternatively, you can wait for the surface to dry and in the meantime, take care of removing the curtains, which also need to be washed.
  • Throw the curtains in the wash and return to the windows.
  • If the result of washing does not satisfy you, then we advise you to rub the windows with a good old newspaper.

Yes, you will be surprised, but even employees of cleaning companies sometimes do not disdain the old methods, rubbing mirrors and glass to a shine, which is sometimes impossible to achieve even with the most expensive detergents.

Kitchen

The kitchen is the place to start: it is the most dirty room and takes the most time and effort to clean.

Fill dirty dishes with water to soak them or put them in the dishwasher. Apply detergent to the stove and leave it on for a while.

In the meantime, put all the excess away and wipe down tables and other surfaces and appliances with a damp cloth.

The soaked dishes will now quickly and easily come off, and you won’t have to put any effort into cleaning the stove.

Bathroom

Spread the detergent over the surface of the bathtub and sink and leave it for a while to work. For the bathroom, it is good to take a detergent that gets rid of yellowing and water stone.

Be sure to wash the walls and walls of the shower stall. Water droplets remain on them, which turn into an unsightly plaque. Pay attention to cleaning the intertile seams of mold.

Pay special attention to the mirror – window cleaner and a quality cloth are faithful helpers.

Under the rim of the toilet bowl and on all surfaces where there is no water, you should also apply detergent and leave it to dissolve all the plaque. Also wash the toilet bowl from the outside as well. To the toilet was a pleasant aroma and cleanliness, you can put special tablets in the toilet bowl, which will become faithful assistants of the mistress. And also, especially in a large family, it is recommended to install an automatic air freshener in the toilet – constant freshness and pleasant aromas will be ensured.

Cleaning up the excess

Now you can move to other rooms of the apartment: bedroom, living room. Put away in places all unnecessary things, everything that needs to be washed, send it to the basket with dirty laundry. Broken things send either to repair or to the trash. If there is a general cleaning at the change of seasons, it is very good to sort out unused things. There is a tenet – if an item hasn’t been used/worn in a year, throw it away or give it to someone. Put together a bag of unused stuff and give it to charity.

Dust

It’s time to fight dust. And the very first assistant in this case is a vacuum cleaner. Vacuum the floor, even if it is without carpeting. This will simplify further wet cleaning. It is necessary to vacuum also upholstered furniture. And after that, wipe the dust from all other surfaces. It is good to use special rags with an antistatic effect or rotary brushes for this purpose.

Mirrors

The mirror in the bathroom is already washed, it remains to wash all the other mirrors in the apartment. Choose a product that does not leave streaks from the first time, so that washing mirrors does not turn into hard labor.

Clean, streak-free mirrors are very important not only when guests are expected.

Washing the floors

This is the final step in cleaning the apartment. You have to mop the floor everywhere: kitchen, bathroom, all other rooms. Always mop the floor towards the door and rinse the mop/rag more often. Pay special attention to hard-to-reach places: under furniture, under radiators, along baseboards.

Some places are worth paying special attention to:

  • Places under furniture (beds and closets) – this is where most dirt and dust collects;
  • Interior and exterior surfaces of furniture and interior details;
  • Office equipment and lighting fixtures (lamps, sconces, floor lamps, small chandeliers);
  • Door units and skirting boards;
  • Pipes and heating radiators;
  • Bathroom and washbasin drains;
  • Window units, including the outside. It is not uncommon for tenants to clean windows exclusively on the inside;
  • Cleaning upholstered furniture and carpeting. Dust accumulates in the pile, and you can’t do without a vacuum cleaner.

Why it is better to turn to a cleaning company in Calgary

Quality. Speed. Efficiency. Guarantee. These are the advantages you get when you turn to a cleaning company in Calgary.

The cleaners have a certificate of quality, and vast experience, thanks to which they perform all duties as quickly as possible.

The cleaning company in Calgary is a guarantor of a conscientious cleaning by the cleaner. This means that you will have no complaints about the work performed.

If you contact a cleaning company, you can be sure that your apartment will be cleaned with professional equipment, which means quality and speed. You save your money, because you do not buy, for example, specific means for disinfection.

A definite plus is also that conscientious and quality cleaning prolongs the life of furniture, interior, plumbing, and floor coverings.

Together with order and cleanliness in the rented apartment you create a cozy space and an atmosphere of comfort.

Post thumbnail

Flood in the apartment. What to do?

None of us is insured from domestic troubles, especially the inhabitants of apartments, whose well-being depends not only on themselves, but also on their neighbors. We are afraid to leave the iron, light, TV on. But trouble can come from the other side, a flood in the apartment – for many people is not just a hypothetical problem, but a real disaster on a local scale.
There are several reasons for it: a burst pipe, a burst siphon, the usual forgetfulness of you or your neighbors from above. The problem is that it is not easy to eliminate the consequences of flooding, water is quickly absorbed and destroys your favorite repairs and furniture literally before your eyes. To stop the water element, you need promptness and a cool mind, but also a few tips and help from a cleaning company in Calgary.

What should you do if you have been flooded?
If your neighbors are guilty of flooding your apartment, be prepared for unpleasant conversations and possibly litigation. In some cases, the situation can be resolved amicably, but some “physical evidence” will not hurt:
– take a photo or video of the consequences of the flood so that you can easily see the extent of the damage in each room: the state of the floor, walls, furniture, decor;
– invite one of the neighbors as a witness;
– draw up an act of damage (possibly need expert opinions) with a specific amount of money to be compensated – it is this figure you will operate, trying to get justice.
All this should be done very quickly to start pumping out excess water as soon as possible. It is desirable to involve in this process as many helpers as possible, but even better – to call a prompt team of our company’s cleaners, as a rag and a bucket at your disposal – not the best tools when you need to pump out cubic meters of water.
When the culprit of water trouble is yourself, find and disarm its cause, and without delay contact our company, otherwise the neighbors below will sue you. And then, in addition to cleaning up after the flood in your apartment, you will have to compensate for the damage caused to the neighbors.

How does flood cleanup work?
Flood cleanup is a cleaning service in Calgary that requires the utmost efficiency and consistency. Liquidation of the consequences of the flood with the assistance of a cleaning company will be faster and much more effective, which means that not all of your things after that will go to the trash, but will continue to serve faithfully and truthfully.
In addition to pumping out the water, cleaning after the flood involves:
– removal of debris and dirt brought by the streams of water;
– drying furniture, parquet or laminate flooring;
– removal of stains and sweat from the walls and ceiling;
– treatment of walls and surfaces with special antifungal agents to prevent mold and odor;
– deodorization of the premises.
Cleaning after a flood is complicated in winter, when wet furniture can not simply dry on the street, and the apartment to ventilate. In this case, our specialists use special fans and dehumidifiers. With a cleaning company in Calgary, even a flood in the apartment becomes not such a terrible and insoluble problem!

Post thumbnail

How to remove stains from upholstered furniture

Have you spilled coffee on your favorite chair? Or, after a friendly party, a red wine stain appeared on the couch? Or maybe your kids love to eat jam in the living room, leaving sticky sweet spots on the furniture? Whoever caused the incident, the problem can be solved in 2 ways – remove the stains yourself or contact a cleaning service in Calgary. The first option is cheaper, but there are no guarantees that you will not spoil the upholstery. “Soft” folk methods may simply not help, and aggressive store products can not only remove stains, but also discolor the surface of the product. If you turn to the specialists of a cleaning company, then of course the visit of a specialist will not be free, but your sofa, armchair, bed or other furniture will definitely remain intact and clean. Professional chemistry copes with stains by 100% and leaves no traces, and experts always know what kind of product is needed to remove this or that pollution.

In this article, we will consider different options, but you decide which option suits you best.

“Folk” recipes for cleaning upholstered furniture

Spots can have a different origin, so in each case, you need to use different means.

Coffee stains can be easily removed with soapy water. You just need to wet a rag or sponge in it, wipe it, and then let it dry. It also removes chocolate stains.

Beer stains are not easy to remove. You can cope with them with the help of an acetic solution: 1 tbsp. vinegar to 1 liter of water. Blot a fresh stain with a napkin and only then use the solution. Blot excess moisture with a tissue and let dry.

Fruit juice from the surface of the sofa is removed with a more complex solution: vinegar + ammonia in a 1: 1 ratio. Apply it to the surface, wipe the stain and dry.

Sweet stains from jam and jam are also removed with a soap solution. But first you need to clean up what is possible. After that, use the solution to remove the stain. And finally, you need to sprinkle the soiled place with salt, which will absorb the remnants of the sweet pollutant. Let the surface dry, then clean it well with a brush and vacuum cleaner.

Red wine leaves stains that are almost impossible to get rid of if you didn’t do it while the stain was fresh. If the wine has just been spilled on the sofa, blot the stain with a napkin, cover this place with salt, let it dry. And then take a brush and a vacuum cleaner and thoroughly clean the surface.

But this is not the most difficult pollution. Despite the fact that white wine does not have such a bright color, getting rid of stains after it is much more difficult. It will not be enough just to get wet and vacuum. You need to use a special solution: 3 parts of methanol and 1 part of water. And do not forget that methyl alcohol is very dangerous for health and life. Handle him carefully. The stain from white wine is first wiped with this solution, and then with water and soap. Do not forget to dry the surface well after treatment.

Non-food stains are also quite easy to remove from the surface of upholstered furniture.

Acetone will help get rid of traces of lipstick and ink, blood is removed with cold (only cold) water. And after a romantic evening with candles, a scraper will help to remove wax from the surface of an armchair or sofa (it is used to remove cooled wax), a vacuum cleaner (removes residues), blotting paper that absorbs wax residues (after ironing). If the situation is very difficult, after all these manipulations, additionally wipe the stain with methanol.

If you value your time and sincerely worry about this or that piece of furniture, then contact us. Cooperation with our cleaning company Calgary is about:

  • affordable prices for services. They are fully consistent with the quality of their provision. When you pay for cleaning, you pay not only for the result, but also for their skills, professionalism, the company’s time spent on training and educating their subordinates. And it is right;
  • high quality cleaning and guaranteed results;
  • use of high-quality and safe materials for cleaning. We use only those products that are not capable of harming the health of people and pets;
  • high speed of work.
Post thumbnail

Window cleaning: entrust specialists or use folk methods?

Every owner of an apartment or homeowner reasonably believes that the washing of windows in her home is carried out at a quite high, proper level. In her opinion, glasses without divorce are not so difficult to by proven methods or the use of a “fashionable” detergent, which is advertised on television. This unpretentious initiative at first glance is available to those lovers of independent cleaning, who have large volumes of free time. The inventory required to implement a periodically necessary task is simple and accessible to everyone. However, the number of people who want to do this work on their own is becoming less and less. Why is this happening, you may wonder? The problem is, first of all, that today the modern person is not always, but rather very rarely, has the necessary amount of time to clean the house itself. In fact, this type of activity is available only to housewives, engaged in the upbringing of the younger generation, and older family members are most often unavailable, as there is a high percentage of trauma hazard in its process. That is why cleaning in Calgary is becoming increasingly popular. But in this article we will still talk about alternative options for windows washing (in addition to professional cleaning). 

What will be needed to wash the window at the amateur level? 

If you do not have enough experience in this business, then achieving immediate success will not be as easy as it might seem at first glance. You will undoubtedly need a mandatory set of items that differ from each other only in their design, but in functionality are roughly identical. 

  • A scraper, which is designed to eliminate stiffness from the plane, or a slide, conveniently strapping wet traces with a smooth surface – is considered one of the most indispensable tools to eradicate divorces even at the preventive stage; 
  • Sponge, on the one hand, which is propelled for moisture and small particles, and on the other – absorbing substance; 
  • A glass cleaner to remove the presence of any liquid from the glass – for example, a drop of rain; 
  • Swab, the position of which is easy to fix by applying a special device for adjusting the length of the lever and a special “short” for pressing the replacement towels; 
  • Wipes for dry wipes, towels made of microfiber. 
  • High quality cleaning products from good manufacturers. 

Are there any effective ways to clean the windows?

The first number is, of course, the already archaic newspaper – not only the packaging material, but also a wonderful dirt washer and surface rubber. Wash the glass with water with soap, and then, taking the newspaper bag in your hand, you sparkling glow and perfect cleanliness. Newspaper paper has a pronounced ability to absorb residues of fluid, which does not make moisture any chance of divorce. And this is the result and we wish all without exception the owners of the window. 

The solution of glycerin with water (one to one) gives an unusual gloss to the smooth surface, if you add to it the nasopharynx in a volume of just a few drops. 

The powder of starch easily eliminates window divorces. At the same time, the cost of cleaning when using such a tool is very low, and reliability is proven by years of successful use. You will only need a liter of water and a tablespoon of starchy powder consistency. After washing with such a composition, it remains only to wipe the glass with sludge or dry paper. A more authentic method involves the use of potatoes in the cut – tubers contain the amorphous substance of polysaccharides, half of the potato is a wonderful means of achieving the brilliant brightness of light passing through the glass. It remains only to dry. 

The fluid pressed out of their roasted onions is a natural composition that is absolutely irreplaceable (excluding modern cleaning mixtures) when getting rid of the window glass from bird spotting and squeezing of dead insects. The only nuance: after the onion juice requires a good wet cleaning, followed by rubbing with a newspaper or assembling foam sliding. 

Citric acid is equally effective in this context. About one hundred grams of lemon juice are added to the water (250 g) and obtain a composition that has miraculous properties. With the help of a nebulizer, which can be made independently from any plastic bottle, we apply to the surface of the window and level the dust plaque. Packed lemon nectar containing preservatives is not suitable for window cleaning. 

The mold in the powdered state will also be perfectly suitable after washing with simple soap water. The mill mass perfectly cleans to shine – you only need to dilute the mill in two liters of water in a volume of two tablespoons, and after wiping with this composition and drying rub properly with a towel to the perfect condition. Half a litre of water, a few drops of dishwasher and 50 grams of vinegar mixed together are a wonderful invention for washing window frames, as it carefully dissolves the plaque until it is completely removed by a cloth or wrap. 

No less good is the composition of two tablespoons of nasopharynx mixed with two glasses of water. The only disadvantage of this fast-acting remedy is nasopharyngeal vapour, from which, in order to avoid irritation of the respiratory channels, a medical mask protects.

Just imagine how long it will take you to wash the windows in any of the above-mentioned scenarios – to spend time preparing the solution and then washing yourself or order a professional cleaning in Calgary to decide you, but the advantages of delegating the washing of the windows to specialists are obvious. The cleaning company in Calgary is maximum comfort, convenience, high speed of service and impeccable result.

Post thumbnail

The finer points of caring for wooden furniture and floors

Wood in the interior is so familiar to us that we do not always think about the fact that this valuable natural material requires special care. Wooden floors, furniture, shelves, partitions and other interior details ennoble any design, make it warmer, cozier, if you want – more sincere, and as a bonus – fill your home with the scents of wood. Wooden finishing is more typical for country houses, but in the city apartment there is always a place for wooden household items, especially if eco-repair is planned or already made.
Given the enormous popularity of wood as a means of decorating the interior, a cleaning company in Calgary offers to talk about the intricacies of caring for this valuable natural material.

Peculiarities of caring for wood in the interior
Cleaning the apartment, which has wooden interior items, in general, is not complicated, but even at the stage of their installation, you should remember that wood does not like:

  • Exposure to moisture. Because of its porous structure, wood is capable of absorbing and then giving up quite a lot of moisture, so if it is not used properly, it can shrivel and swell, forming cracks and gaps between the joints. Of course, drying and treatment of wood before industrial use somewhat mitigates this negative effect, but only proper operation ensures long life of wooden products.
  • Mechanical damage. An important characteristic of wood is its hardness, which is different for each species. There are species of wood, close to the hardness of metal, such as boxwood, which is also called “ironwood”, and there is very soft, almost like butter – South American balsa. But in the interior objects such species as pine, alder, cherry and oak are used more often – they are not so hard that we can forget about the necessity to treat them with care. So, take care of your wooden floors and furniture from dropping heavy objects or bumps, otherwise dents and chips will not be avoided.
  • Exposure to aggressive environments. Water is harmful to wood, and acidic or alkaline liquids are twice as harmful to them, so in the kitchen it is better not to lay parquet, giving preference to tiles.
  • Excessive heat. Wooden furniture should not be placed close to radiators or other heat sources, the distance of 1 m from them is considered optimal.
    Features of care for wooden interior items depend on the type of wood, the method of treatment and method of external finish – whether the wood is covered with lacquer, paint or patina. Now wood is often encountered in a form as close to natural as possible: minimal, even brutal treatment with preservation of the natural structure of wood, protection by special compounds, rather than varnishes or paints, which hide the natural color of wood.
    Therefore, before ordering a cleaning service in Calgary, tell us in what form and amount of wood is present in the interior, you may have to adjust our standard cleaning service in Calgary to suit the individual characteristics of your home.

What products are used to care for wood?
For the care of wooden furniture, two types of cleaners are usually used:
Polishes, which not only remove dirt, but also give the varnished wooden surface a shine. A good polish has an antistatic effect and creates an invisible layer on the wood that protects from moisture, sunlight, greasy fingerprints. But unlacquered surfaces are not always advisable to treat with polishes.
Wax remedies. As well as polishes remove dirt, polish, but also create a dense wax film on the surface, protecting the wood from minor damage and giving it a beautiful matte shine.
To remove dust from carved elements, our cleaning company specialists use round brushes with soft bristles and cleaning agents with sprayers. Soft brushes are also used to remove sand that acts as an abrasive on the wood floor. If possible, try to sweep up trash and debris from the floor (especially around the threshold) in between visits from the cleaner so that it does not accumulate in the joints of the bordering boards.
In addition to regular cleaning, dry cleaning with polishing cloths and maintaining a stable microclimate will benefit “home” wood. Periodic ventilation, humidity levels of 65% and temperatures of 15-23 degrees will feel good not only for you but also for your wooden floors and furniture.
In the case of cleaning in an apartment with antique furniture made of rare wood a personal set of detergents is chosen.
By following simple guidelines for using wood floors and products, and involving professional cleaners in cleaning Calgary apartments, you will ensure that your wooden furniture will last for years to come.

Post thumbnail

How to return carpet products to their former beauty and former freshness?

If you ask the question: what piece of furniture wears out the fastest, then one of the first answers is the carpet. It is easy to argue for such an opinion by the fact that people walk on carpets every day (even if we are talking about a small apartment where several people live), furniture is installed on them, and they are often polluted by spilling drinks or spilling something. Therefore, over time, the villi break, change color and texture. This process is greatly accelerated if there are pets or children in the room. It is possible that because of all this, carpet products have earned the disrespectful status of “dust collectors” among the people, but this does not happen in every case. Delicate care is simply necessary for each product, and qualified specialists of our cleaning company in Calgary know exactly how to return carpet products to their former beauty and freshness. But about everything and in order. In this article, we will talk in detail about how to care for the pile, how often it is necessary to dry-clean carpets, and why you should not resort to traditional methods.

Are there traditional ways to clean carpets?

Like any type of carpet, fleecy products require care. The difficulty lies in the special structure of the pile, in which dust, small particles of debris, and dirt accumulate. The owners of such a decorative accessory should be prepared to set aside time for cleaning and it is advisable to do this regularly. However, it should be understood that it is only about vacuuming products. After all, not knowing all the nuances of cleaning work, there is a risk of harming and simply spoiling the coating. But, there are a couple of tips that you can still use to care for the carpet at home (we note right away that this will not help in cases where the coatings have been damaged too much – juice, ketchup, etc. have been spilled on them):

  1. Dry cleaning. The main assistant in dry cleaning is a vacuum cleaner and soda (or another substance, further on in more detail). With the help of soda, salt and starch, you can remove fresh stains and dirt, and eliminate unpleasant odors. The work takes place according to the following scheme:
  • the place of contamination should be covered with soda, starch or salt. But it is best to use soda, which is an effective absorbent;
  • leave the carpet for 8-12 hours for a complete absorption reaction;
  • vacuum the coating to remove the soda.

Baking soda can be used on a variety of long pile carpets, but not on silk or viscose.

  1. If dry cleaning does not give the desired result, then wet cleaning is indispensable. Before you wash a carpet with a long pile at home, you need to think about two main points: the correct preparation of the solution and the drying of the accessory. At this point, it is important to think about how to dry the rug. The specificity lies in the fact that an unpleasant odor will immediately appear in a wet long pile. In addition, moisture is the main breeding ground for mold and bacteria. In the warm season, you can dry the carpet on the balcony or on the street. If cleaning is carried out in winter, it is better to use air conditioning. Now proceeds directly to learning how to wash a long pile carpet:
  • Vacuum the floor first. The vacuum cleaner pulls out stuck debris and dust well. It will be correct to use a vacuum cleaner hose or a narrow nozzle.
  • Next, we prepare a cleaning solution: fill the bucket ⅓ with water, add washing powder or laundry soap, mix everything well. This is the easiest and safest solution that will not harm the texture of the long pile.
  • Wet the brush with the solution and apply evenly to the surface. The movements should be light and circular. It is not permissible to rub the stains strongly.
  • Then you need to wipe the areas with a dry sponge to remove dirt and moisture.
  • After that, you need to lift the villi and comb the carpet with a dry brush, this will give a smooth texture to the long pile. It is necessary to raise the fibers to acquire the inherent fluffiness.
  • Next, dry the carpet for at least a day on the street. If drying is carried out indoors, it must be well ventilated. It is recommended to put the accessory on a wooden board, use a fan. This ensures aeration of the structure and prevents the appearance of mold.

General cleaning of the carpet surface at home does not allow you to remove all the dirt that penetrates deep into the pile in any case. When it comes to cleaning carpets from stains, there are many different tips on the Internet, including ironing the carpet through a paper towel to remove grease, and using a liquid thought with vinegar to remove coffee. However, we do not recommend resorting to such methods – saving on professional cleaning can be very expensive. Ruining a carpet is actually very easy. To keep the carpets in your home looking clean and well-groomed, just vacuum them periodically and contact the specialists at least 2 times a year for such a service as professional carpet cleaning.

Why is going to a cleaning company in Calgary for carpet cleaning the best solution?

Professional dry cleaning and washing of carpets, rugs, carpet washing is a complex and time-consuming type of cleaning services that requires a sufficient amount of experience, knowledge and skills from the performer. Our specialists know all the nuances of determining the correct composition of the carpet, its type and the correct choice of the appropriate cleaning agent and method of washing the carpet.

Carpet cleaning technology consists of several stages:

– Dust removal

This can be done with a powerful vacuum cleaner. Dust will be removed into the tank. Such vacuum cleaning with a vacuum cleaner will allow you to get rid of not only dust, but also wool, specific contaminants, such as chewing gum, which are pre-treated or first removed, and then vacuum cleaning is performed.

– Spots are cleaned, corrosive dirt is removed. For these purposes, special stain removers are used.

– Deep dry cleaning of carpets with a washing vacuum cleaner, an extractor machine or a special rotary machine with large brushes.

If carpet cleaning is carried out with export, cleaning is carried out:

– Removal of detergent residues.

– Conditioning of carpets and carpets, refreshing the shade getting rid of the static effect.

– The pile is combed in the right direction. For these purposes, a special brush is used.

– Drying the carpet. It is carried out using a special machine or in a natural way.

Dry carpet cleaning allows you to:

– quickly clean the surface and guarantees no shrinkage of the carpet;

– a method that is safe for health and retains the original properties of the product well.

Post thumbnail

How to permanently get rid of dust in the apartment?

On the one hand, dust is associated with the neglect of the house, the absence of life in it – especially when a thick layer of such a coating is found on the furniture. On the other hand, dust settles on different surfaces, including as a result of people being in rooms. One way or another, it is impossible to get rid of it forever even with hermetically closed windows and the complete absence of air movement in the room. And this is bad news for people with allergies or bronchial asthma – all kinds of allergens are often found in the dust, causing attacks of shortness of breath and coughing, potentially threatening the health of apartment residents. By understanding where these particles come from on different surfaces, you can find an effective cleaning method that does not require you to remember to clean all the furniture from dust every couple of days.

 Sources of dust

There are two types of dust sources: organic and inorganic. The first group includes microscopic particles of exfoliating skin, human hair, nails, and pet hair. In addition, in the layer of dust, especially in unkempt apartments, you can find the remains of the vital activity of small insect pests.

Inorganic sources are somewhat more varied. These include: 

  • construction debris – even if you have not had repairs for a long time, someone nearby is still going through it, and dust easily enters your house;
  • volcanic ash and beach sand are two other interesting reasons why you might need to clean your home;
  • any fire, no matter where it is, will also affect the cleanliness in your rooms – as in previous cases, the smallest particles can easily travel thousands of kilometers through the air until they settle on your bookshelf or on your table.

With such a variety of possibilities for dust to appear on surfaces, it already seems that no single wet cleaning and no vacuum cleaner will save the situation. However, this is not entirely true: after all, there are options that allow you to save your furniture and all surfaces from a layer of such particles.

What should I do to make the dust disappear for a long time?

Large dust – accumulating in small lumps in hard-to-reach places – cannot be permanently removed, unless you appear in the apartment once every few months. It is large accumulations that mainly originate from organic particles: skin, hair, wool. However, with the right cleaning technique, you can significantly reduce the amount of these particles, thereby making wet cleaning less regular. A few tips to help you use your vacuum cleaner less often:

  • Wipe the dust with a damp cloth, starting from the upper surfaces, gradually descending to the lower ones – so all the particles from the higher surfaces do not settle where everything is already clean.
  • Try to vacuum your carpets every week, or better yet, shake them out. Everyone is well aware of the ability of carpets to collect a lot of dirt – now imagine that every step you take throws it back into the air.
  • The same thing happens with upholstered furniture and pillows – they also need to be vacuumed from time to time (and, if possible, a full-fledged cleaning) so that a new portion of dust does not fly into the air with each collision with furniture. Curtains should not be forgotten either – without regular washing or steam treatment, they will become an excellent housing for millions of dust particles.
  • Bed linen also needs to be changed, washed and processed. Dust mites are relatively harmless insects that are found in every home. The main problem that arises due to their cohabitation in tissues is the increased formation of dust, so bed linen cannot be dispensed with either.
  • In general, any soft objects should, if possible, be replaced with those that are not capable of accumulating dust. Hide plush toys, extra throw pillows, and generally take an inventory of such things around the house. As soon as soft surfaces are minimized and a full-fledged wet cleaning is carried out, there will be no trace of dust, and it will not return soon.

Dust itself is very fond of slovenliness and disorder. Any trinkets, figurines, forgotten things also actively accumulate dust on their surface and in every fold of their relief. Even five minutes a day will be enough to quickly walk around the room and clean up everything that you can do without on open surfaces.

We also add that people bring a large amount of dust from the street on clothes and shoes. It turns out that even ordinary washing has its effect on pollination in the house. Well, seasonal items in the wardrobe should be stored in special cases through which dust will not break through either in or out.

Add to your cleaning checklist a passage through the most inaccessible places – this is where huge amounts of dust accumulate. You can get there with a damp cloth or a vacuum cleaner with a special nozzle – now there is every means to get to the narrowest gaps between the furniture and the wall. A damp cloth is your best friend for effective dust control, as it collects all the dust particles on itself, preventing them from flying around. For the same reason, you should use a broom or a dry mop less often – these tools only scatter dust around, and do not remove it. For complex, small and embossed surfaces, we recommend using ordinary paint brushes – they can also be moistened to effectively collect dust. Thus, even the most hard-to-reach corners and cracks on decor and furniture are cleaned.

How to make sure that dust does not sit on furniture?

As we know, dust is microscopic particles, so small that they are subjected to gravity with the formation of a static charge. This means that when you get close enough to any surface, there is a charge difference that attracts dust and helps it sit on furniture. To combat this phenomenon, an antistatic agent was invented long ago – a means that neutralizes this effect of attraction. Antistatic is also known as a polish on the market – as a bonus, you will get furniture shine from using it. But you should not rely on this tool alone – you still can’t get away from wet cleaning. It is enough to wipe cabinet furniture once or twice a week with a damp cloth soaked in this agent so that the dust, instead of settling on the surface, simply slides down. There is also a good solution for upholstered furniture: there are special impregnations for sheathing, which in about the same way prevent dust from settling on a soft fabric surface. They should be used no more than once every six months – this at least makes no sense, because the impregnation lasts a long time.

All these procedures may seem quite tedious: they have many stages, they need a lot of money, and not every person will be able to spend a lot of time every week on such a thorough cleaning. That is why many turn to cleaning in Canada. Our Calgary cleaning company uses safe and effective dust repellents to clean whenever you want, quickly and efficiently. You can order a cleaning service Calgary through our website.

Post thumbnail

How to get rid of mold in the apartment?

There is mold in almost every home, someone tries to fight it and succeeds, but someone gets bored with it and simply hides it behind new wallpaper or furniture, which is extremely wrong, since household mold causes a number of unpleasant and dangerous diseases. Today we want to tell you where mold comes from and why it is dangerous.

Mold is a visually distinguishable plaque that is formed as a result of the vital activity of microscopic fungi. They adapt to many conditions – for example, they are often found on stale products.

But if spoiled food can be thrown away, then with a fungus on the walls, floor and ceiling, everything is more difficult. The fact is that mold is a mycelium that grows much deeper than visible surfaces, and simple cleaning will not be enough.  Cleaning  house in Calgary is definitely needed here.

The ideal conditions for the appearance and development of mold is dampness. As a rule, its origin is promoted by a temperature of about 20 degrees in combination with humidity above 70%. In other conditions, microscopic spores of the fungus may be present in the air, but do little harm. Reproduction is activated when they enter a humid environment. The fungus does not immediately cover the surface of the apartment; in the initial stages, it can be identified by the specific smell of dampness. And then it’s worth taking the time to find the source. The sooner you get rid of the mold, the less likely it is to multiply, capturing new areas of the apartment.

Mold can be caused by:

  • improper laying of walls, insulation, insulation during house construction or repair;
  • freezing of the wall;
  • poor ventilation in the room;
  • inappropriate use of humidifiers;
  • breeding tropical plants in large quantities, not suitable for the dimensions of the room;
  • daily drying in a large amount of laundry after washing in the room.

What diseases can be caused by mold?

  • Mold spores are the strongest allergen for the body. They can cause rhinitis, pharyngitis, as well as symptoms of pneumonia, bronchitis and asthma attacks.
  • Under the influence of this fungus, the human immunity decreases.
  • In addition, mold leads to skin diseases – dermatitis and various inflammations.
  • Those types of fungus that appear in apartments are dangerous, since the products of their metabolism are strong poisons. They can lead to poisoning, the development of liver and lung cancer, cardiovascular pathology, damage to the central nervous system and cerebral edema.

For this reason, Calgary cleaning is really in demand and very relevant.

Mold removal methods

Folk methods of combating mold involve the use of such means as:

Ammonia – helps to get rid of the fungus that has settled on non-porous surfaces – tiles, glass, plastic products. Ammonia is mixed with water in a ratio of 1:1, applied to the affected surface with a spray gun, and after 1-2 hours the solution is removed with a damp sponge.

Hydrogen peroxide is a powerful antifungal and antibacterial agent that is non-toxic and does not have an unpleasant odor. Peroxide is applied undiluted to surfaces affected by mold, and then washed off with a damp cloth.

Citric acid is a remedy that is effective against any type of mold. It is necessary to dilute 1 tbsp. acid in 200 ml of water (1 glass), apply the solution to the surface with a sprayer or sponge and leave for 15-30 minutes. Rinse after.

Essential oils. Many essential oils are used for more than just aromatherapy. Essences have antiseptic and deodorizing properties, repel insects and help get rid of mold. Tea tree, rosemary, and lavender oils are natural fungicides that quickly clear fungal spores and prevent them from reappearing. Mix one teaspoon of tea tree oil with 200 ml of pure water, shake well in a sealed container. Spray the product on the moldy area, leave to dry for an hour. Then wipe the surface with a dry towel or microfiber cloth. Some essential oils irritate the skin, so gloves are recommended.

Baking soda. Baking soda has many benefits in home use and is an excellent cleaner and disinfectant. It is safe for children and pets, so it is often included in professional cleaning products. In addition to removing mold, baking soda is great at absorbing odors and moisture. Mix half a tablespoon of soda with 0.5 liters of water and shake in a spray bottle. Spray the composition on the areas affected by mold, remove plaque with a brush and rinse with water. After that, apply the soda solution again and leave to dry. This method allows you to destroy the remaining mold and prevent the appearance of a new one.

Also in stores you can buy various products for removing mold from different types of surfaces (oil paint, wallpaper, tiles, the inside of a washing machine, etc.).

But you must understand that only a specialist who has taken on similar work more than once will be able to choose the right tool and technique for using it. And in principle, it simply does not make sense for you to waste time trying to figure out all the intricacies and nuances of cleaning an apartment and creating comfortable living conditions in it – leave a request to our specialists (Cleaning in Calgary) and they will do everything as quickly and efficiently as possible. You just have to check the work. We also offer window cleaning  in Calgary services.

Post thumbnail

Cleaning after renovation: why should you turn to professionals?

Any repair, even the shortest, leaves behind a lot of garbage in the apartment. After repair and construction work, there are traces of building materials (plaster, putty, cement-sand mixture), paint and varnish materials, glue, adhesive tape. It is also necessary to collect and take out large fractions of construction debris. Please note that it is strictly forbidden to take them out to household waste containers – construction waste must be taken to special landfills for disposal.

The main enemy is dust. After the repair, a huge amount of dust circulates in the air. To remove it on your own, you need to repeat the process of cleaning absolutely all surfaces (walls, floors, ceiling, window sills, door jambs) many times – as soon as the dust has been cleaned from the area, it is covered with it again. Particles that were previously in the air settle. Repeat cleaning will need not two or three times.Cleaning in Calgary after renovation includes:

  • removal of construction debris;
  • cleaning surfaces from dust and dirt;
  • furniture cleaning.

After assessing the scale of pollution, you can understand how best to clean – on your own, or with the help of professionals from a cleaning company. You should also consider some features of this type of cleaning, which may also affect your decision.

What you need to know about cleaning the apartment after renovation?

Such work should be treated as a large complex of works, because it includes: removal of construction debris; dust cleaning; ventilation cleaning; cleaning surfaces from residues of building materials.

Note that cleaning in Calgary different surfaces may require special cleaners that will effectively remove dirt without damaging the surface. In addition, you will have to clean up in hard-to-reach places – sometimes dust clogs even into small cracks and ventilation holes, leading to further constant pollination of the apartment. This, in turn, can cause serious health problems in the future.

To speed up the cleaning process and improve its quality, special equipment is used – construction professional vacuum cleaners, steam generators, rotary machines. You hardly have such equipment at home – it is very expensive, and in everyday life, they are not used for ordinary household cleaning. It will not work to replace a construction vacuum cleaner with an ordinary one – it will not cope with such an amount of dust and will simply fail. But the cleaning company has this equipment. Its use is included in the cost of cleaning and allows you to perform the work as quickly and efficiently as possible.

Clean up the dirt yourself or delegate to professionals?

In the event that you have a clear cleaning algorithm after the repair, as well as all the necessary cleaning products, you can clean the apartment on your own. Do not forget that self-cleaning can take a whole day, or even more than one, so you do not need to plan anything for it. Instead of relaxing or thinking about receiving guests, you have to wash windows and floors, as well as clean upholstered furniture and remove dirty stains from interior doors.

However, in most cases, this work should be entrusted to the specialists (cleaning service) of the cleaning company. You need to do this for a number of reasons:

  • these people know how to quickly bring perfect cleanliness, and what to use for this.
  • professional cleaning in many ways turns out to be more efficient and profitable – and there are reasons for this: the work of cleaning specialists on technological maps specially designed for each room – detailed instructions that speed up cleaning and indicate what is needed for each surface;
  • professional cleaning products are used – environmentally friendly and safe for both furniture and apartment residents; the time for which cleanliness can be achieved is reduced as a result of the work of several people and the presence of a technological map;
  • the customer of services can save his time and do his own business during the cleaning.

When cleaning is carried out by professionals, they will not miss a single centimeter of the contaminated area. You can check the quality of cleaning by swiping your finger along the top edge of the interior doors or the bottom shelf of the bookcase, almost hidden from view – perfect cleanliness and lack of dust are guaranteed!

If you are looking for a cleaning company and enter the following query into the search country: “cleaning near me”, then you should contact our company. We are the best cleaning in Calgary!